Webmin Installation on Linux Server
This document is divided into three sections:
- Installing Webmin on Linux Server
- Installing ConfigServer Security & Firewall (CSF) on Webmin
- Enabling Two-Factor Authentication for Webmin
Installing Webmin on Linux Server —
Webmin is a free, open-source application for Linux server administration. Webmin enables you to manage your Linux system’s hardware and software, native and third-party applications, Webmin itself, and even log in with a web-based text terminal for those command-line purists.
1. Setup
The simplest and best way to get Webmin is to use automatic setup-repos.sh script to configure official repositories on your RHEL or Debian derivative systems. It can be done in two easy steps:
curl -o setup-repos.sh https://raw.githubusercontent.com/webmin/webmin/master/setup-repos.sh
sh setup-repos.sh
This script will automatically setup our repository and install our GPG keys on your system, and provide webmin package for installation and easy upgrades in the future. The supported and tested systems are Red Hat Enterprise Linux, Alma, Rocky, or Debian, Ubuntu.
If you receive an error like Hash algorithm SHA1 not available on newer versions of RHEL or related Linux distributions, you may need to run update-crypto-policies –set DEFAULT:SHA1 before re-running setup-repos.sh.
2. Install
If Webmin repository was setup using our setup-repos.sh as described above then Webmin can be installed as easy as:
RHEL and derivatives
dnf install webmin
Debian and derivatives
apt-get install webmin
Webmin is installed on your server, you can log in to your Webmin instance. By default, the address is:
http://your-server-ip:10000
Installing ConfigServer Security & Firewall (CSF) on Webmin —

- Preliminary requirements
- 1. CSF installation
- 2. CSF module installation in Webmin
- 3. CSF configuration
ConfigServer Security & Firewall (CSF) is a Stateful Packet Inspection (SPI) firewall, login/intrusion detection, and security application for Linux servers provided by ConfigServer. Login Failure Daemon (LFD) is a daemon process that runs on our servers, which uses CSF for server security.
ConfigServer Security & Firewall (CSF) is a suite of scripts that provides:
- A straight-forward SPI iptables firewall script
- A daemon process that checks for Login Authentication
- A Control Panel configuration interface
Preliminary requirements
- Ubuntu 22.04 Webmin” template installed on server
- perl-libwww-perl installed on the server
apt-get install libwww-perl -y - Fully updates server software
sudo apt update
1. CSF installation
Installation of CSF is quite straightforward:
cd /usr/src
wget https://download.configserver.com/csf.tgz
tar -xzf csf.tgz
cd csf
sh install.sh
2. CSF module installation in Webmin
CSF module installation is done through Webmin interface so first, you should log in to your Webmin instance. By default, the address is:
http://your-server-ip:10000
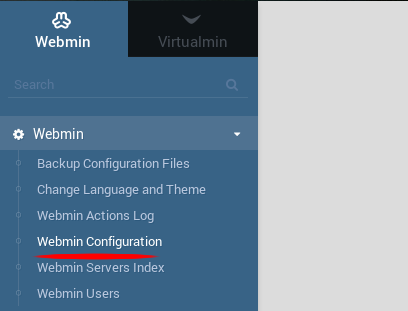
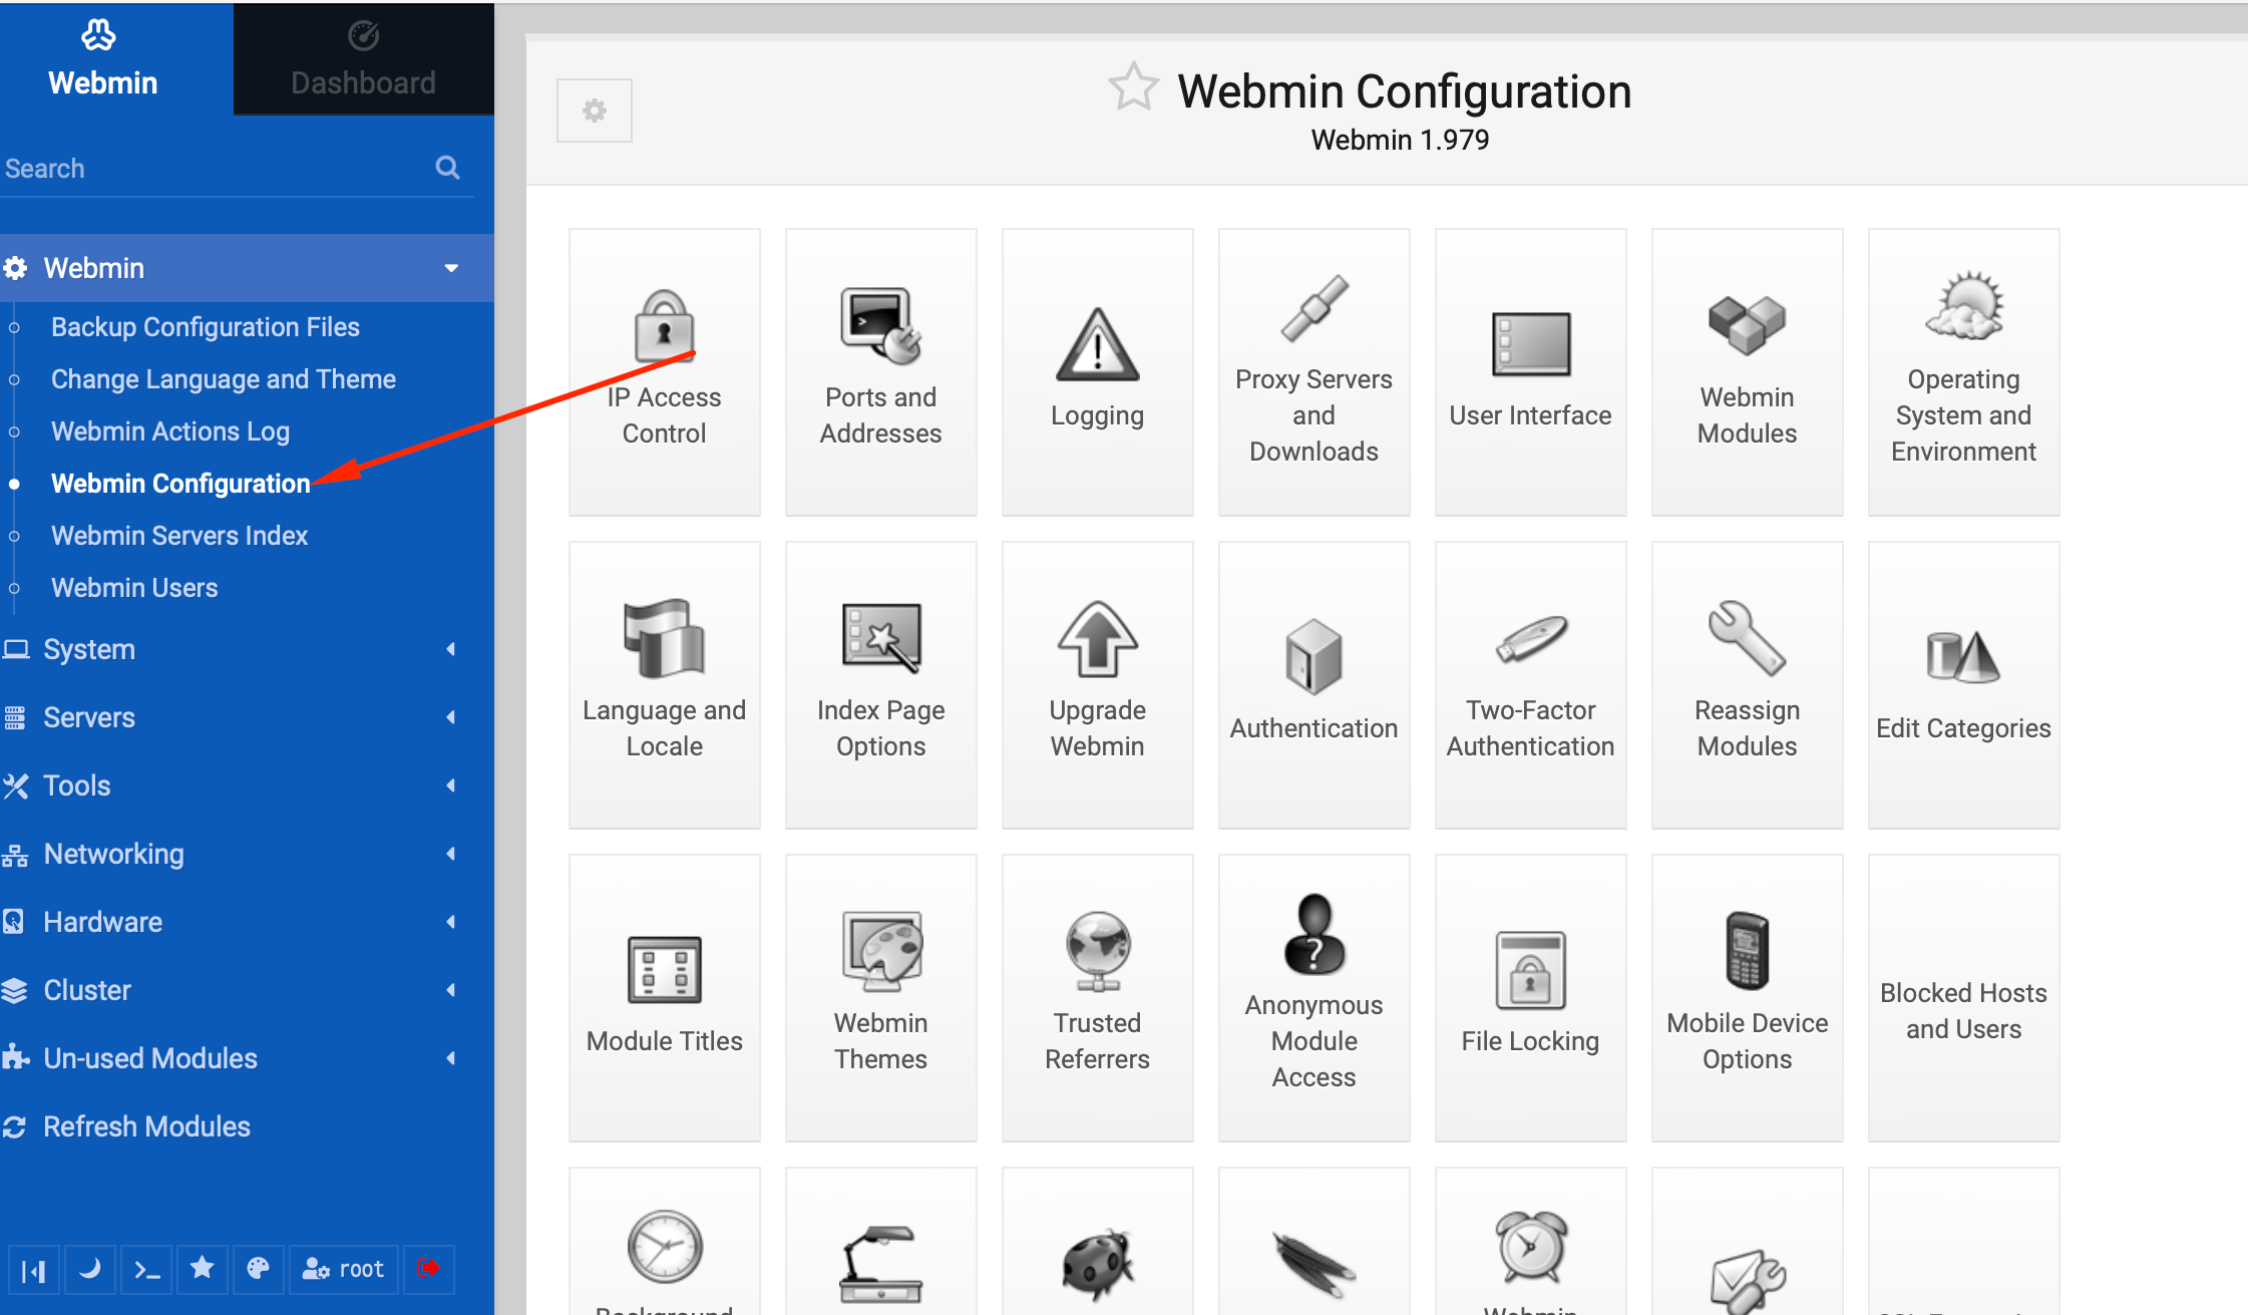
After successfully login you should select Webmin and Webmin Configuration:
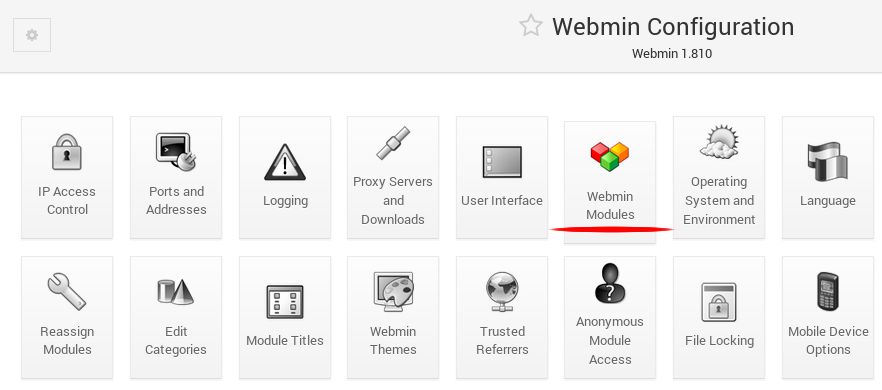
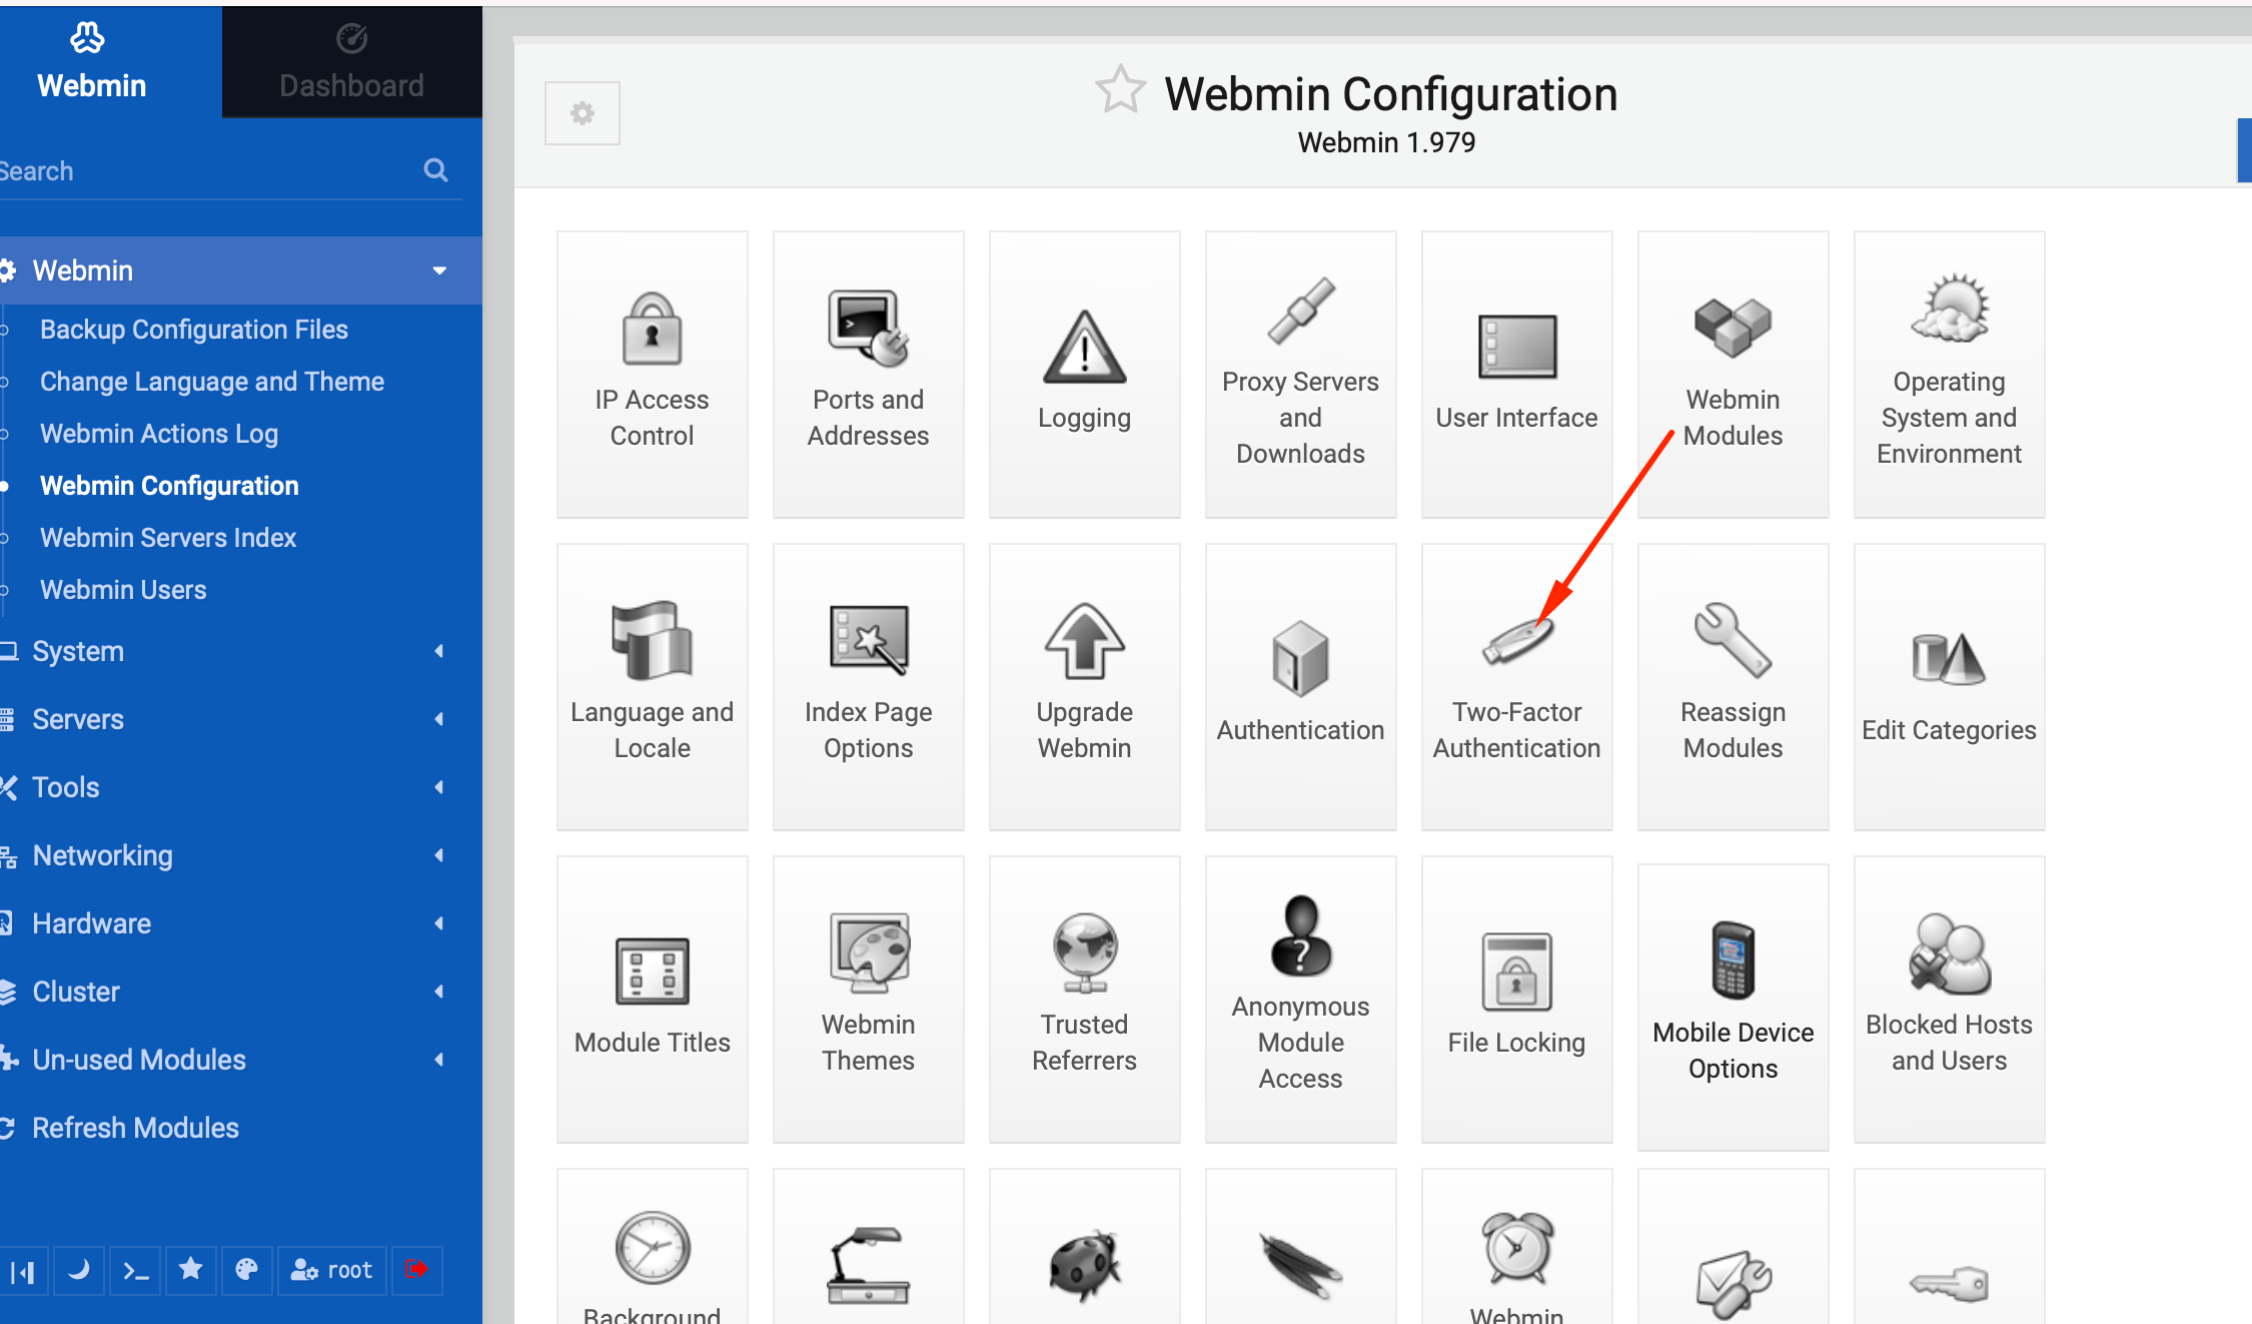
In Webmin Configuration select Webmin Modules:
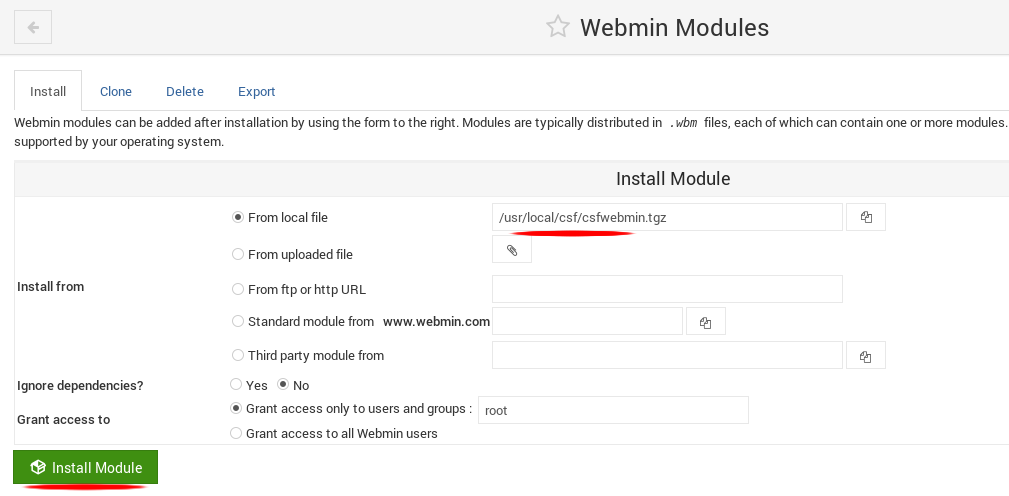
In Webmin modules select From local files and specify the path to module archive and isntall module.
NOTE: If you are using “Authentic Theme 18.10” you should remove “csf.min.js” file because of a bug.
rm /usr/libexec/webmin/authentic-theme/extensions/csf.min.js -f
3. CSF configuration
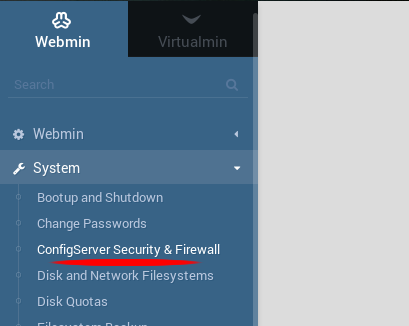
After successfully installation you can now configure your ConfigServer Security & Firewall. Select System and ConfigServer Security & Firewall in your Webmin instance:
You should now use the Module config button at the top left corner of the module:

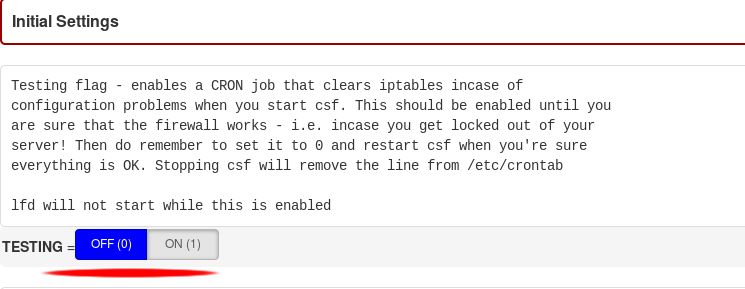
First, we will turn of testing mode:
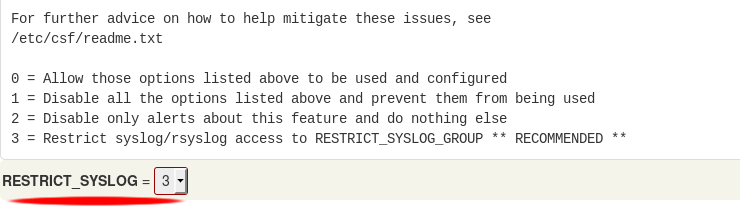
And then we should restrict syslog/rsyslog access:
NOTE: Since the CSF firewall will be enabled now, you need to allow the required ports and IPs in the CSF firewall
After these changes press the button Change at the bottom of the page and Restart csf+lfd afterward.
Enabling Two-Factor Authentication
Webmin provides Google Authenticator Two-Factor Authentication tokens to generate and use. We highly recommend looking into this security measure for your server, as it will greatly increase overall protection. You will require the Google Authenticator application or a compatible authentication application to generate codes each time you’d like to log in. Enter your username and credentials, then follow by entering the generated code.
Step 1 : Visit the Webmin menu and select “Webmin Configuration”.
Step 2 : Go to “Two-Factor Authentication”.
Step 3 : Select “Google Authenticator.”
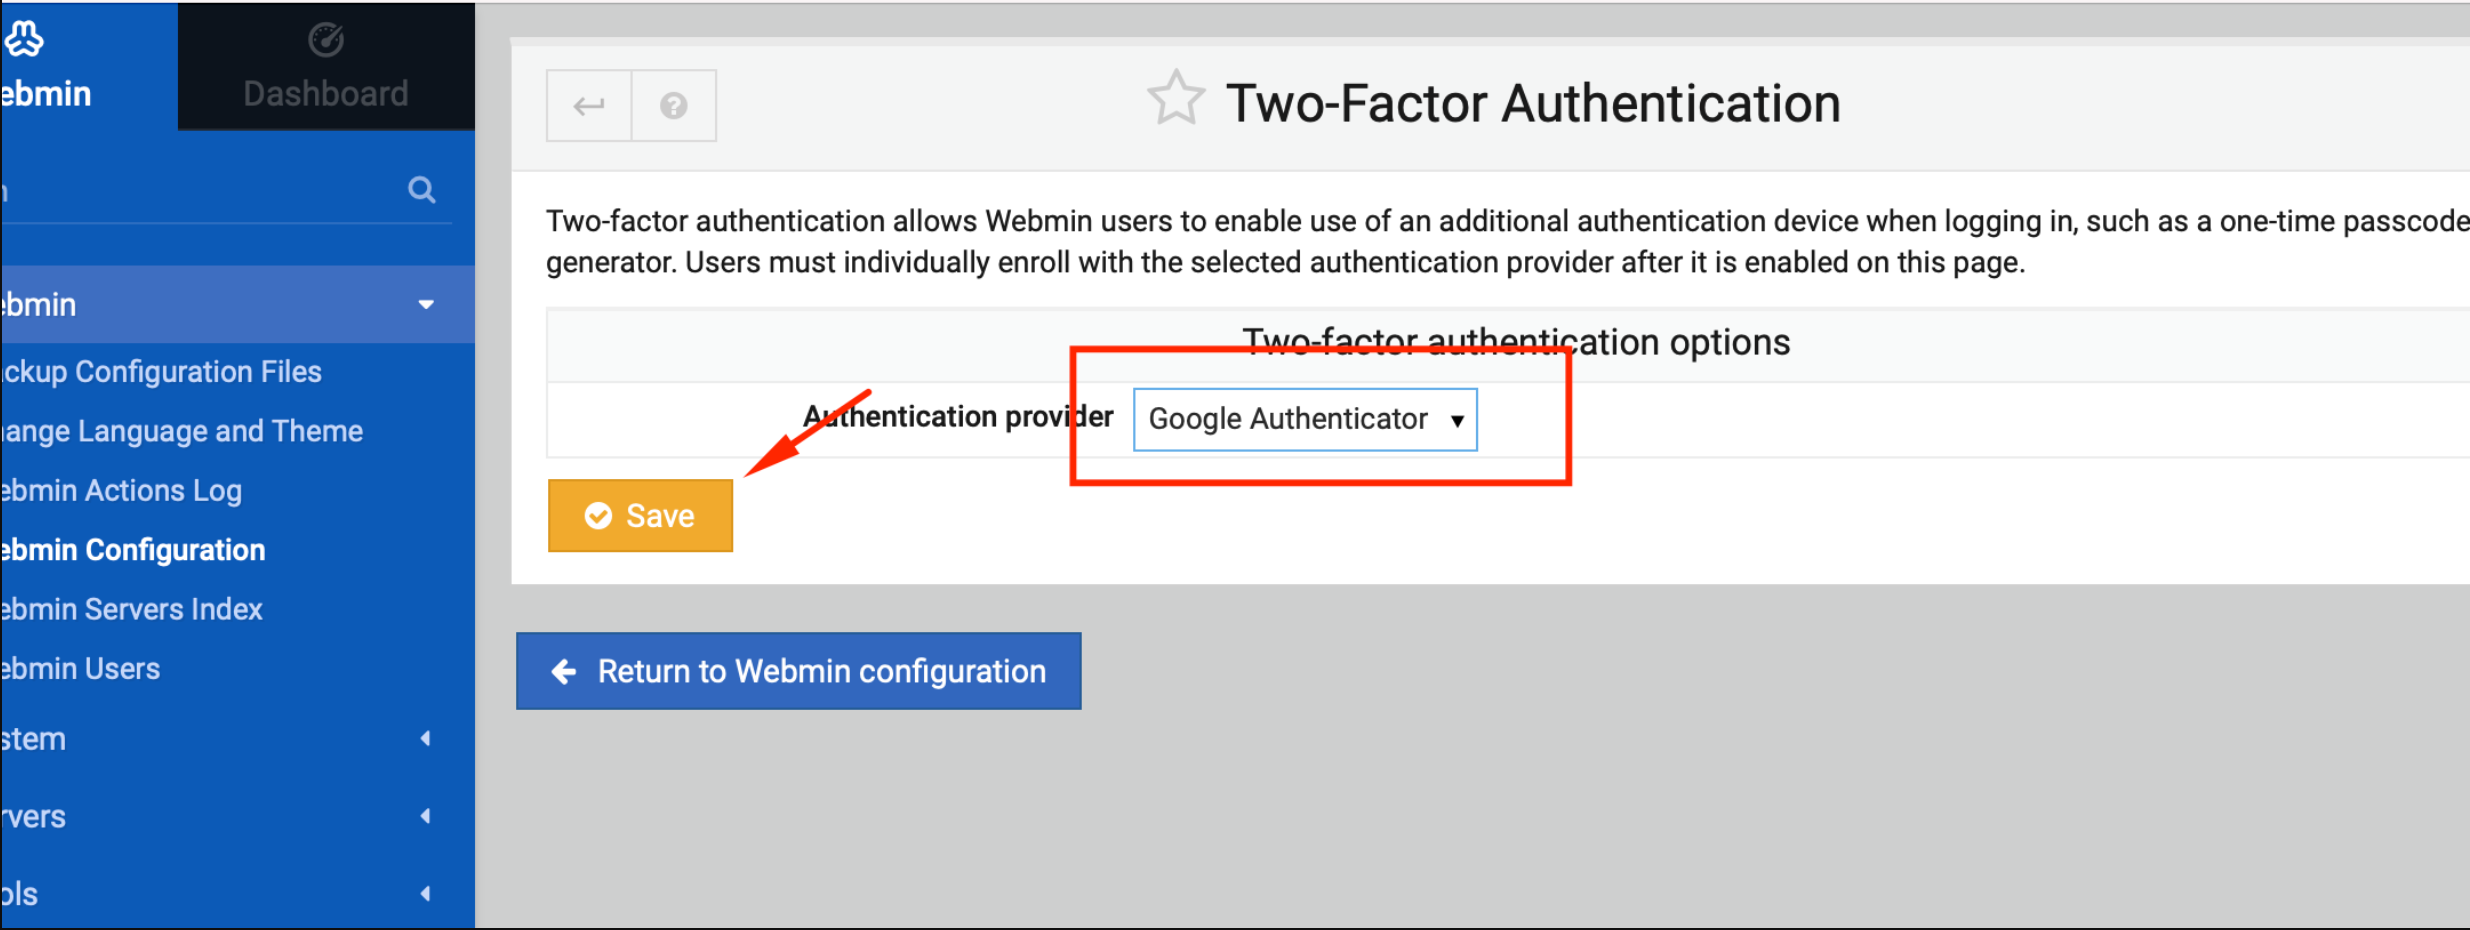
Step 4 : Click on “Save.”
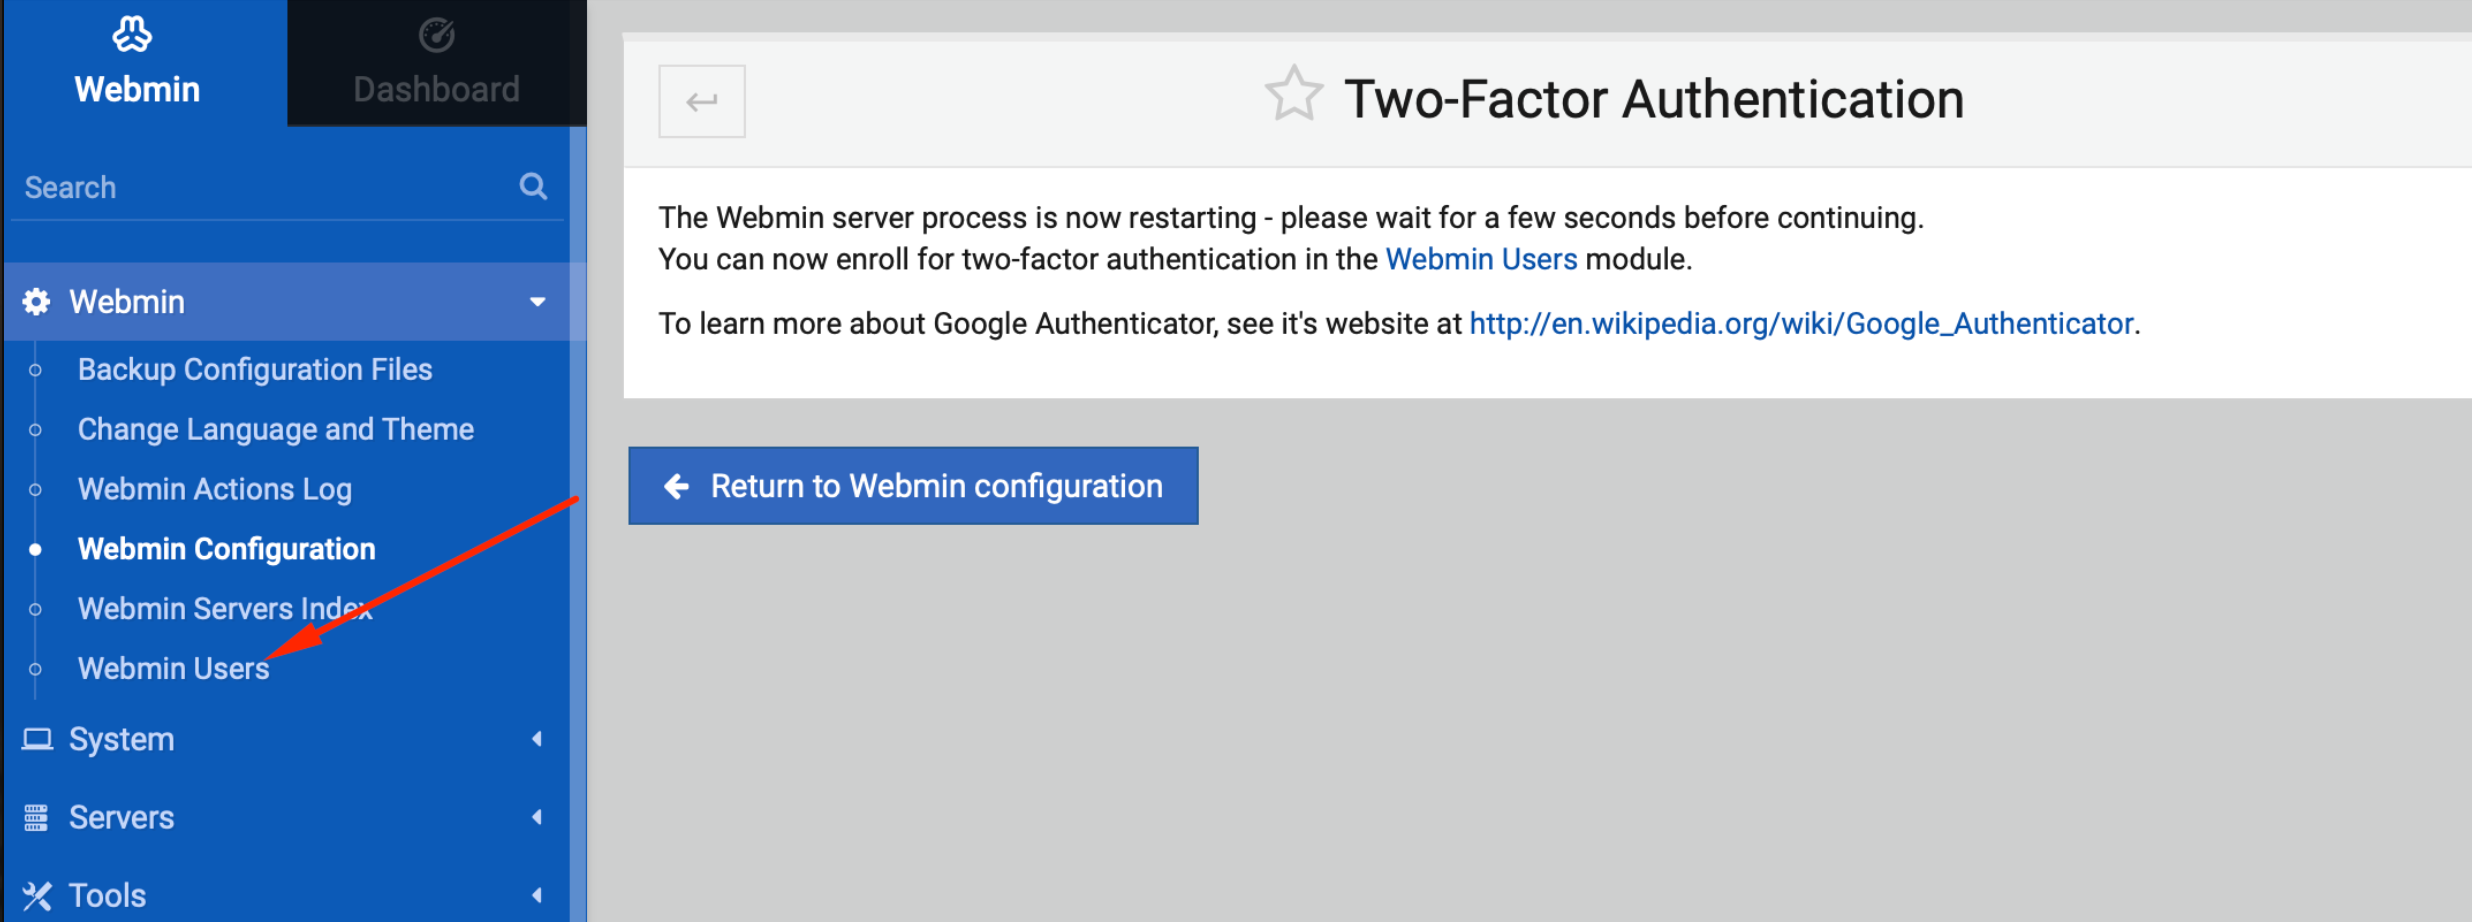
Probably you will be told that “The Perl module Authen::OATH needed for two-factor authentication is not installed. Use the Perl Modules page in Webmin to install it”.
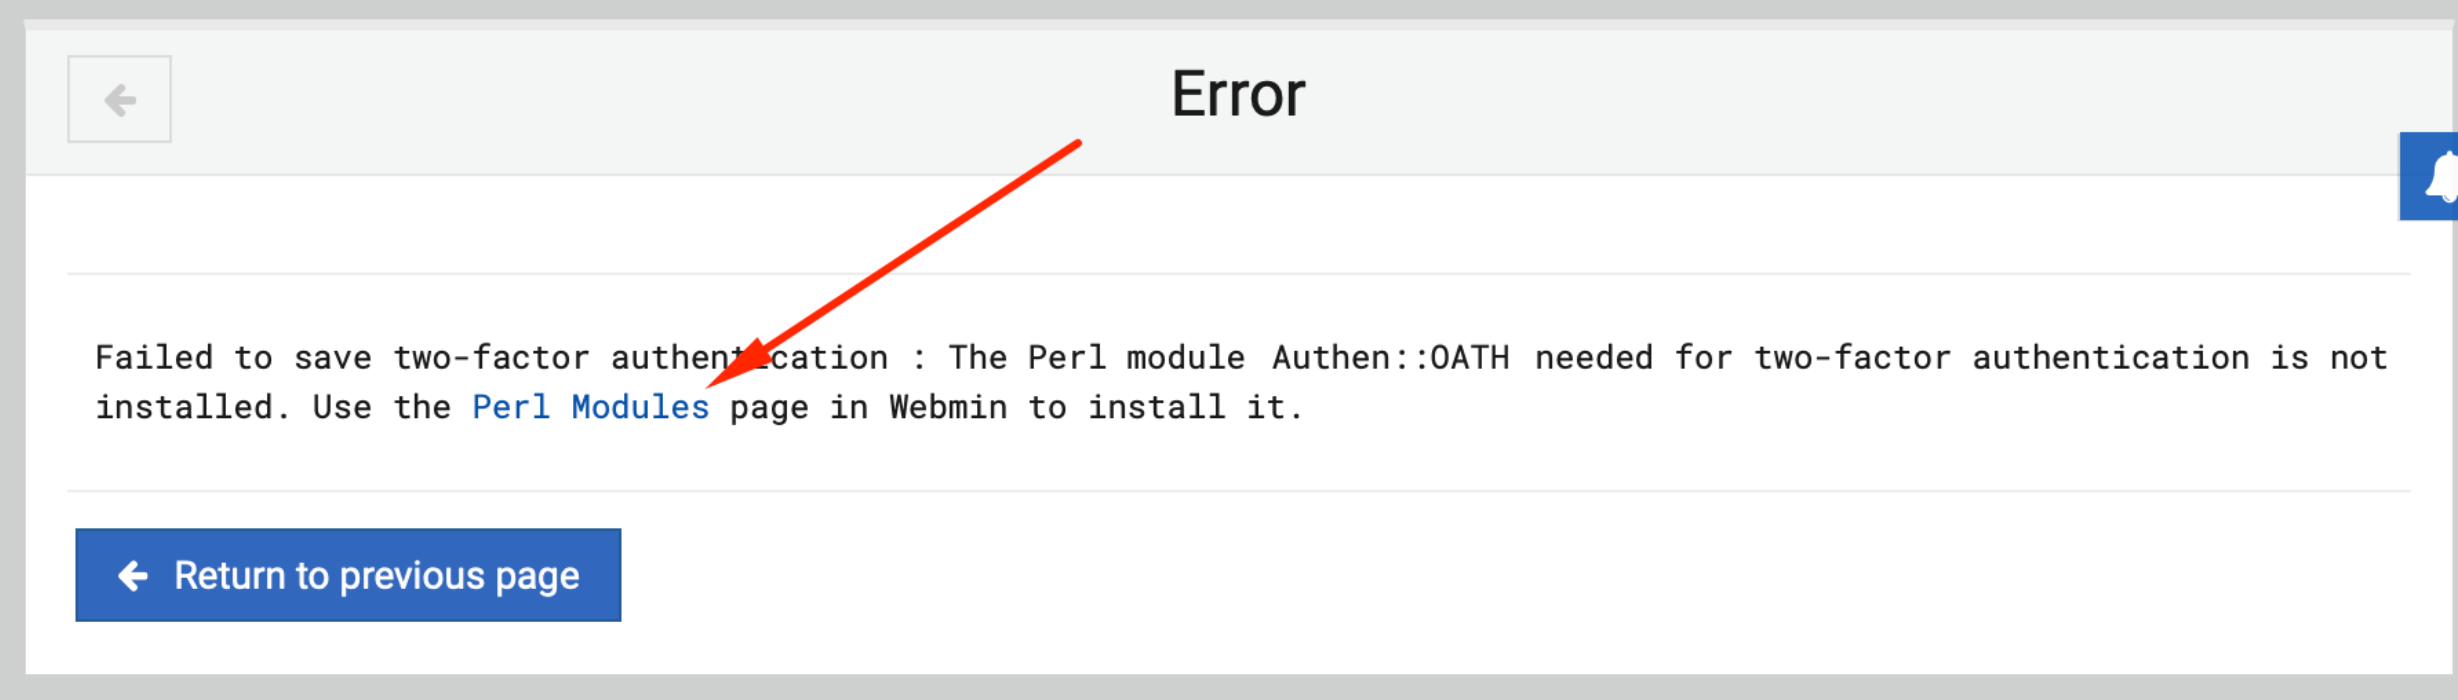
Step 5 : Go ahead and select on the “Perl Modules” link and let it install automatically. Installing on Debian should be fairly easy, while you may need to install multiple modules for CentOS installation.

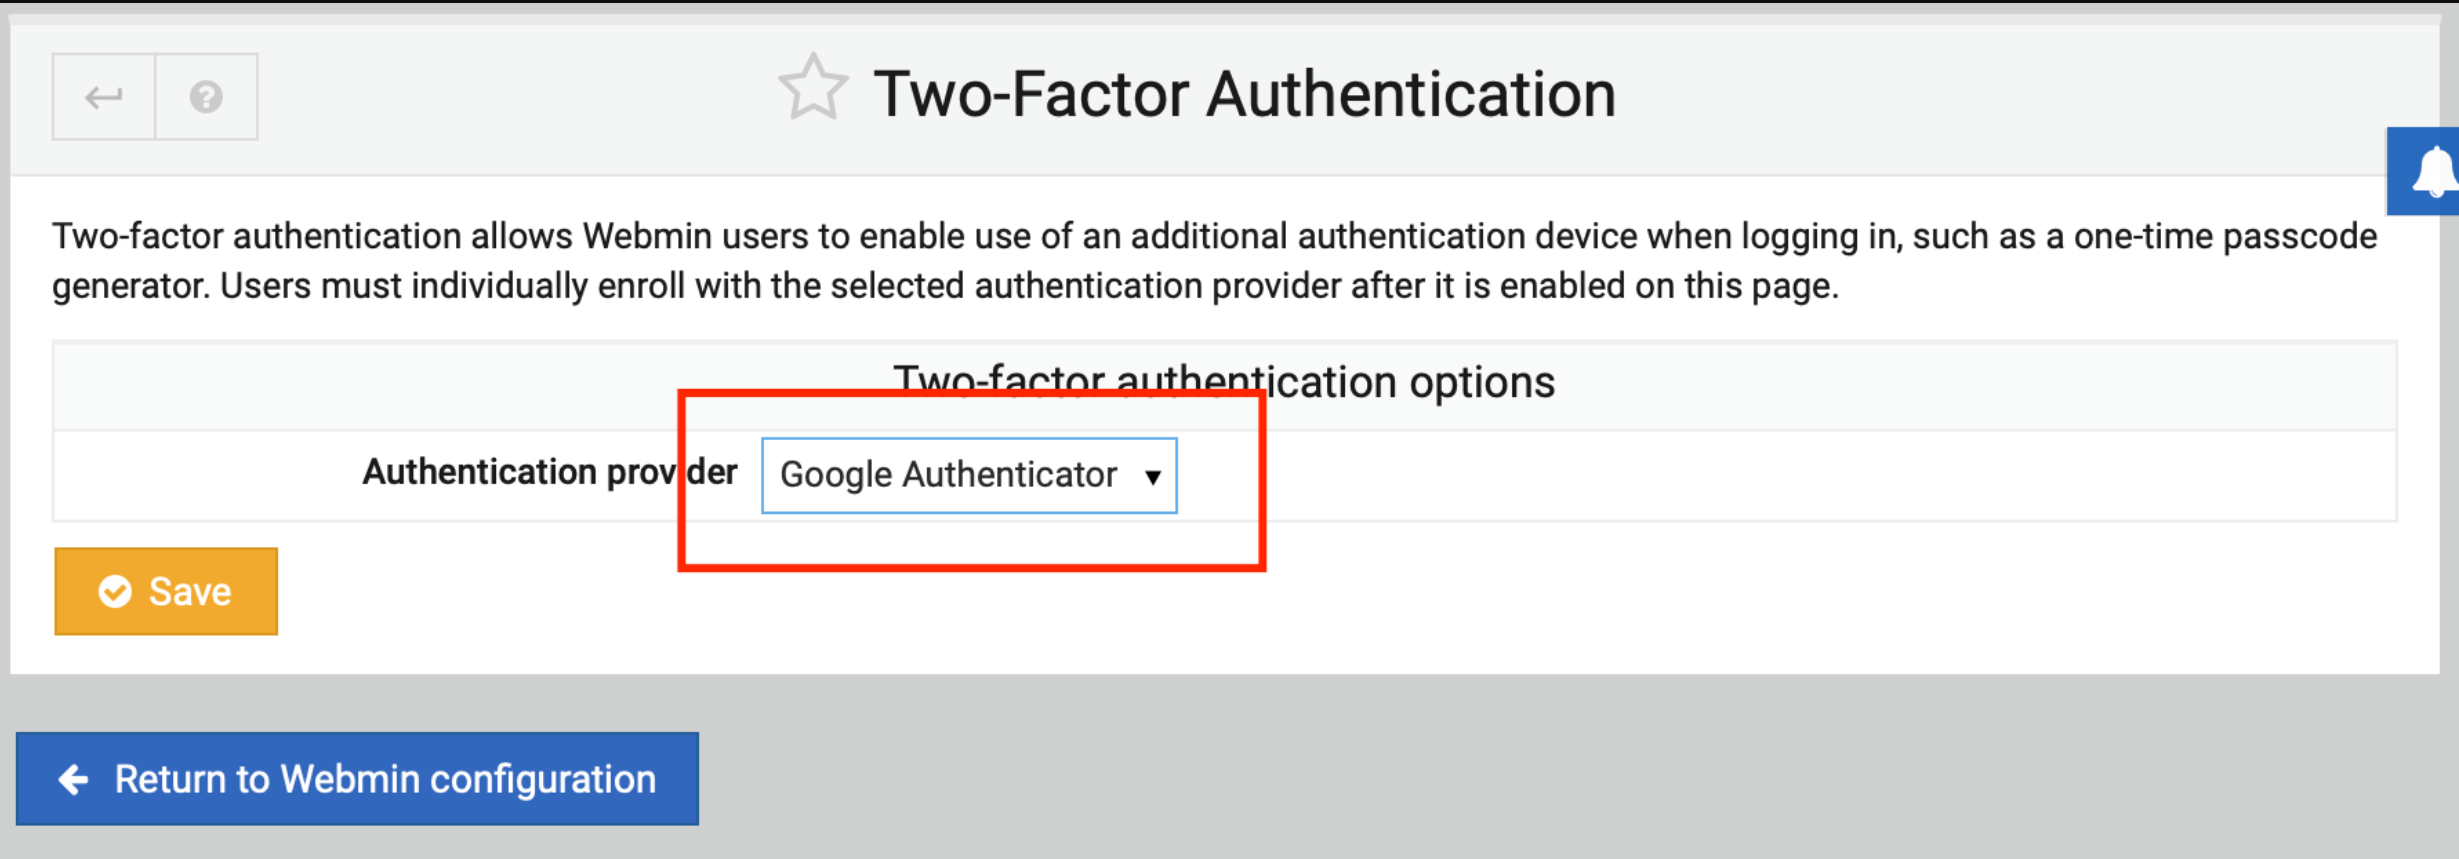
Step 6 : In order to add on Google Authenticator as an extra layer of security, go back to the two-step verification screen and select “Google Authenticator.” Select “save” after it’s been selected.
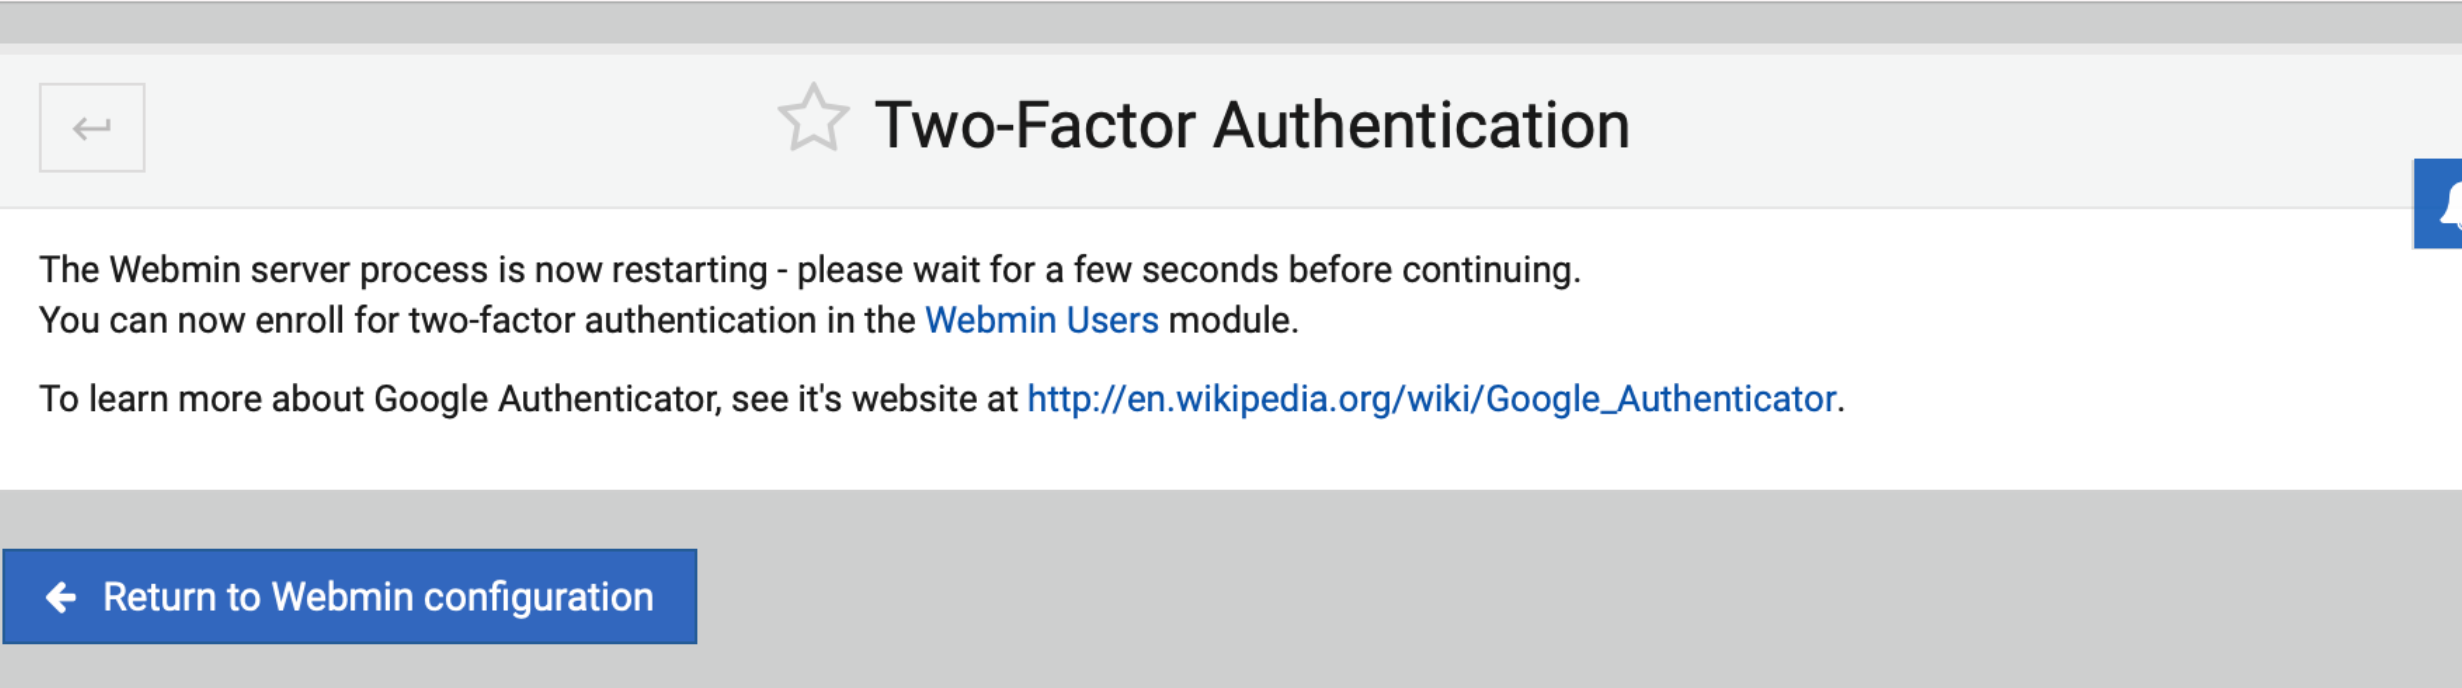
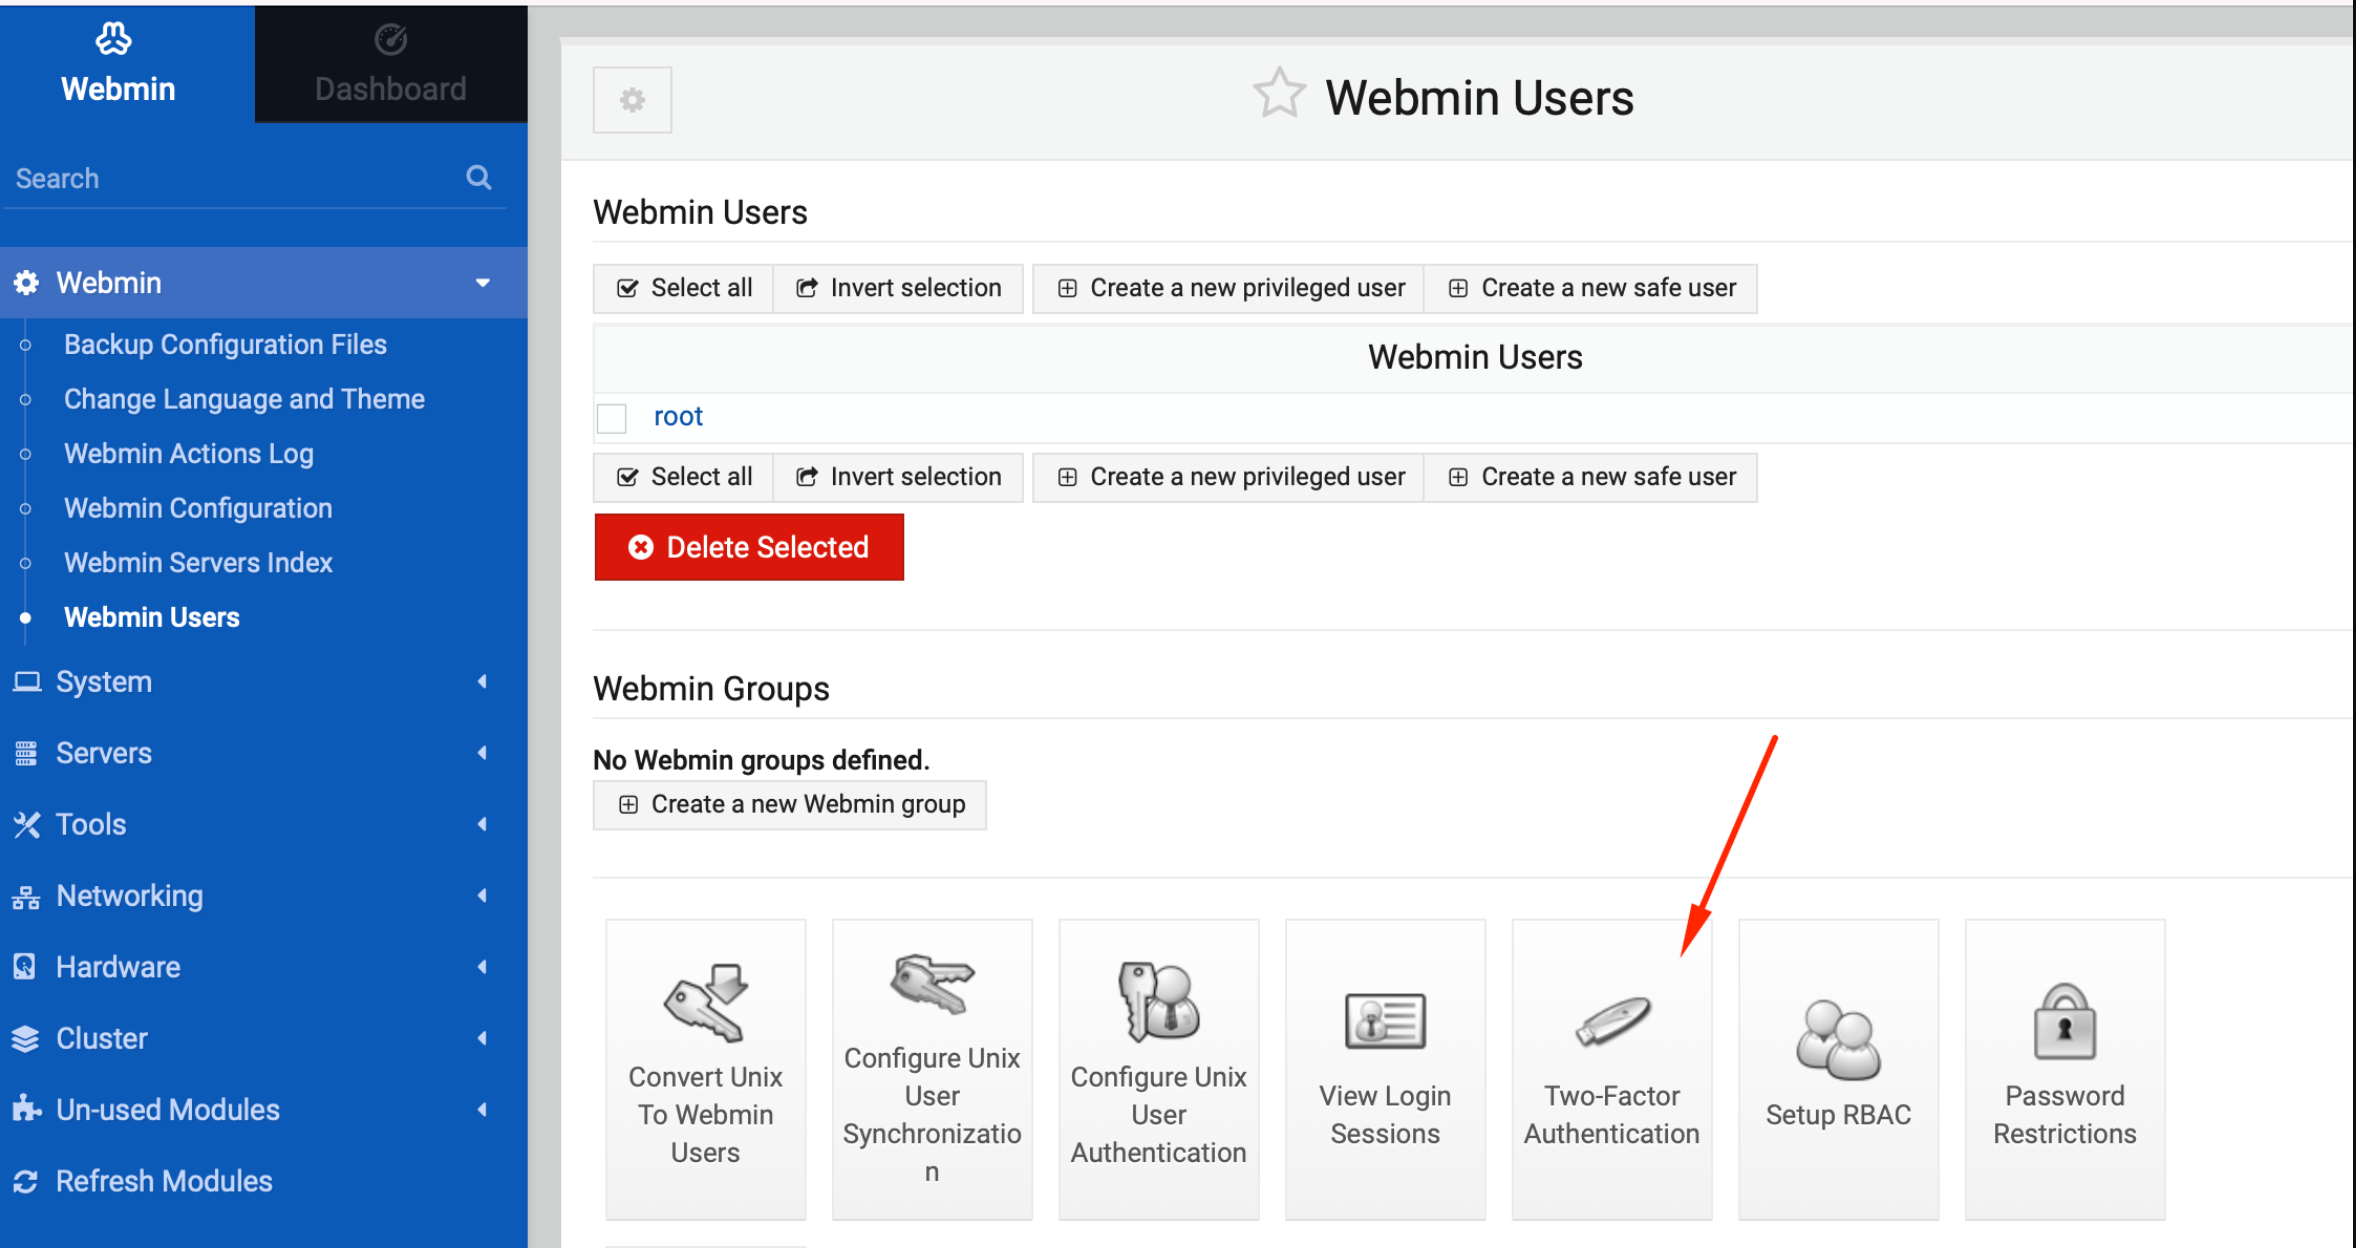
Step 7 : Below the Webmin menu on this web page, click the “Webmin Users” link.
Step 8 : Select the “Two-Factor Authentication” button.
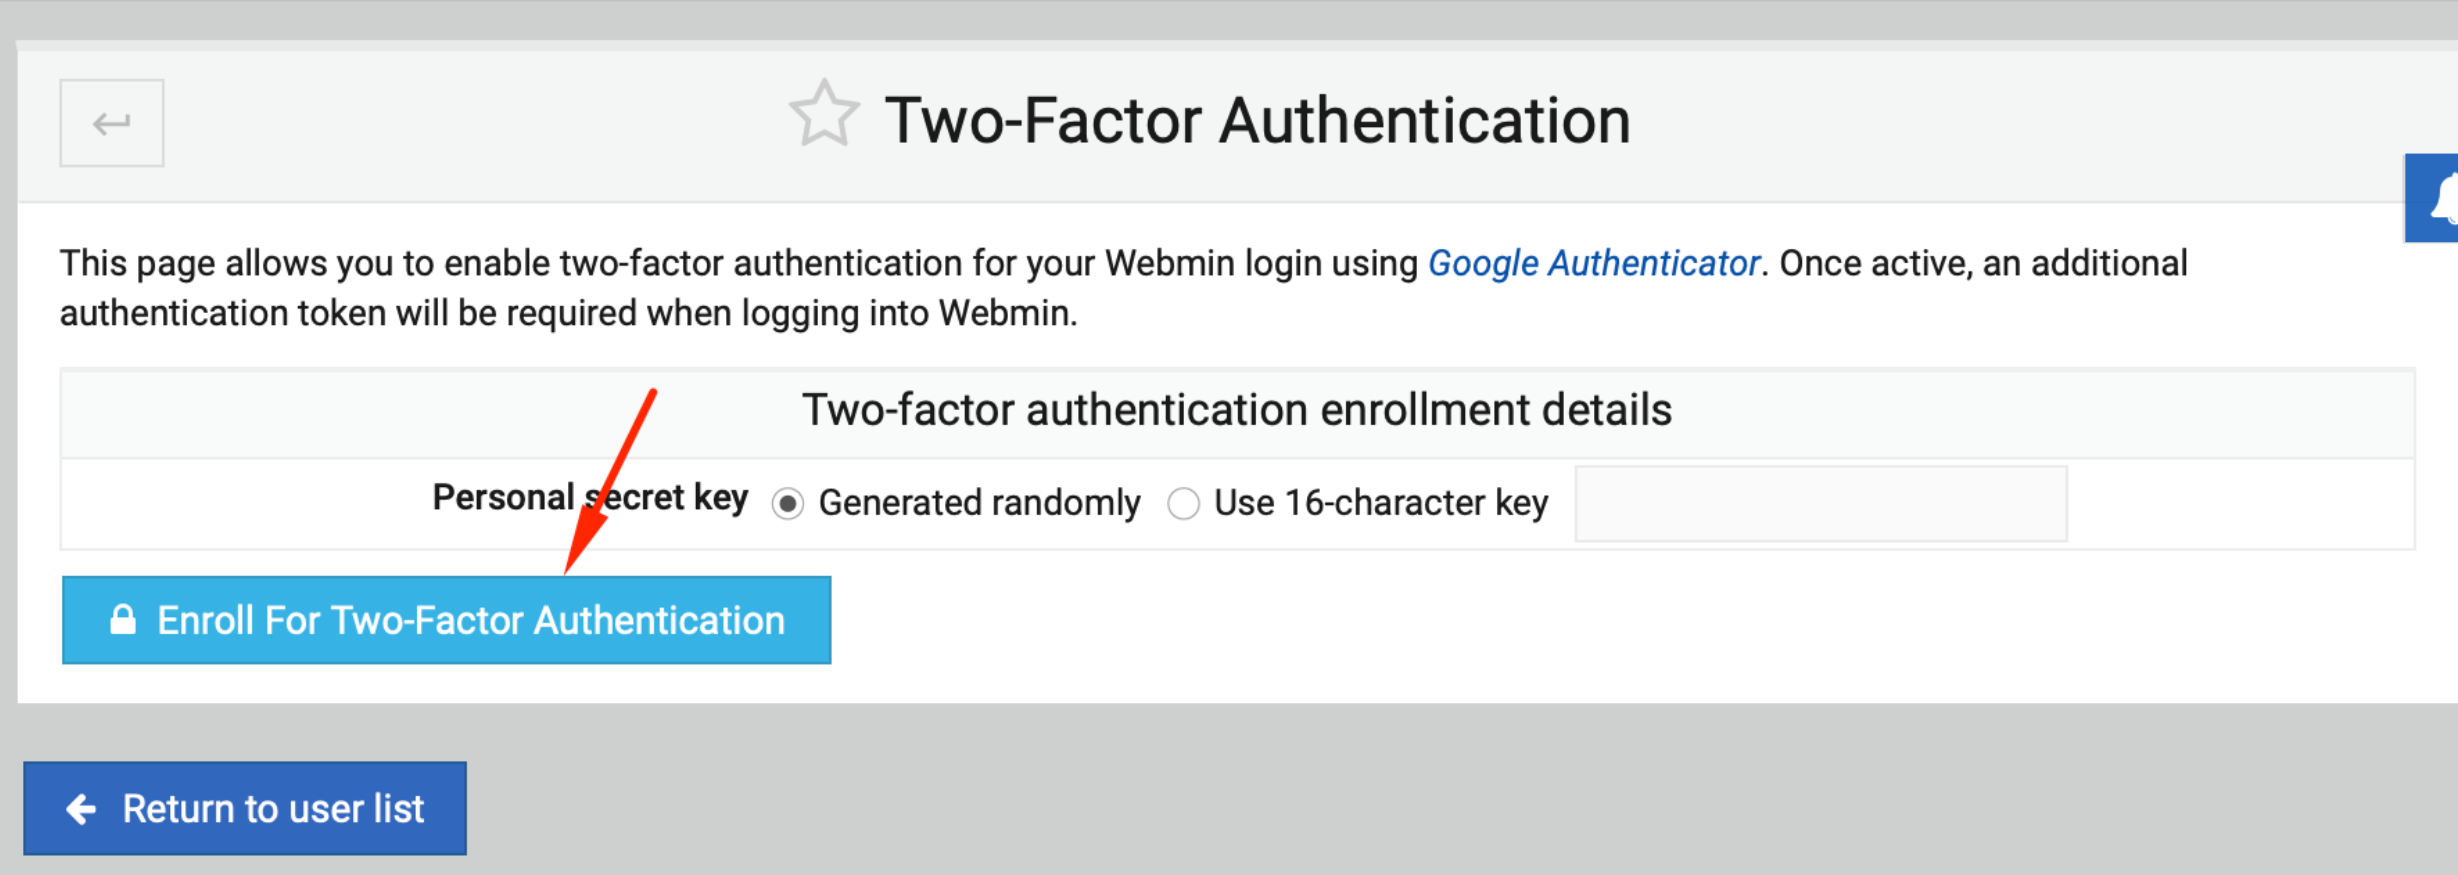
Step 9 : Select “Enroll for Two-Factor Authentication” button and click it.
Enrolling an authenticator will require a compatible application that is installed on your mobile device, such as Google Authenticator/Authy. We would recommend Google Authenticator/Authy until other clients are fully compatible.
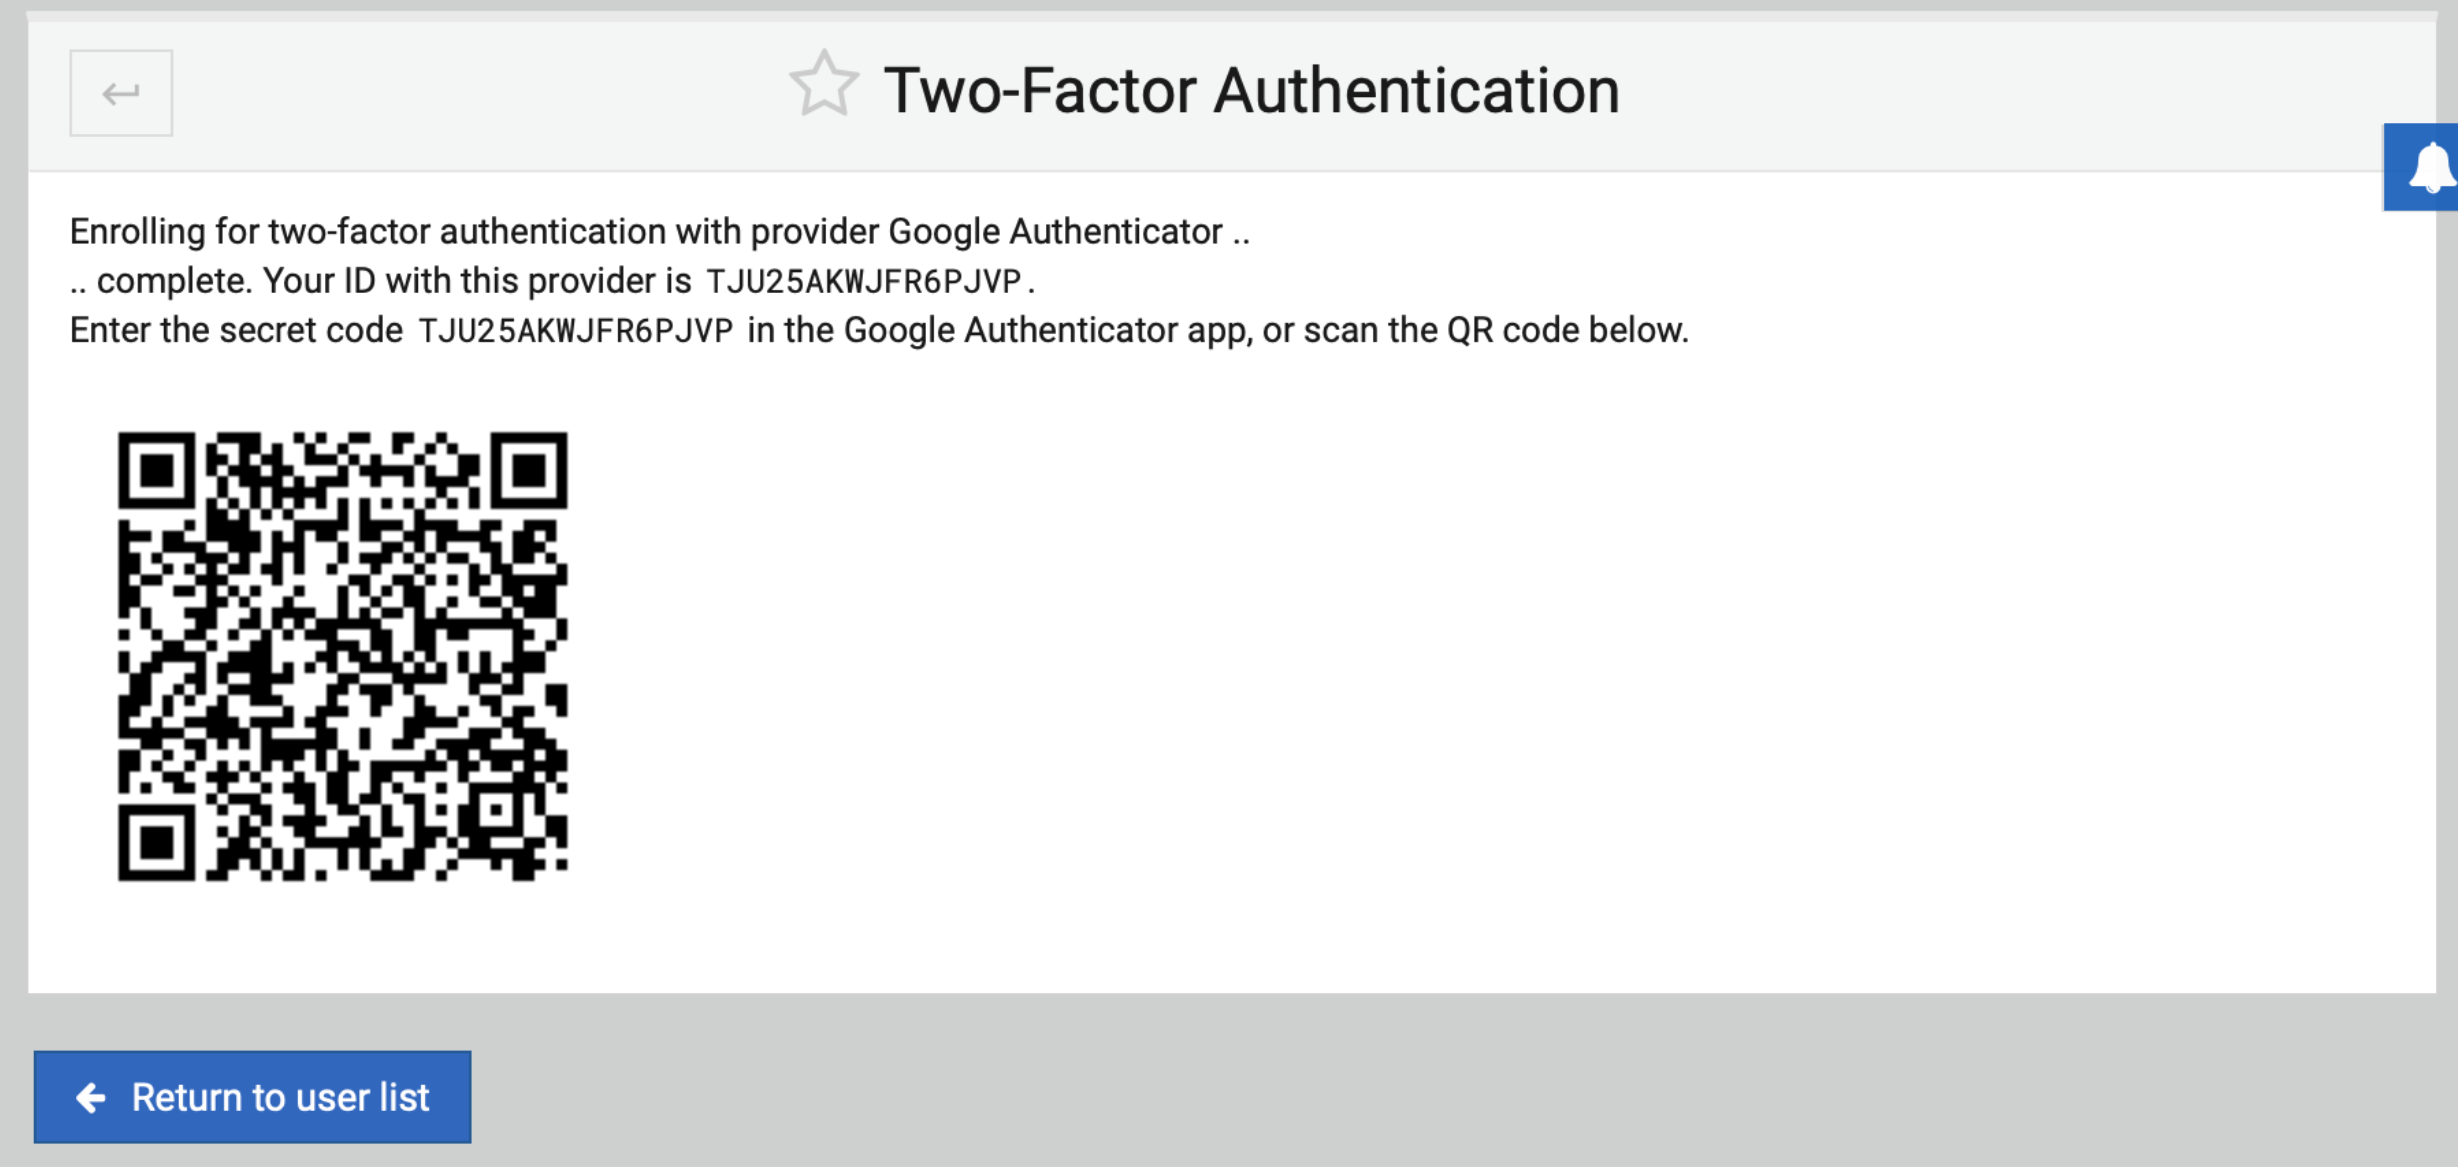
NOTE: The Above QR Code and the Google Authenticator code are for the reference, your Codes will be different than the above.
Step 10 : When you log in, use your two-factor authentication key as well as your username and password.
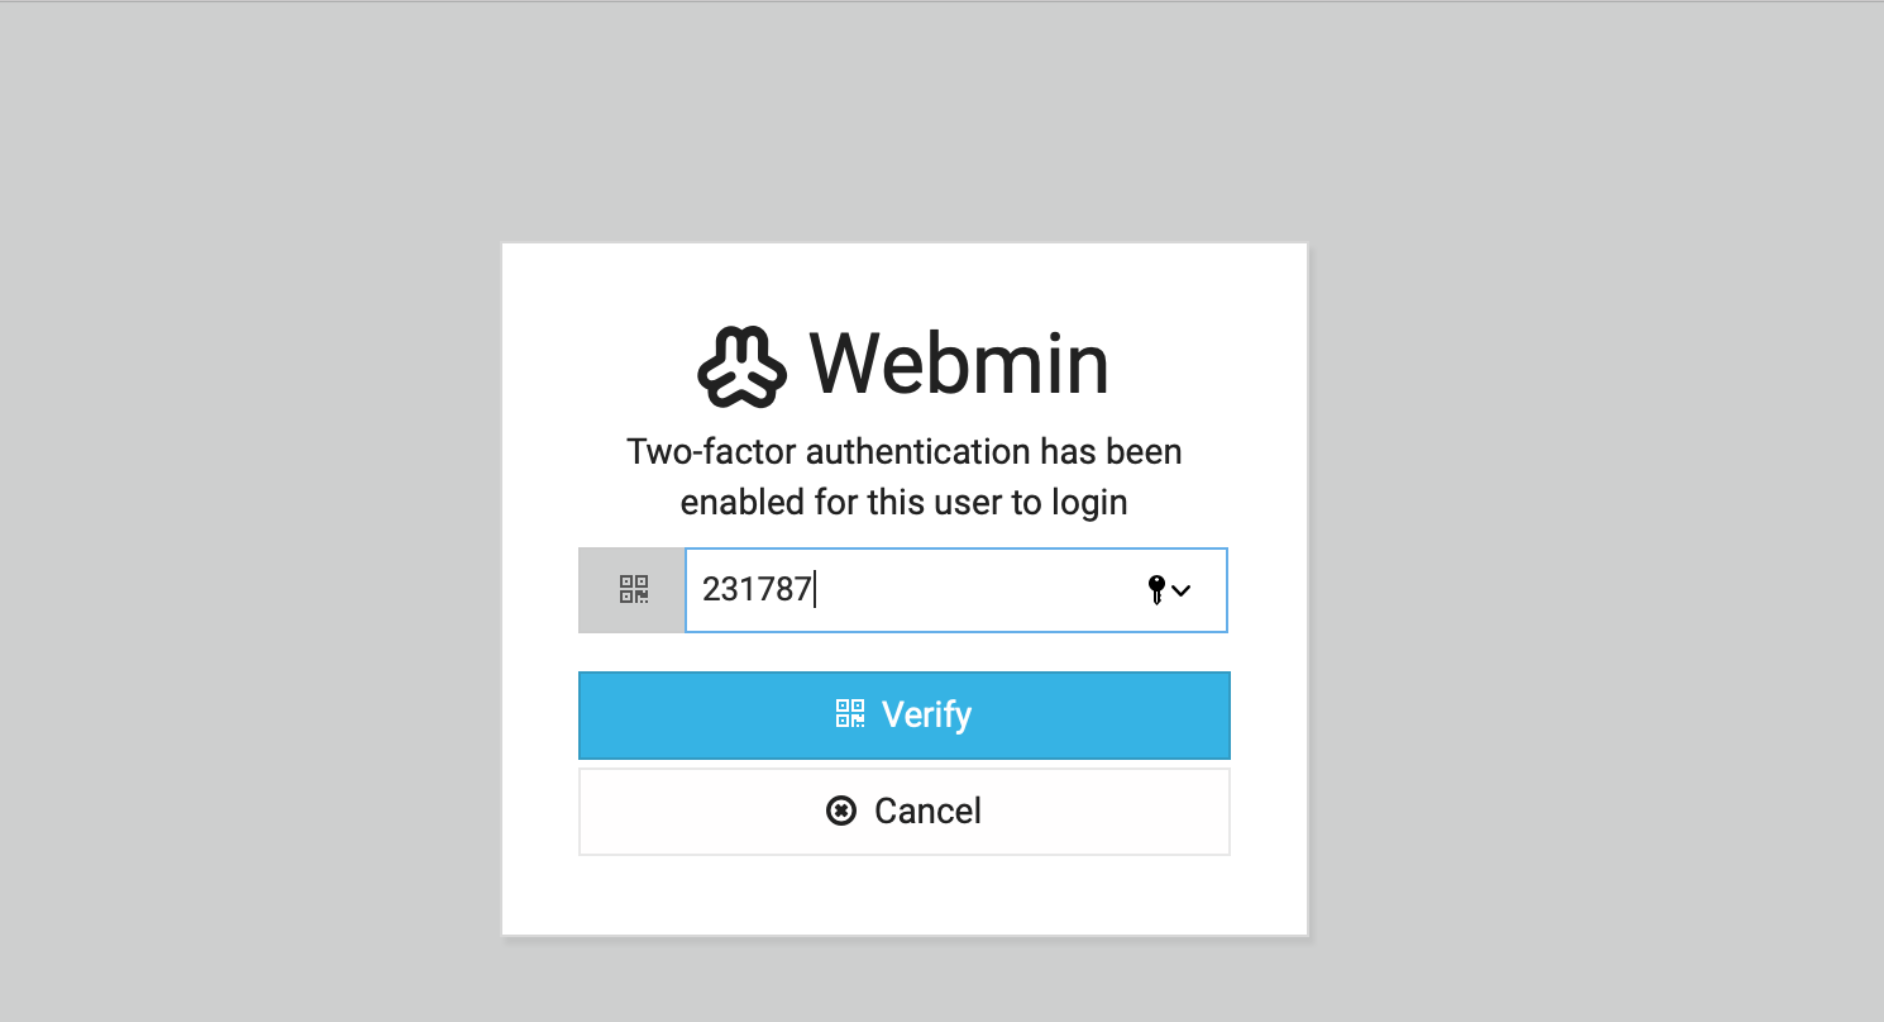
Installing Webmin with two-factor authentication enabled helps secure your Webmin installation.