UrBackup Tool for Faveo File System and Database Backup
![]()
UrBackup Tool
Note We are using URBACKUP a Third Party Tool which is used to backup file system and Database to a remote server, This can be used for both Linux Based and Windows server.
Requirements
1. We need a Server to store the backups which are taken. this server can be Windows or Linux based.
Usage
1. We need to set up the URBACKUP Server first to do the same follow the below steps.
1.a. In the backup server you need to install URBackup server to install follow this : (https://www.urbackup.org/download.html)
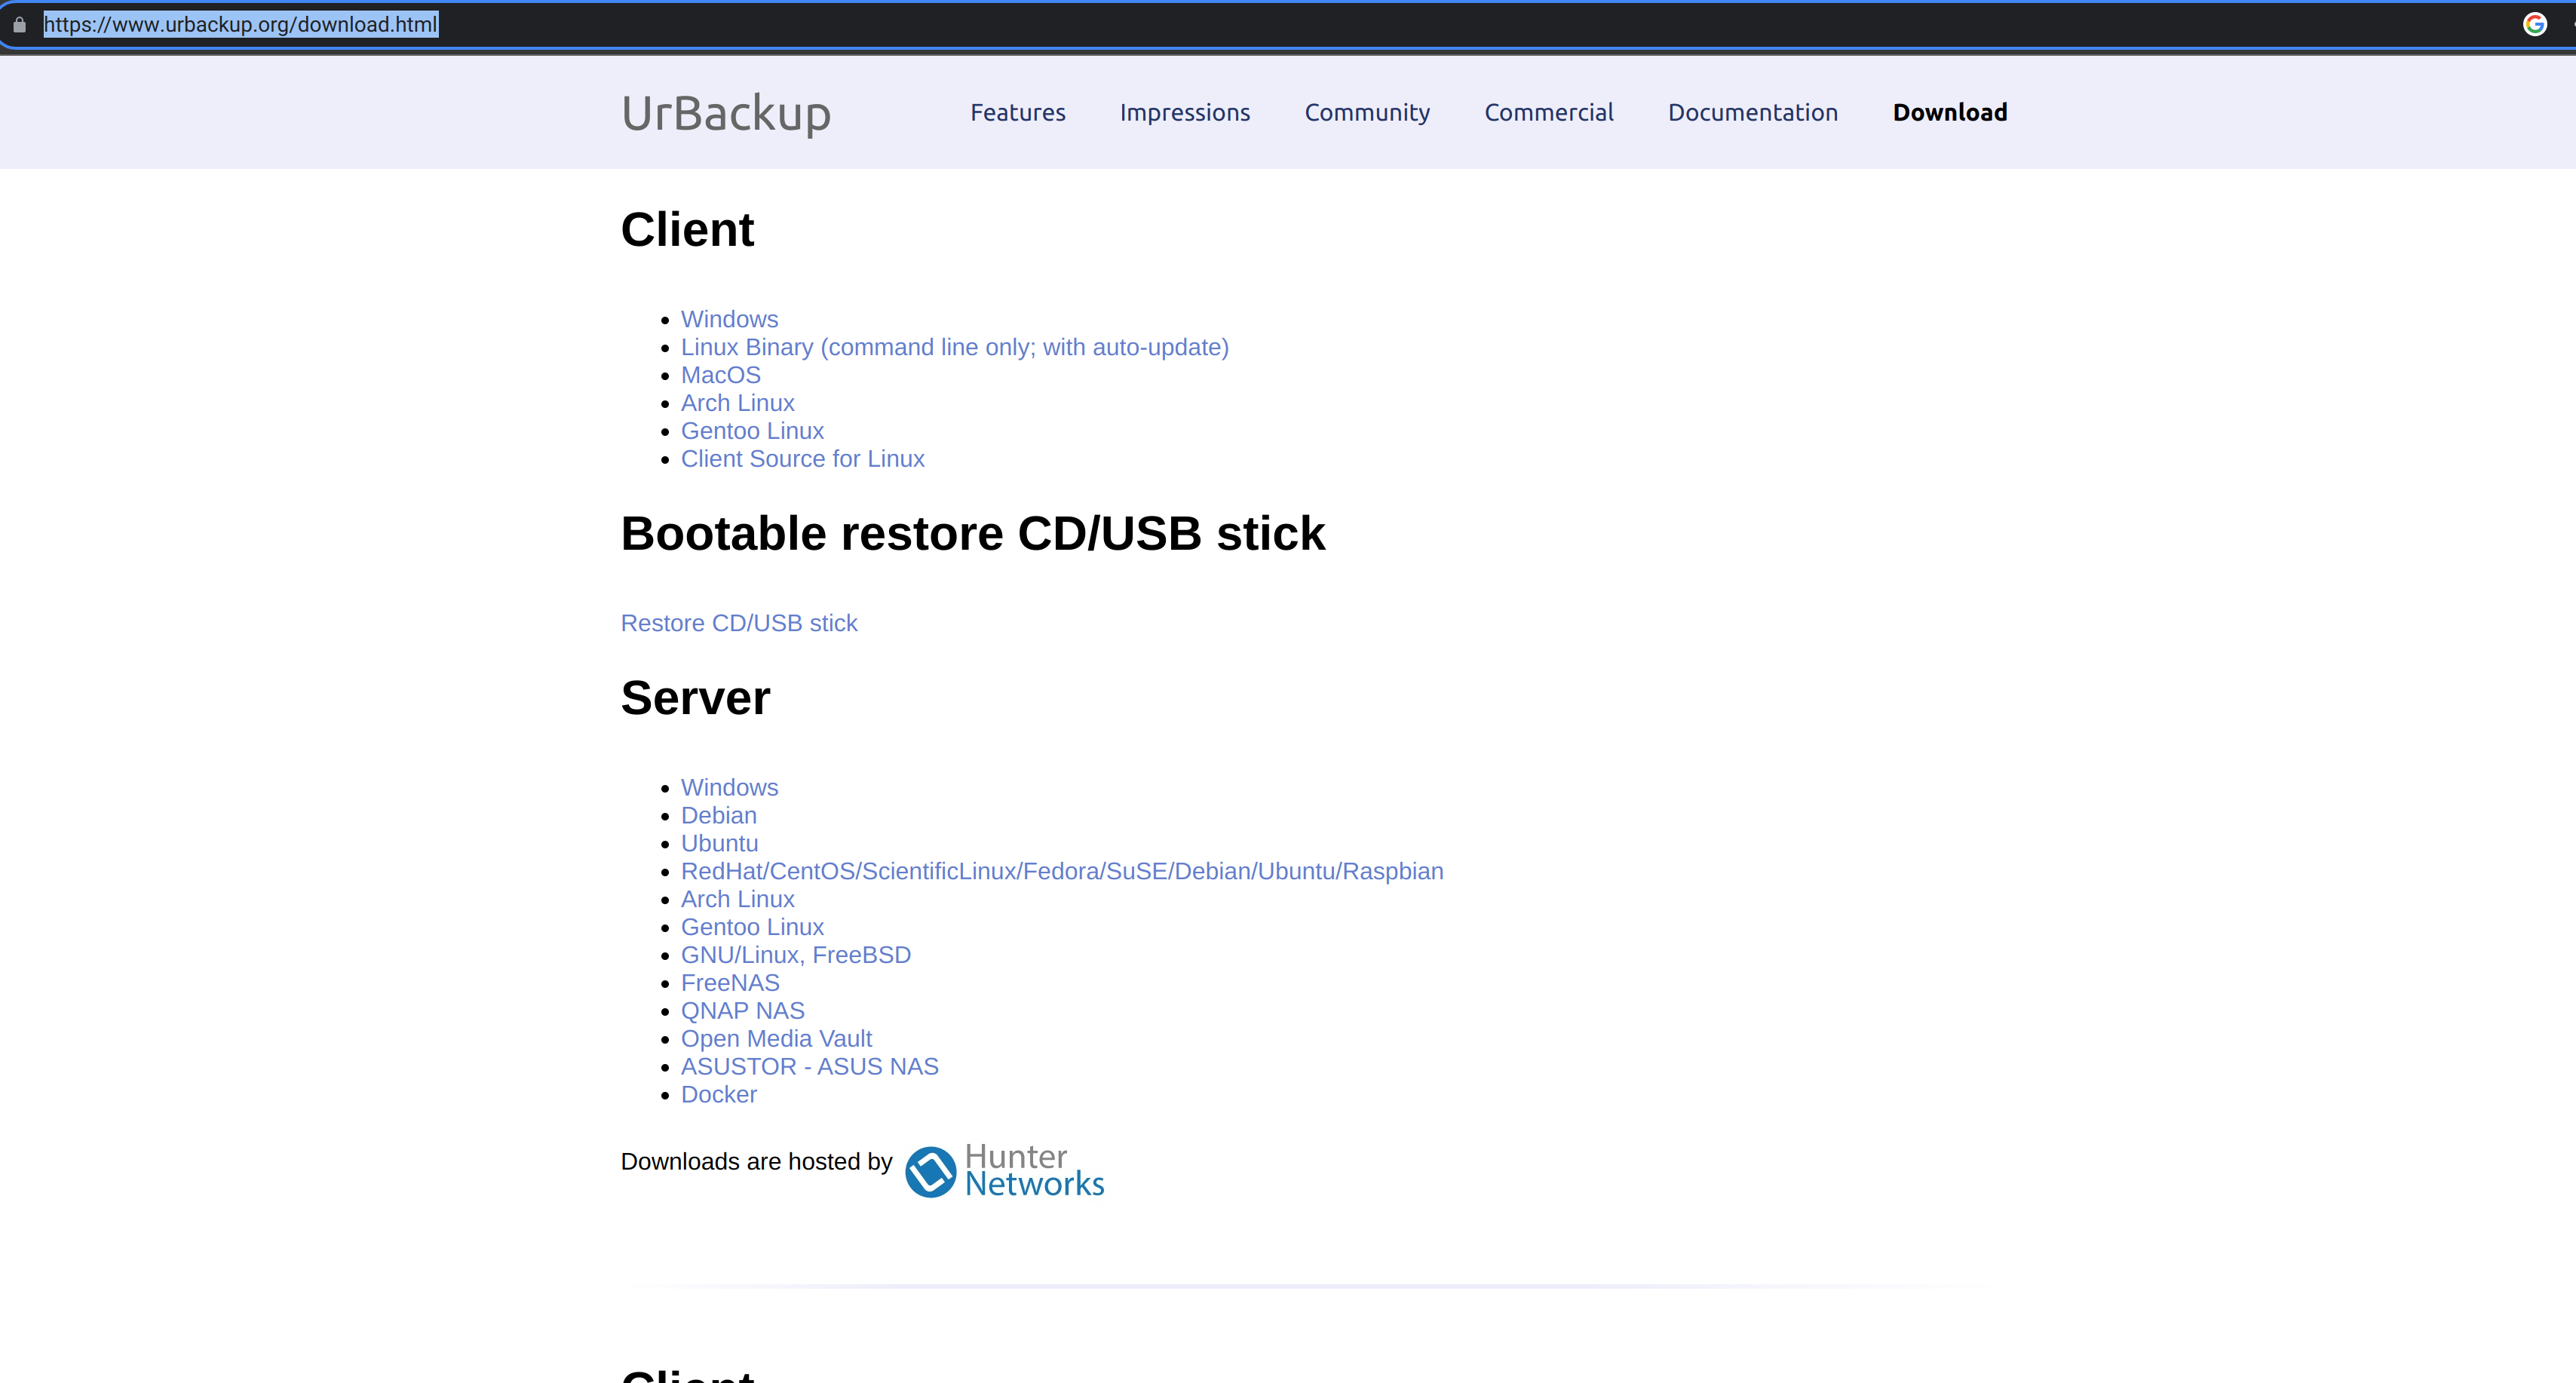
1.b Once the installation is started it might ask for the directory where to store the backups please select a directory and the urbackup user should have permissions to access it once it is done, you can browse the domain or IP of the URBackup server with the port 55414.
1.c. Once that is done we need to configure the server.
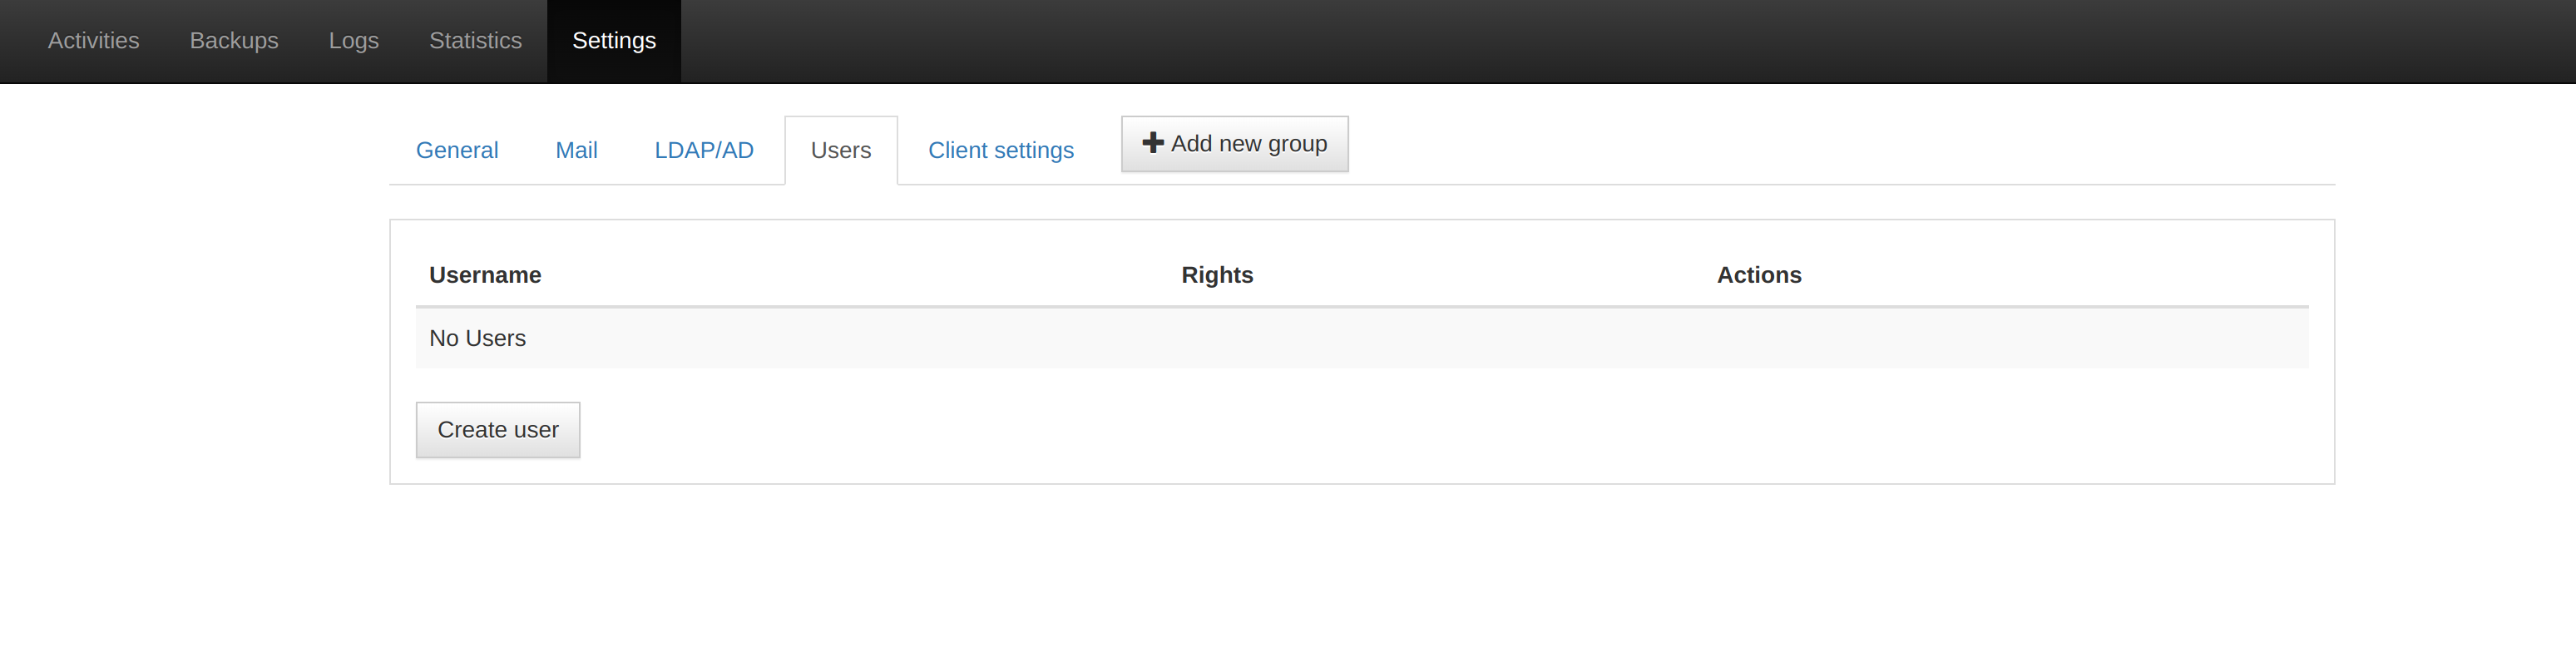
- Once the above page is opened we need to create a user and set a password for the same, to do so we need to click on the setting icon on the top and then click on the user and create a user as shown in the below snap.
- Once the above is done we can continue setting up the server to do so click on general as shown in the below snap.
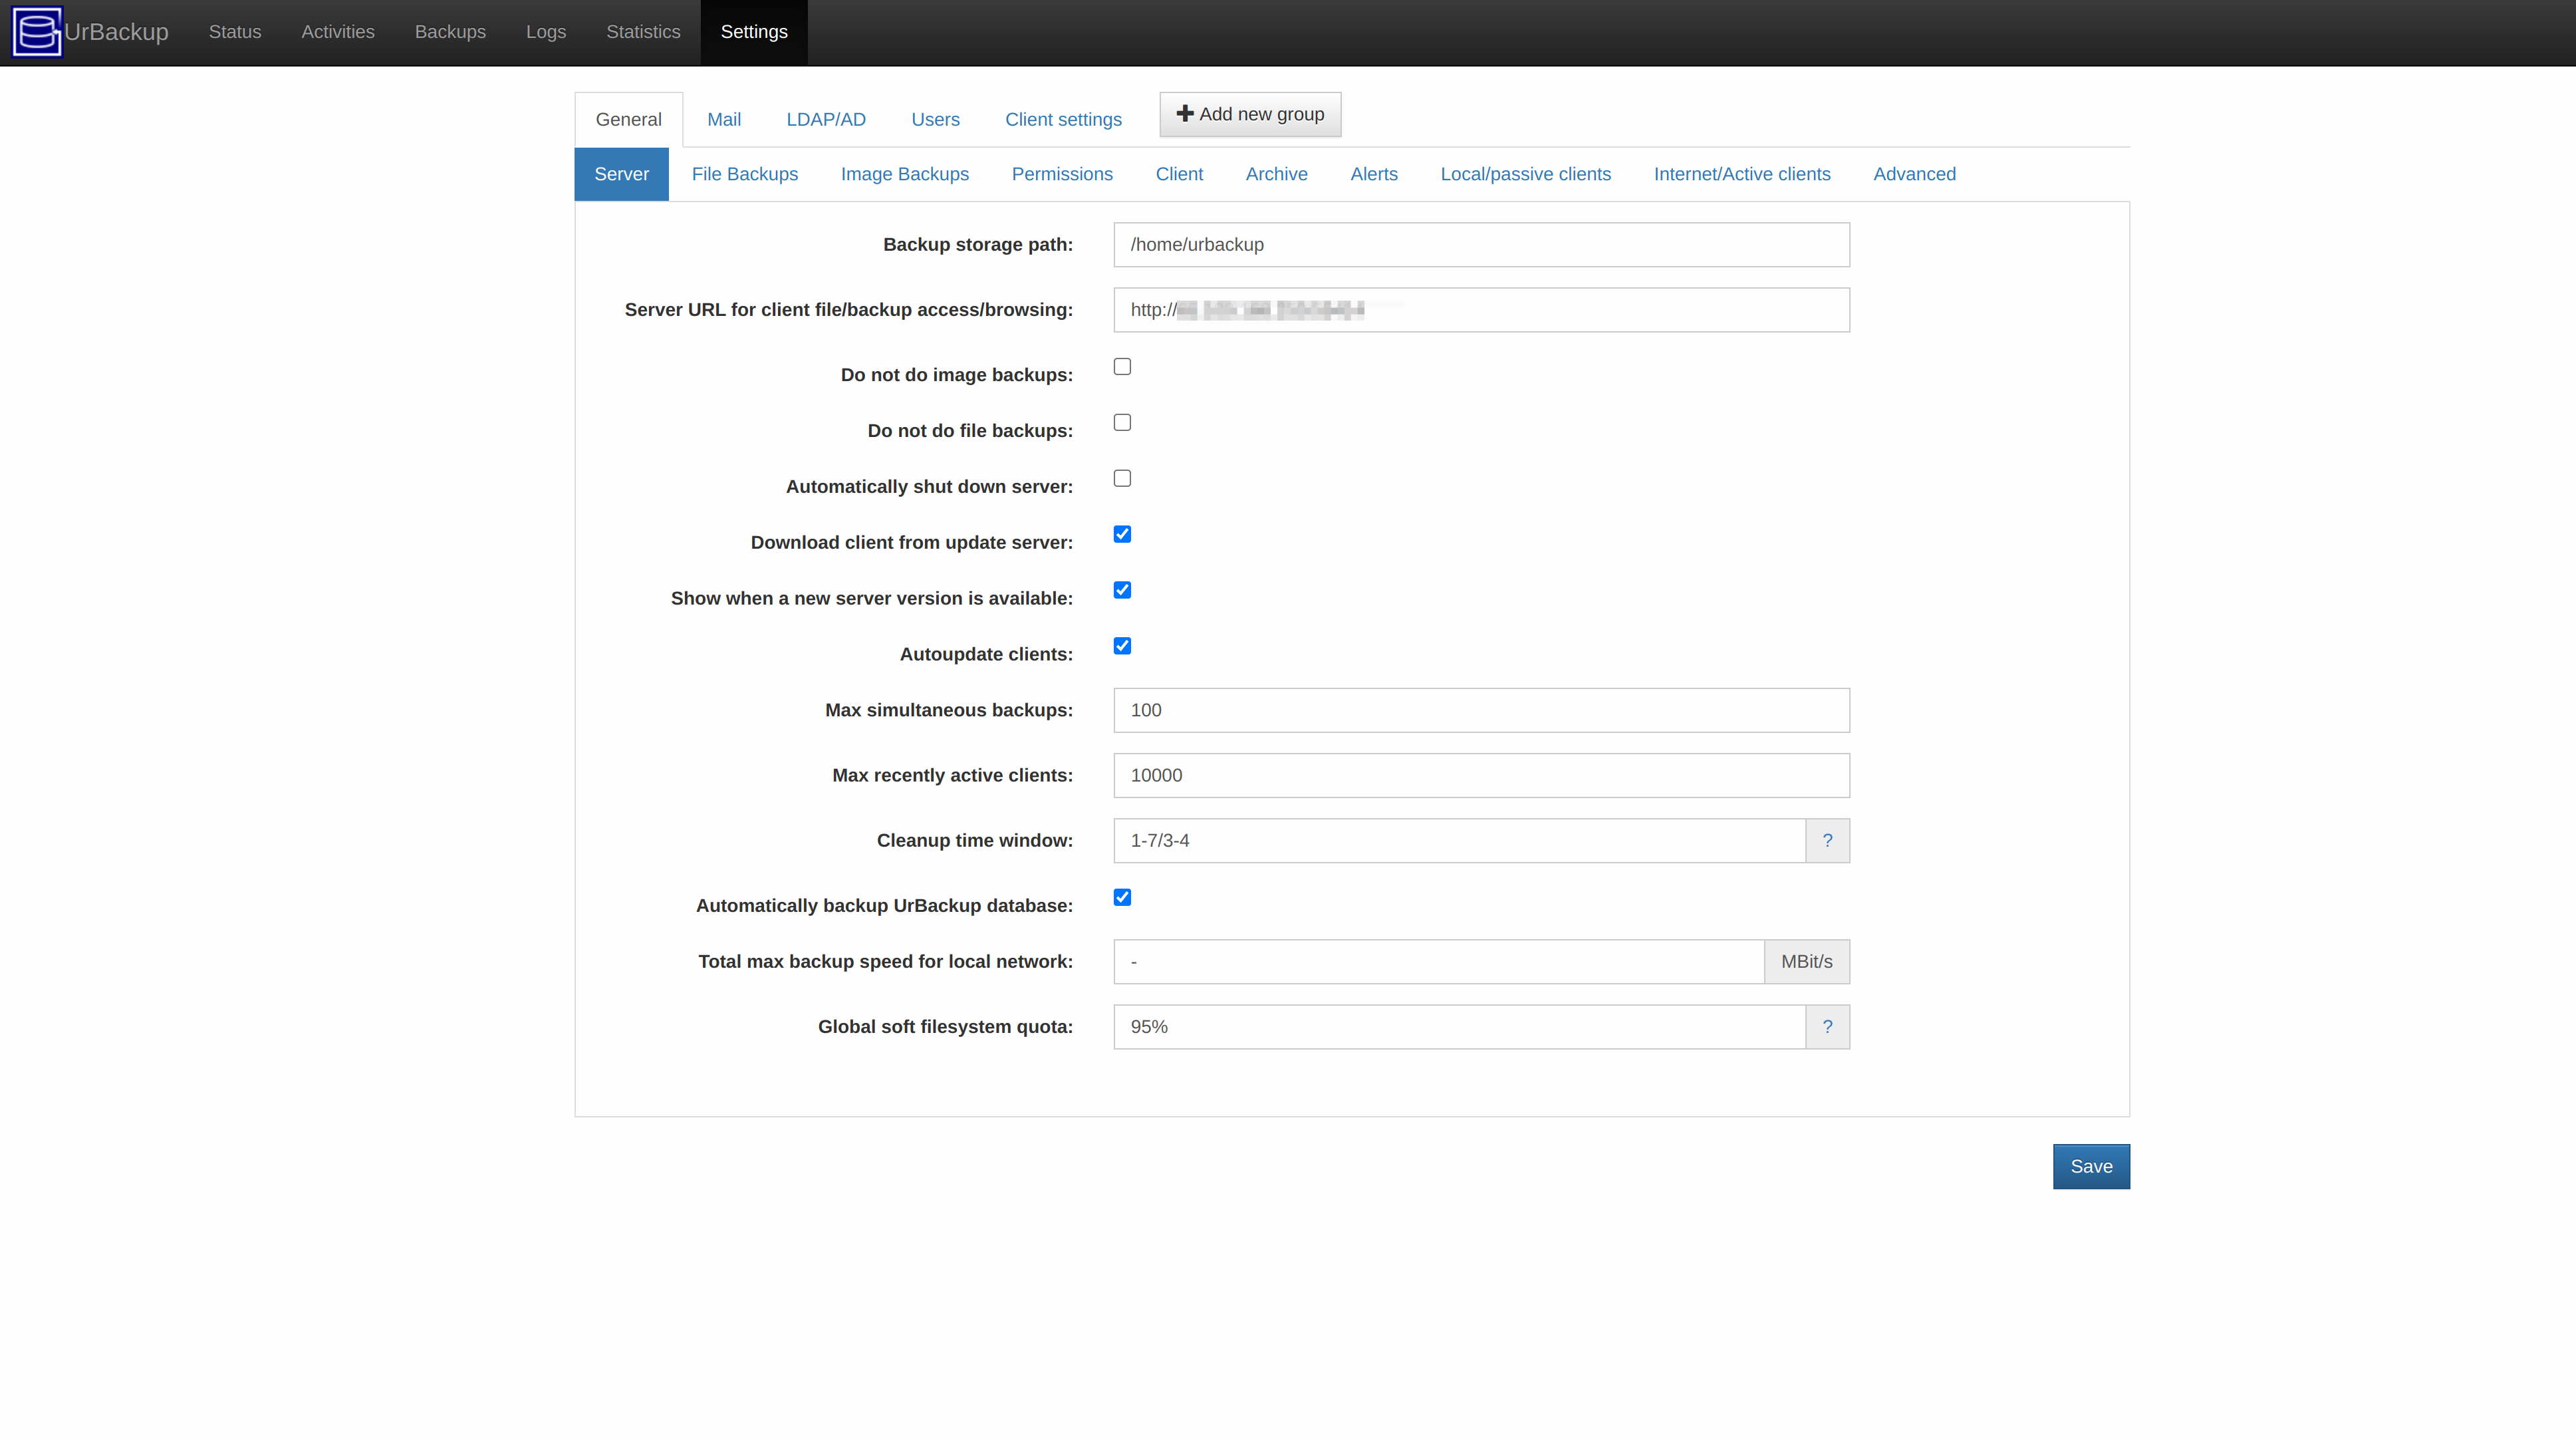
- Click on server under general as shown in the above snap and fill the details below as shown in the above.
Backup Storage Path : This is the location where we need to store the backups in the server.
Server URL for client file/backup access/browsing : Here we need to add the server url which you are trying to access urbackup
- Once that is done we need to set the options for the File Backup to do so click the next option after the server as shown in the below snap.
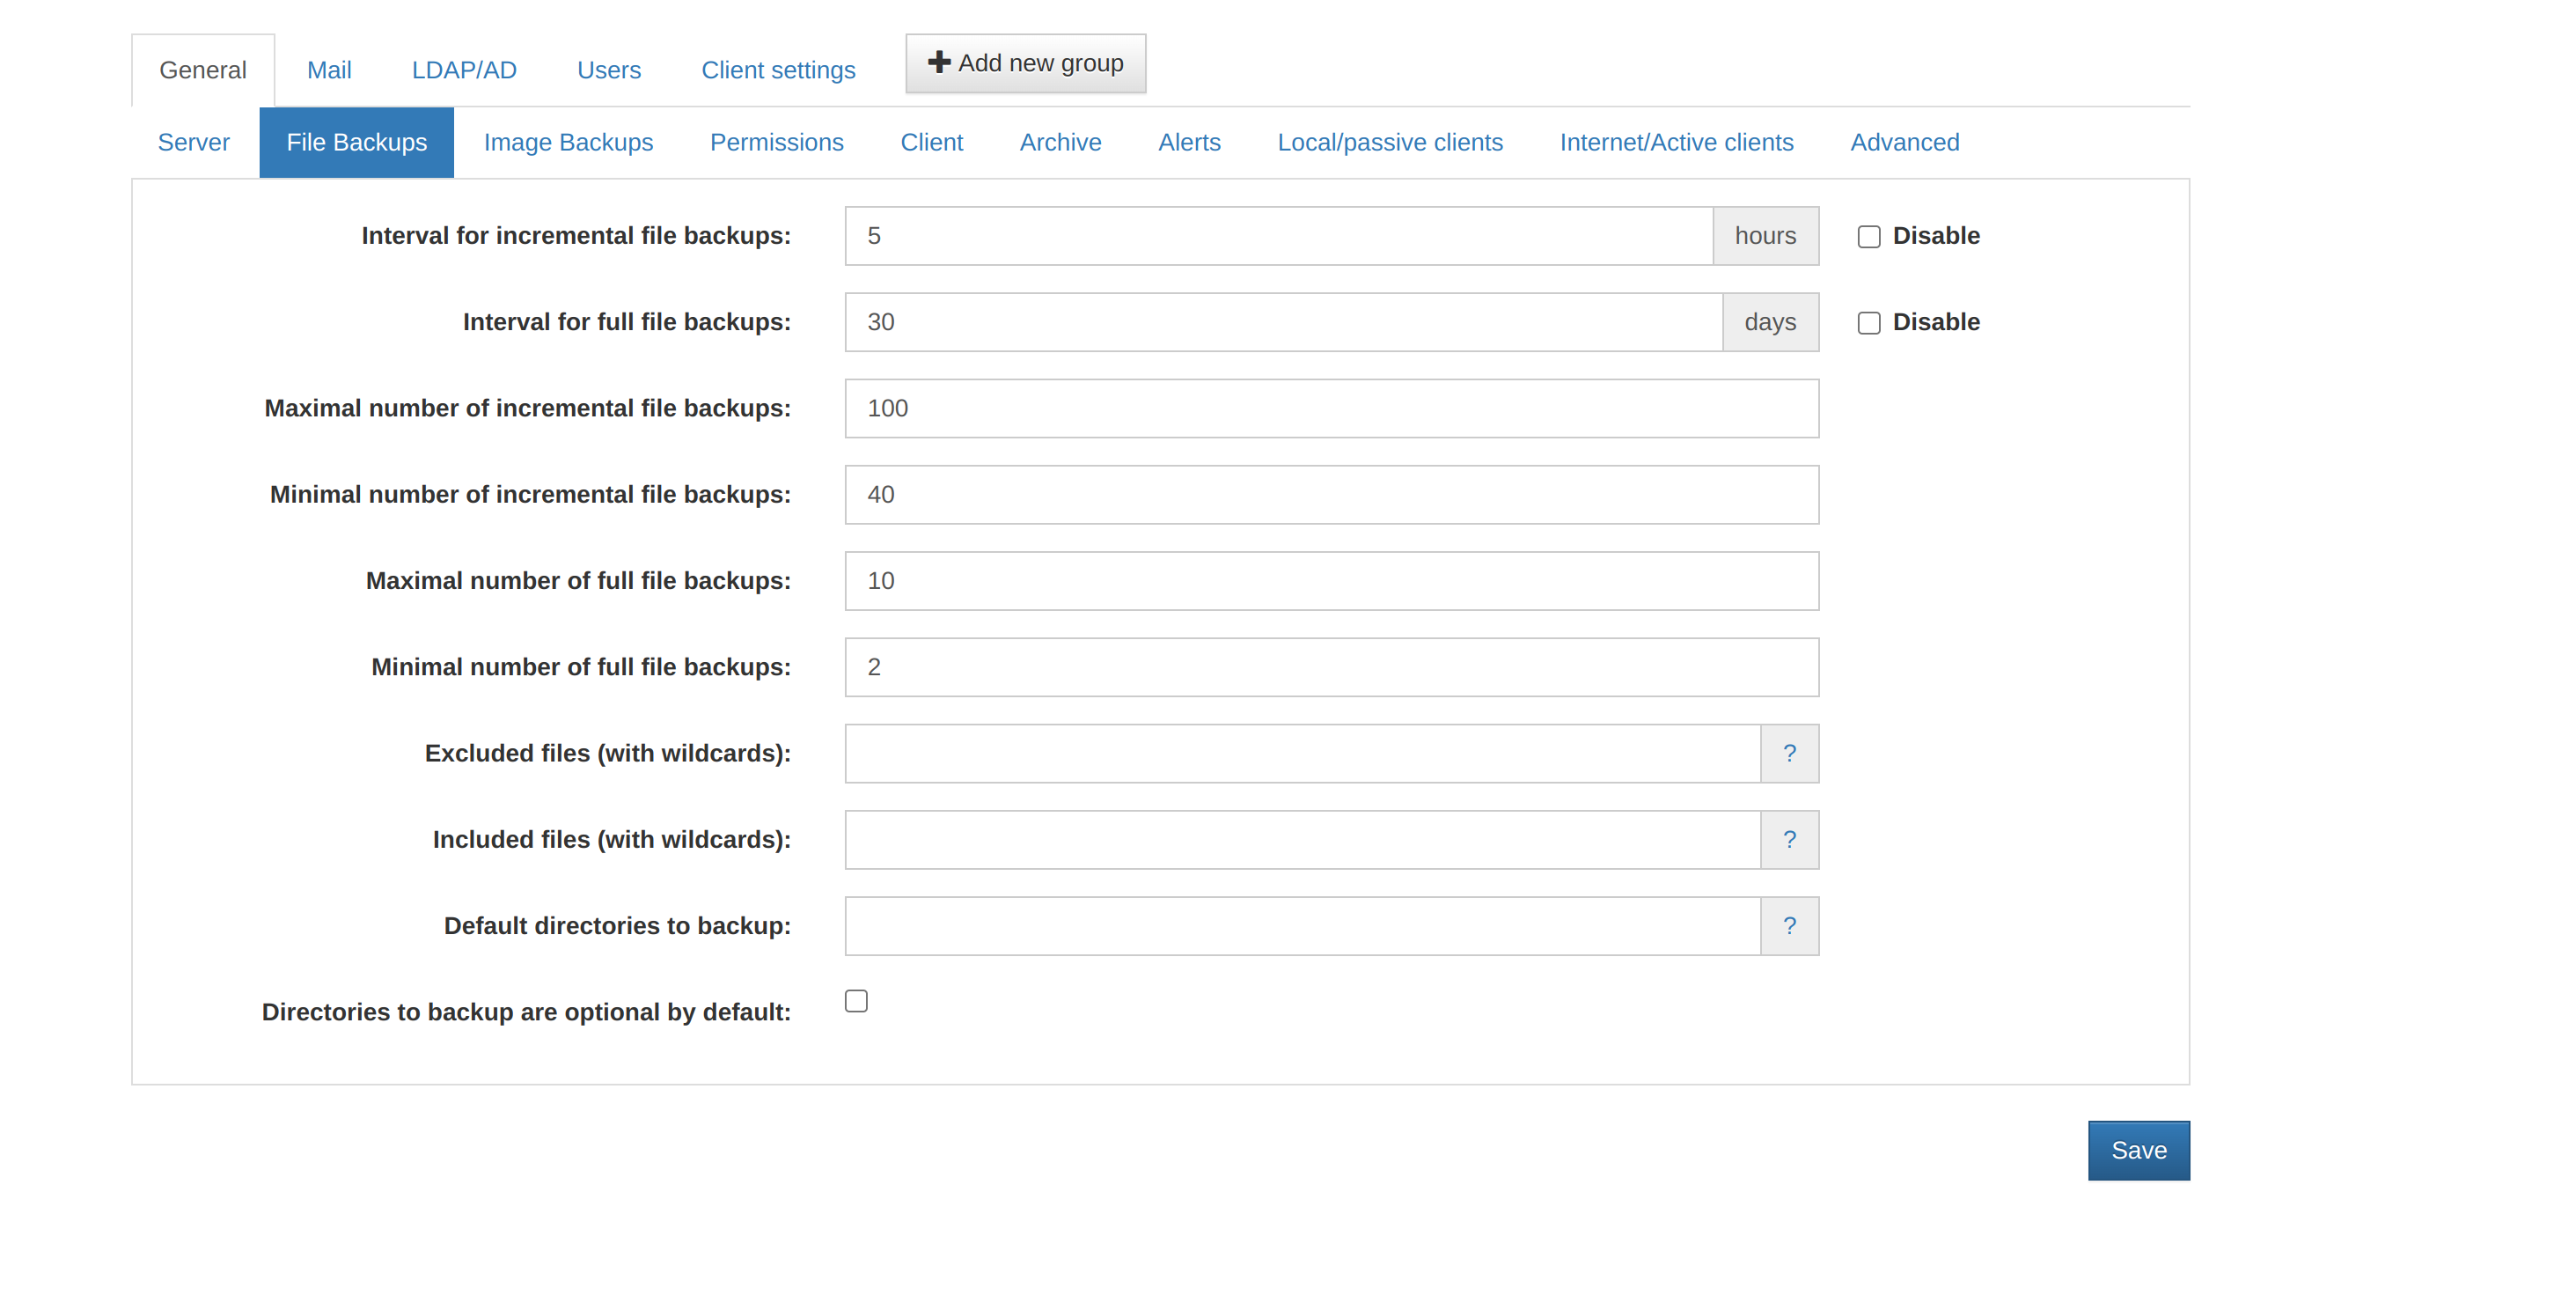
- we need to change the default values like interval for incremental file backups and things as shown in the snap above, we can also change the options as per our requirements.
Incremental Backup : Instead of making a copy of every file on the server, backing up files incrementally stores just what has changed since the last backup was performed, only the files and db entries that have changed are backed up instead of backing up the whole data.
Incremental Backup Interval : By default Incremental Backup Interval is set in hours, the default value is 5 hours, if it is to be changed, the minutes need to be changed to hours.
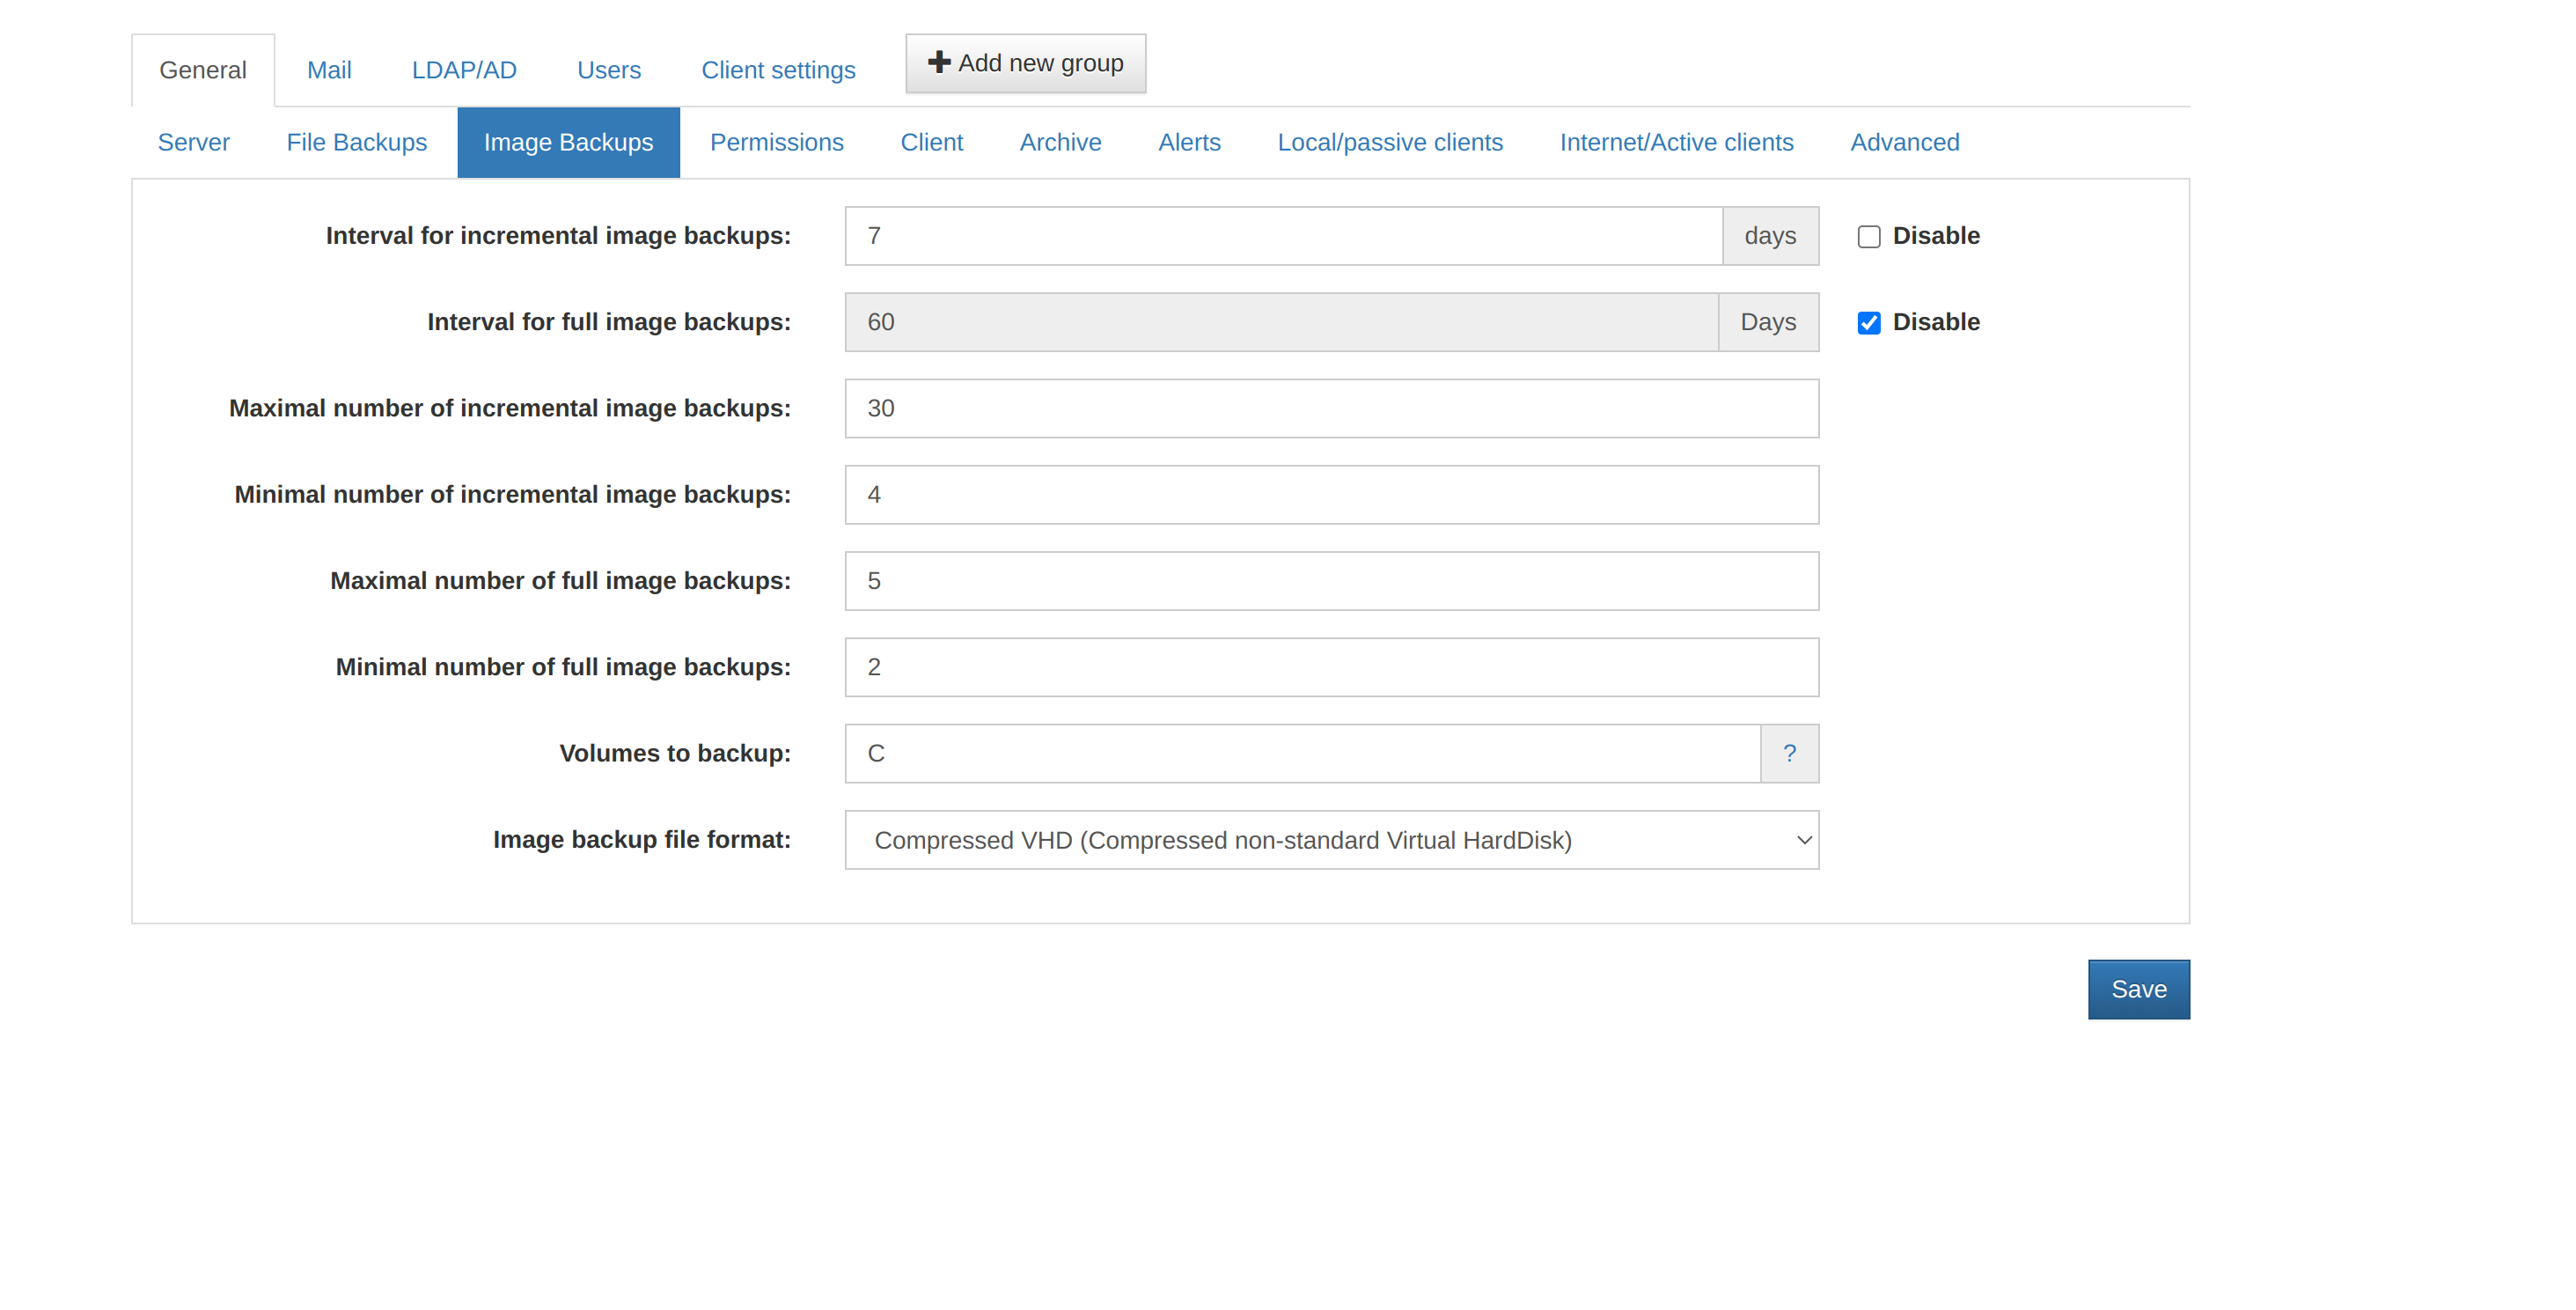
- Then we can also change the options for Image Backups as shown in the below snap. This is optional and depends upon the needs of the client.
-
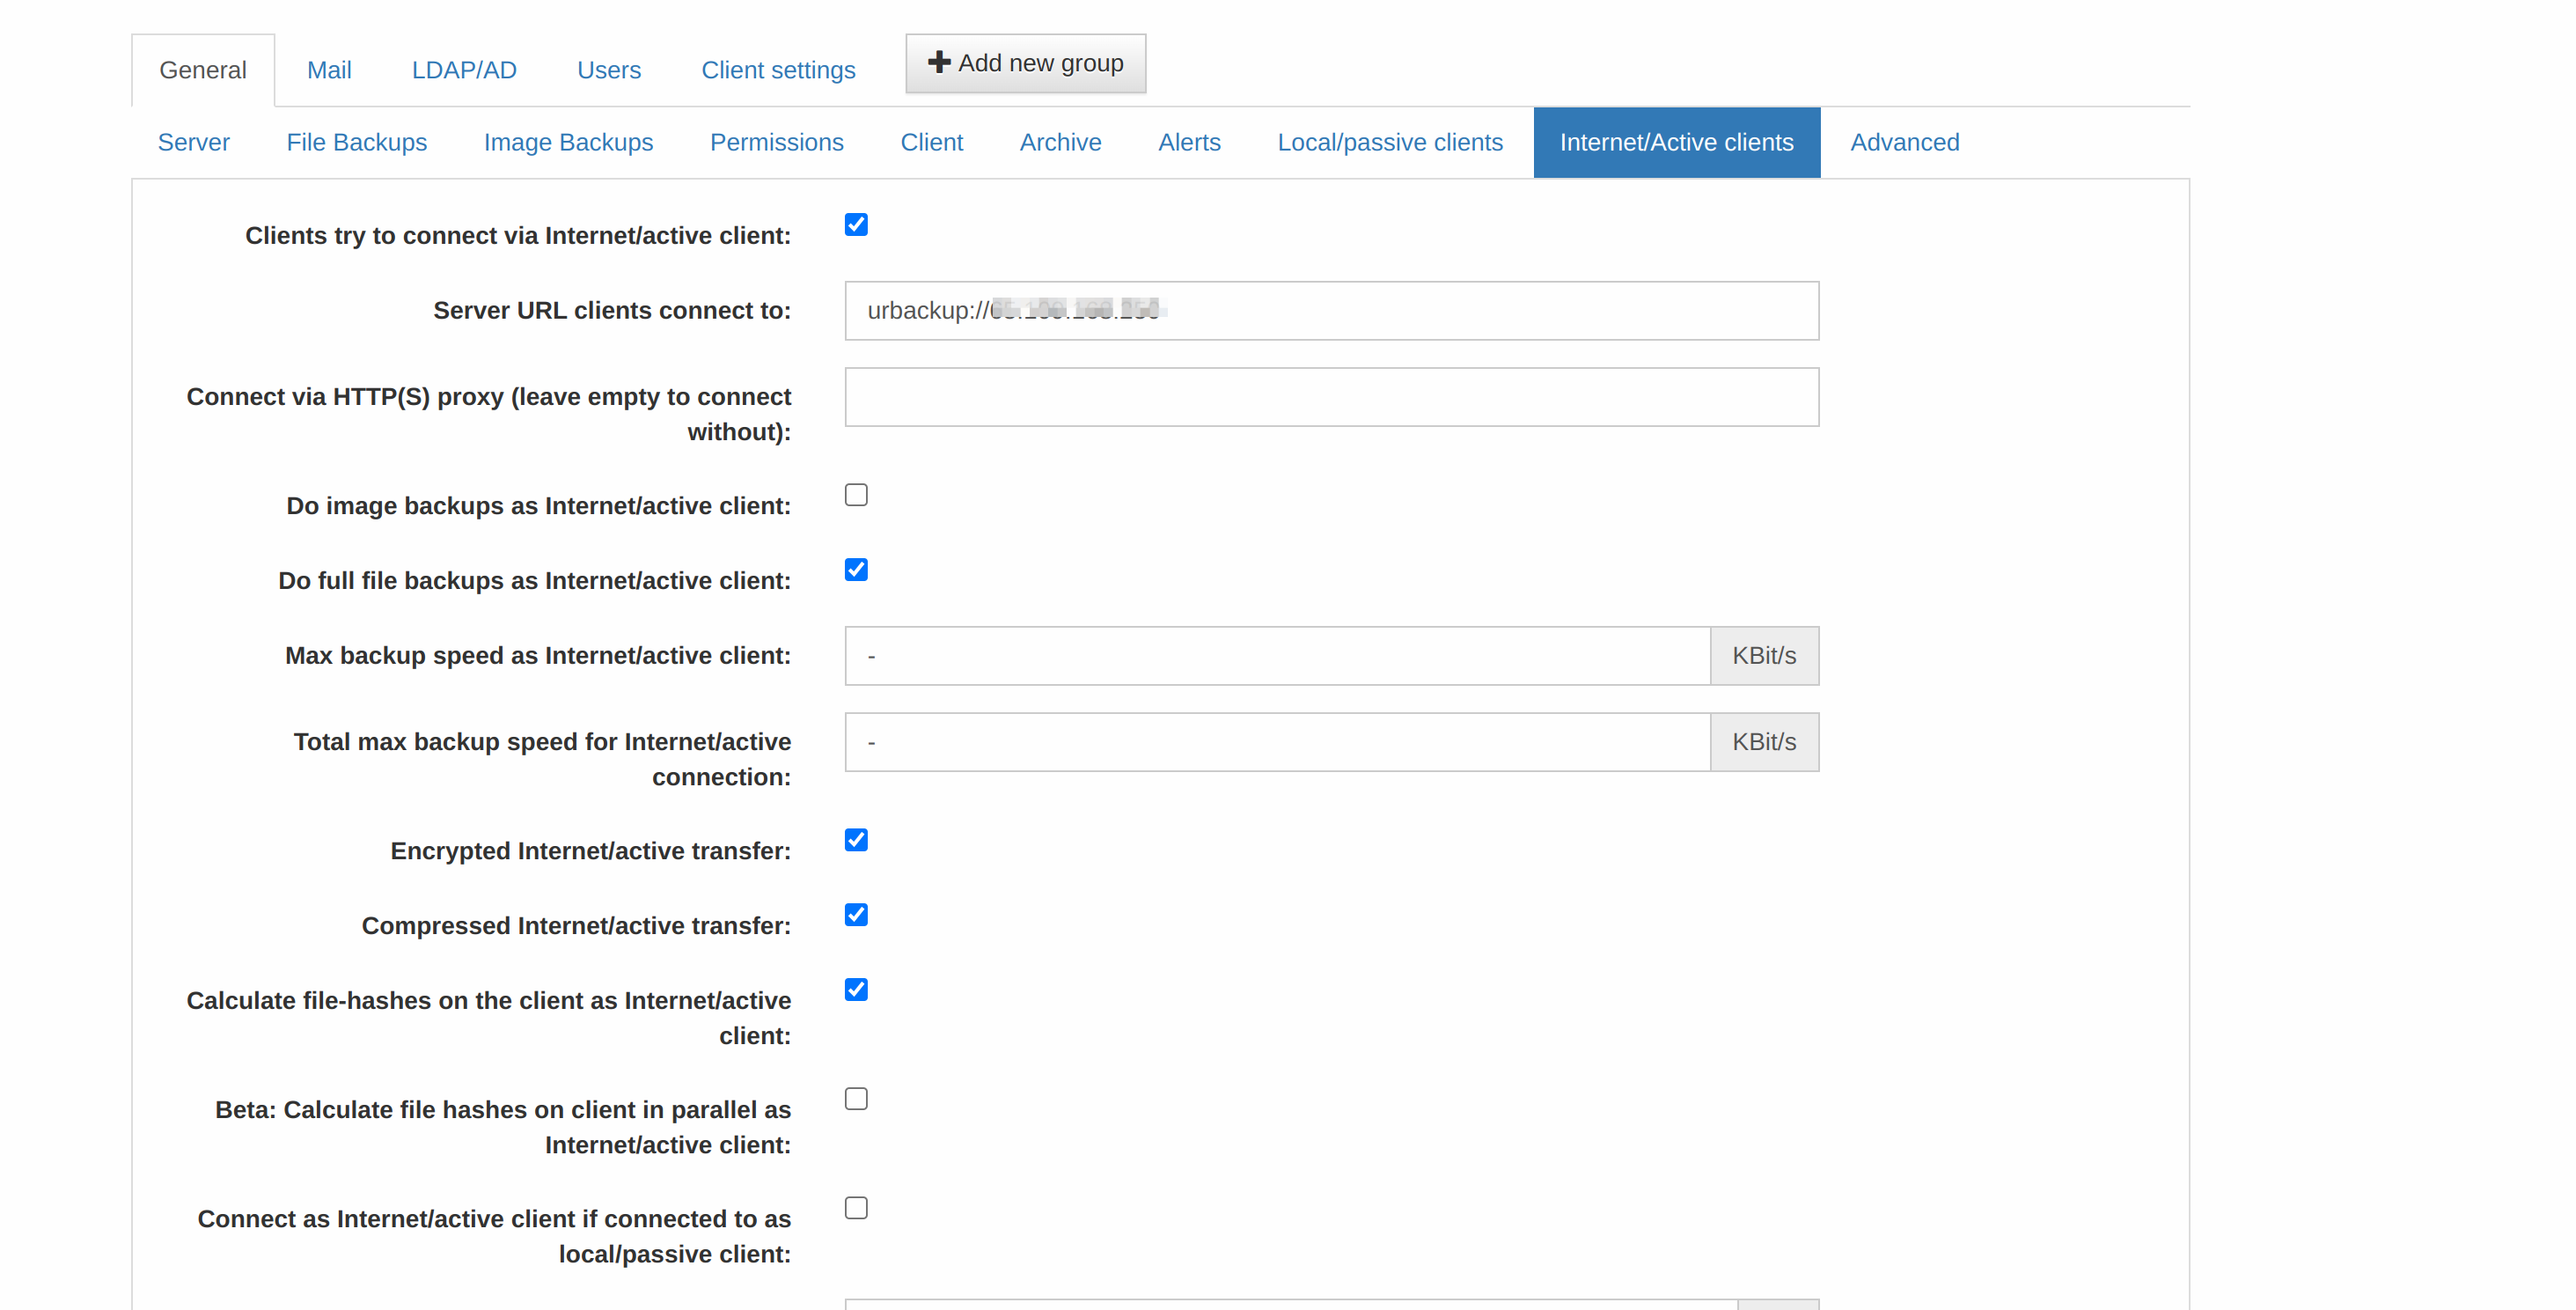
Once the above is done we need to configre the Internet/Active Clients option, this will be the configuration we need to pass in the URbackupp client servers.
-
To do the same follow the below snap.
-
As shown in the above snap we need to enter the URbackup Server Domain or IP to it, this IP or domain we use for connecting URbackup client to the server.
-
Save the configuration changes everytime before moving to the next section.
-
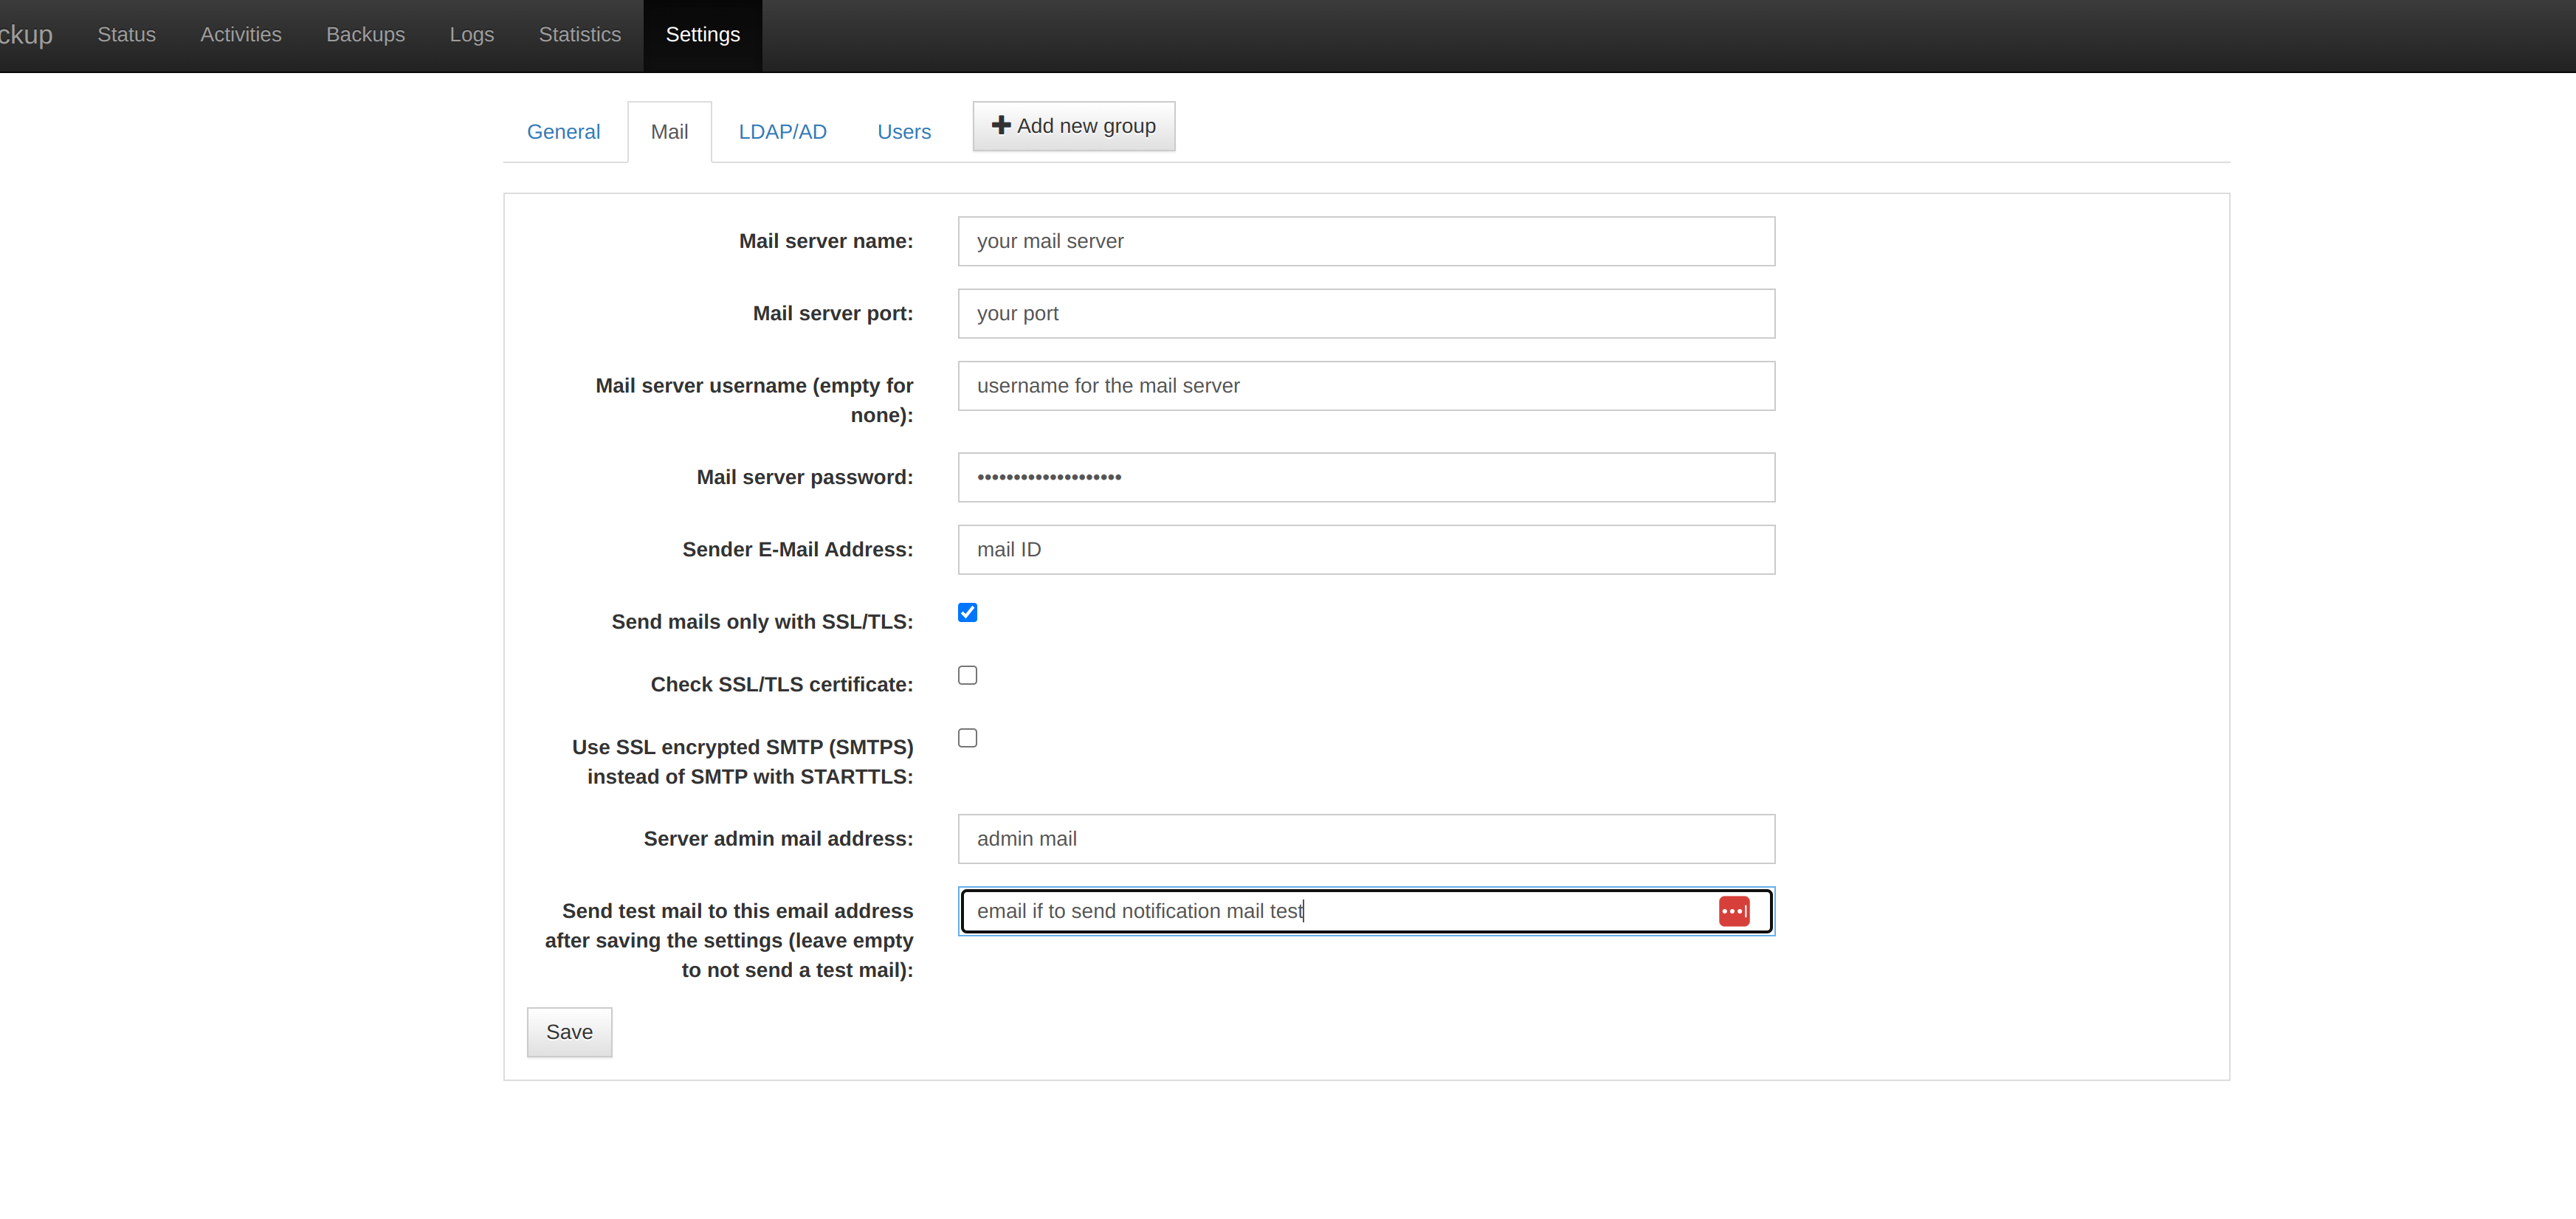
Once the above is done we can enable email notification for the backup to do so click on Mail next to general and configure as show in the below snap.
-
Once this is done the server is ready, now we can start adding clients to the server to do so, follow the below in structions.
-
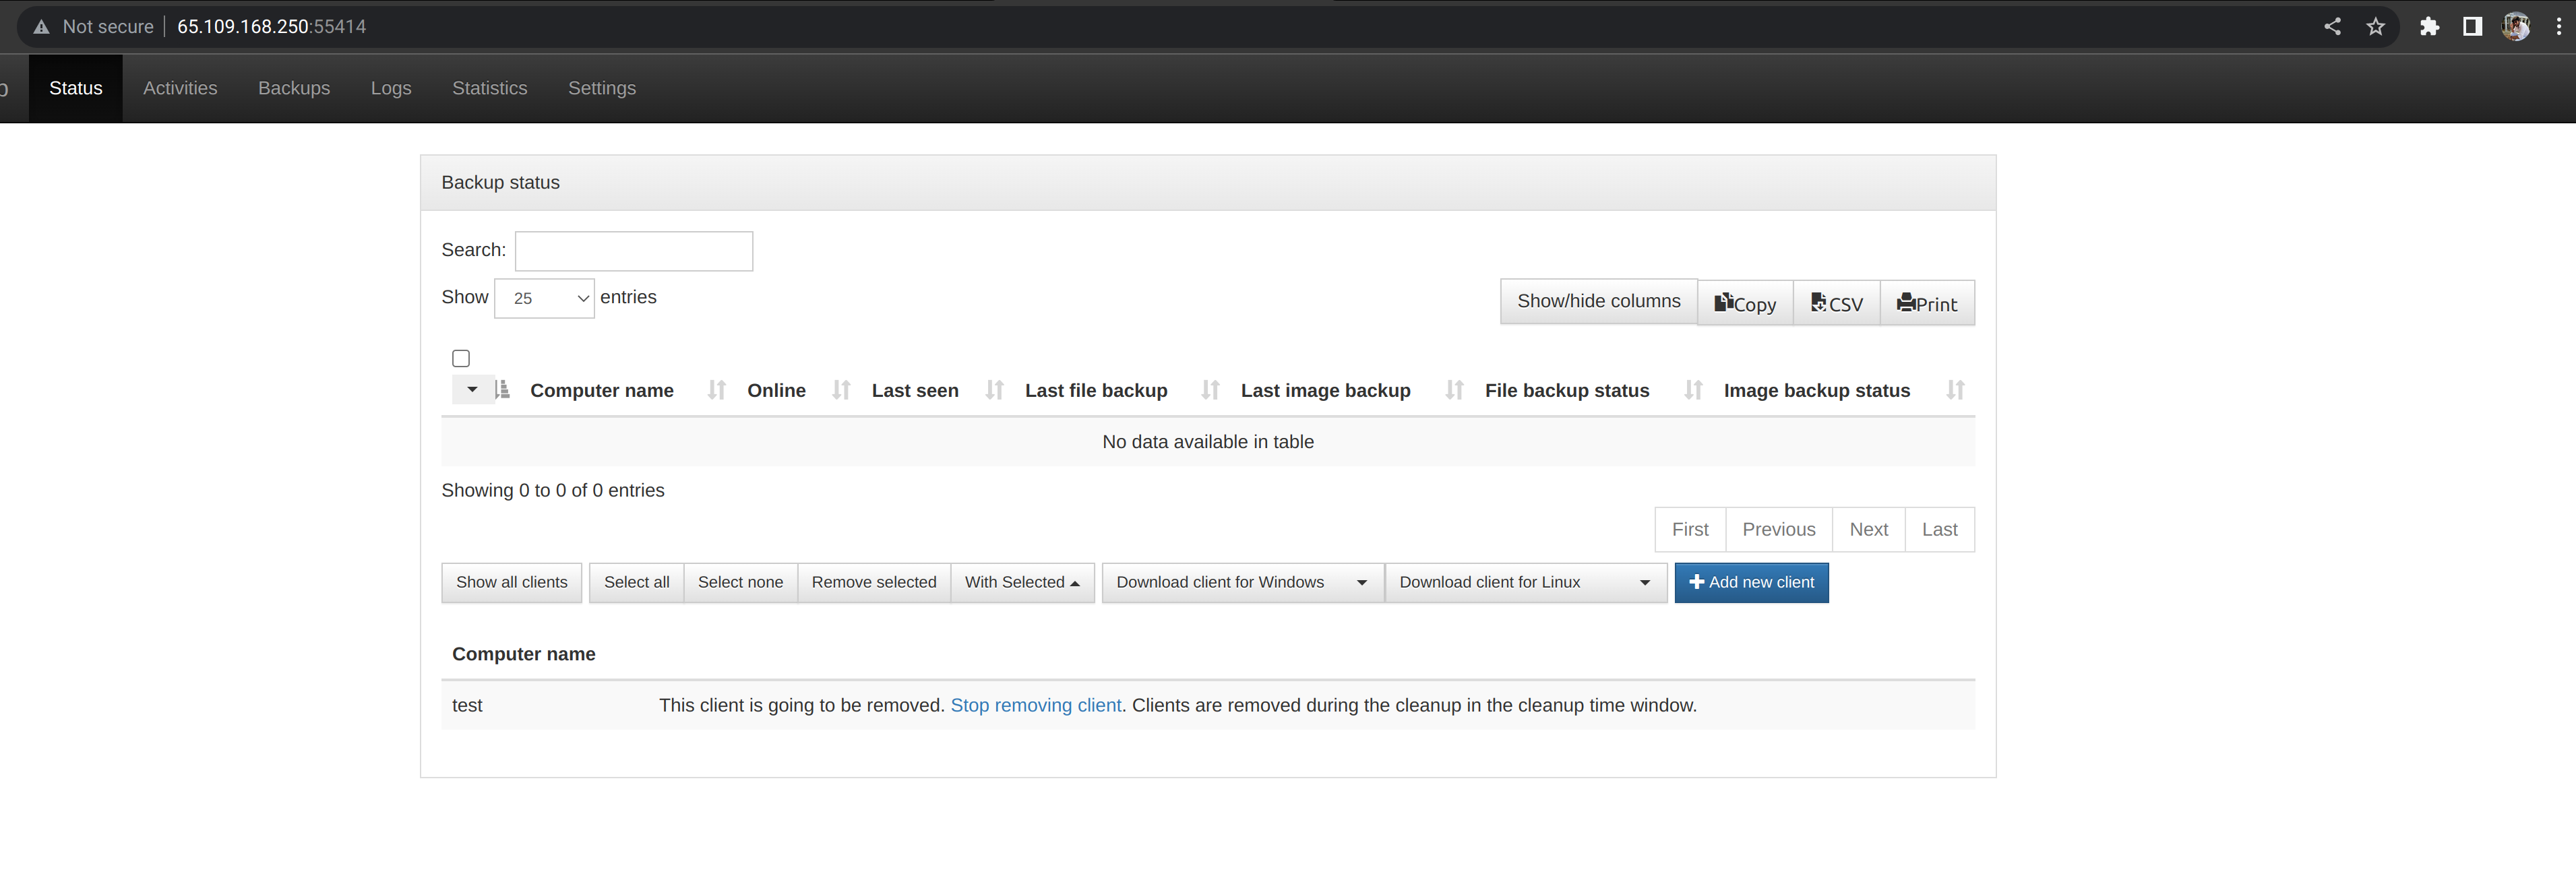
Go to the urbackup home page, you can find a Add New Client button over there as show in the below snap.
- Click on the Add New Client, it will ask you the client details with the IP or hostname and the client name as show in the below snap.
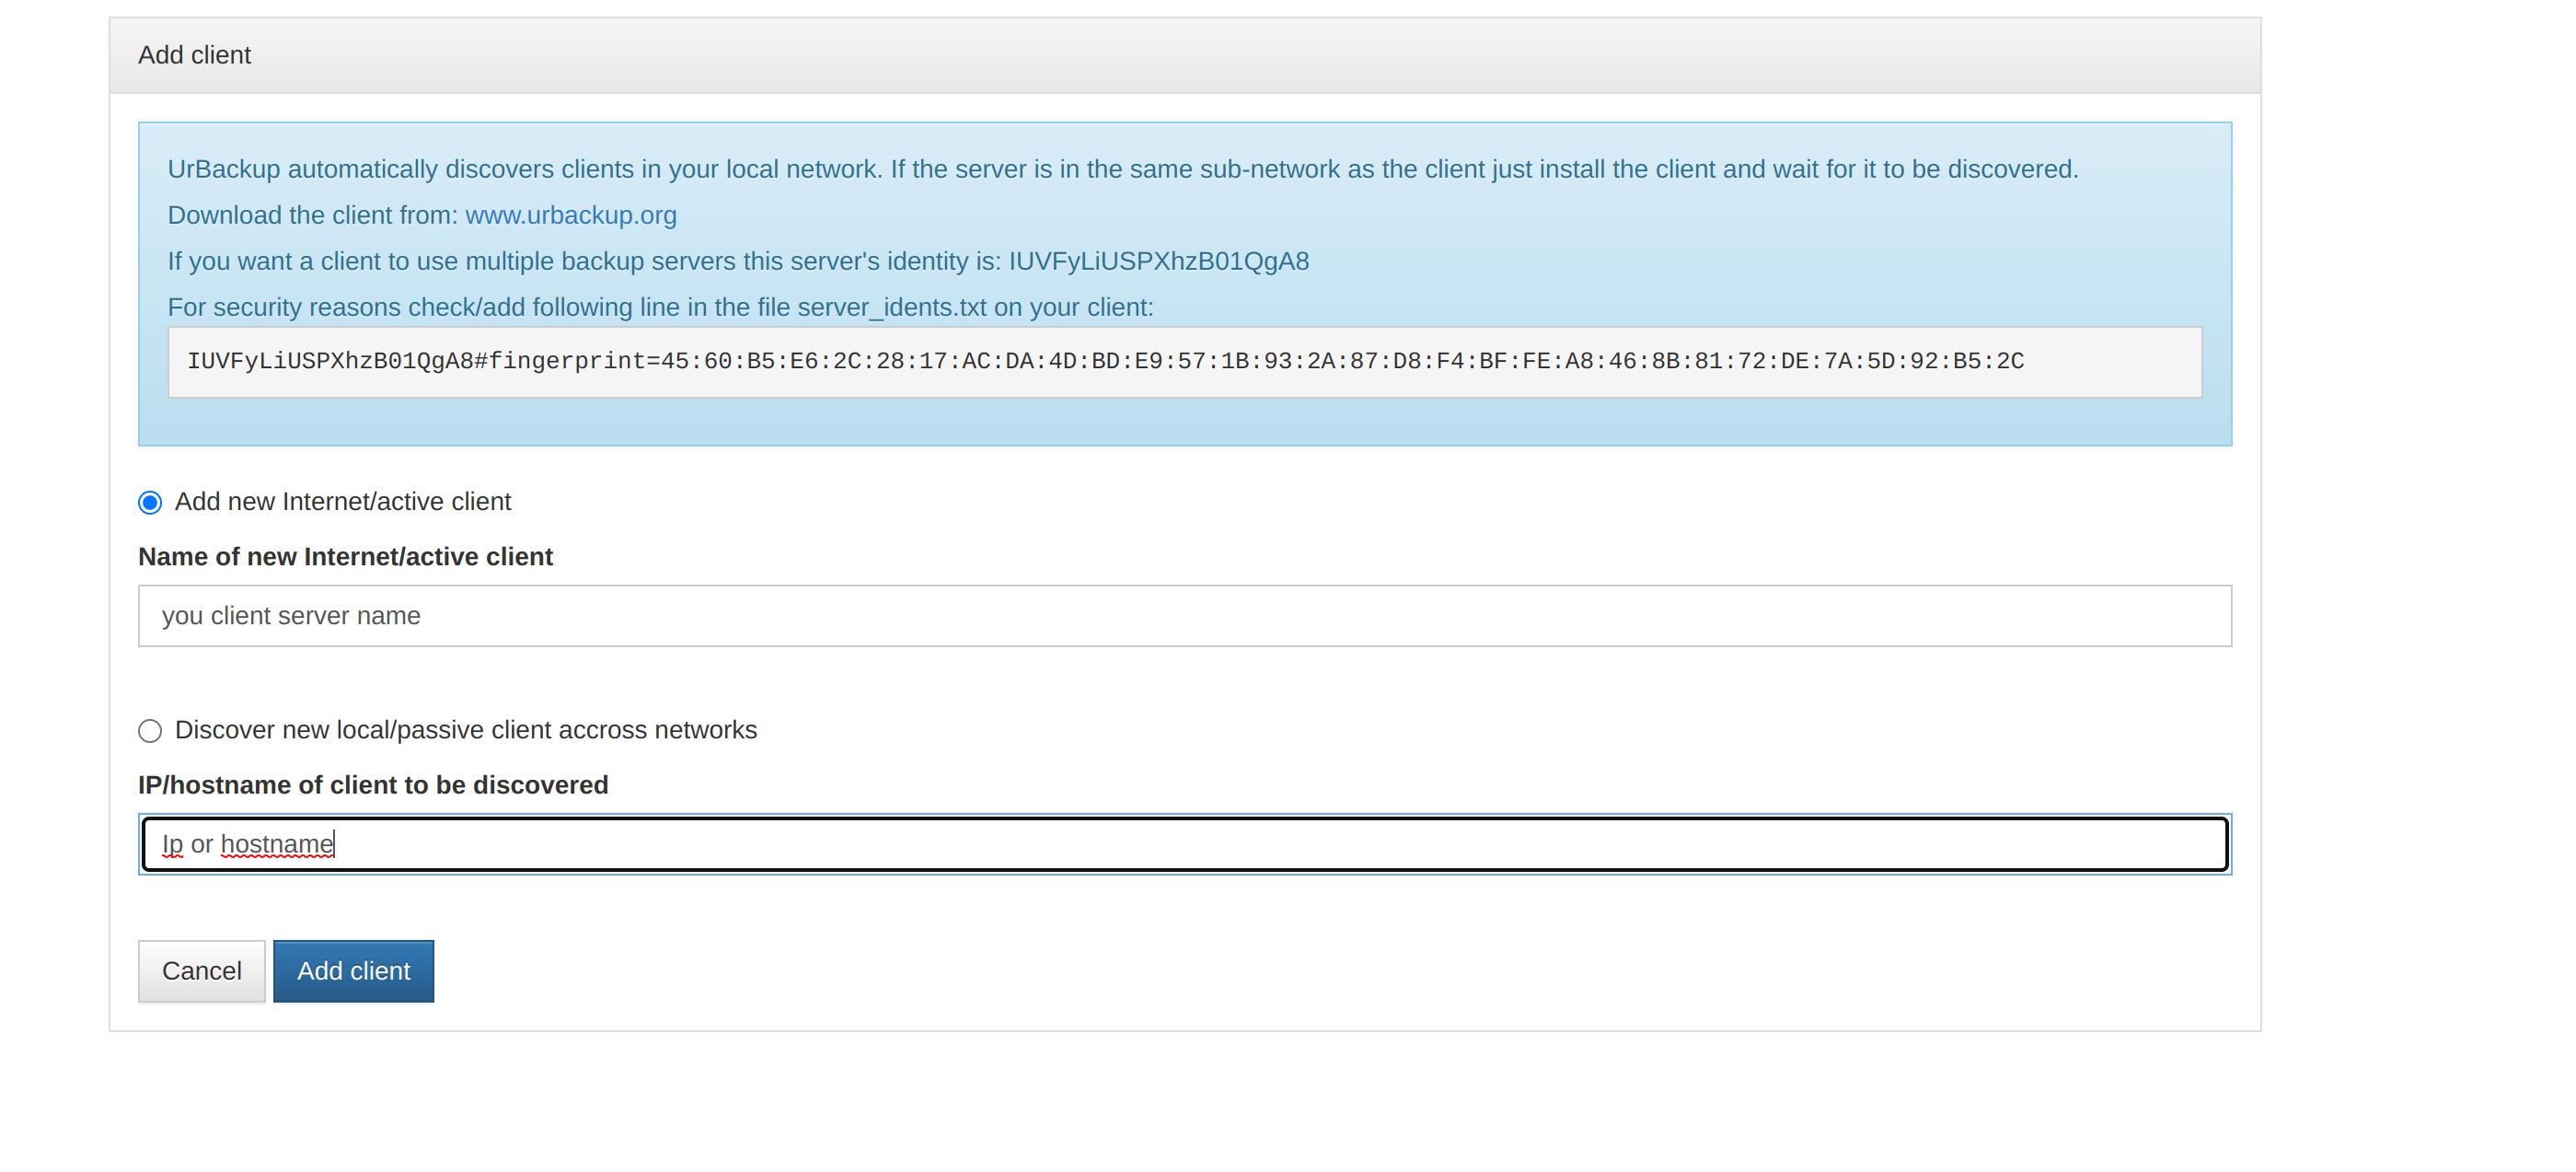
There are two options to add the client:
- Internet/Active Client - This is the remote client, only client name needs to be mentioined for this option.
- Client to be discovered - This is for local network, IP/hostname of client needs to be mentioined for this option.
- Once this is done it will take you to the client download page as show in the below snap.
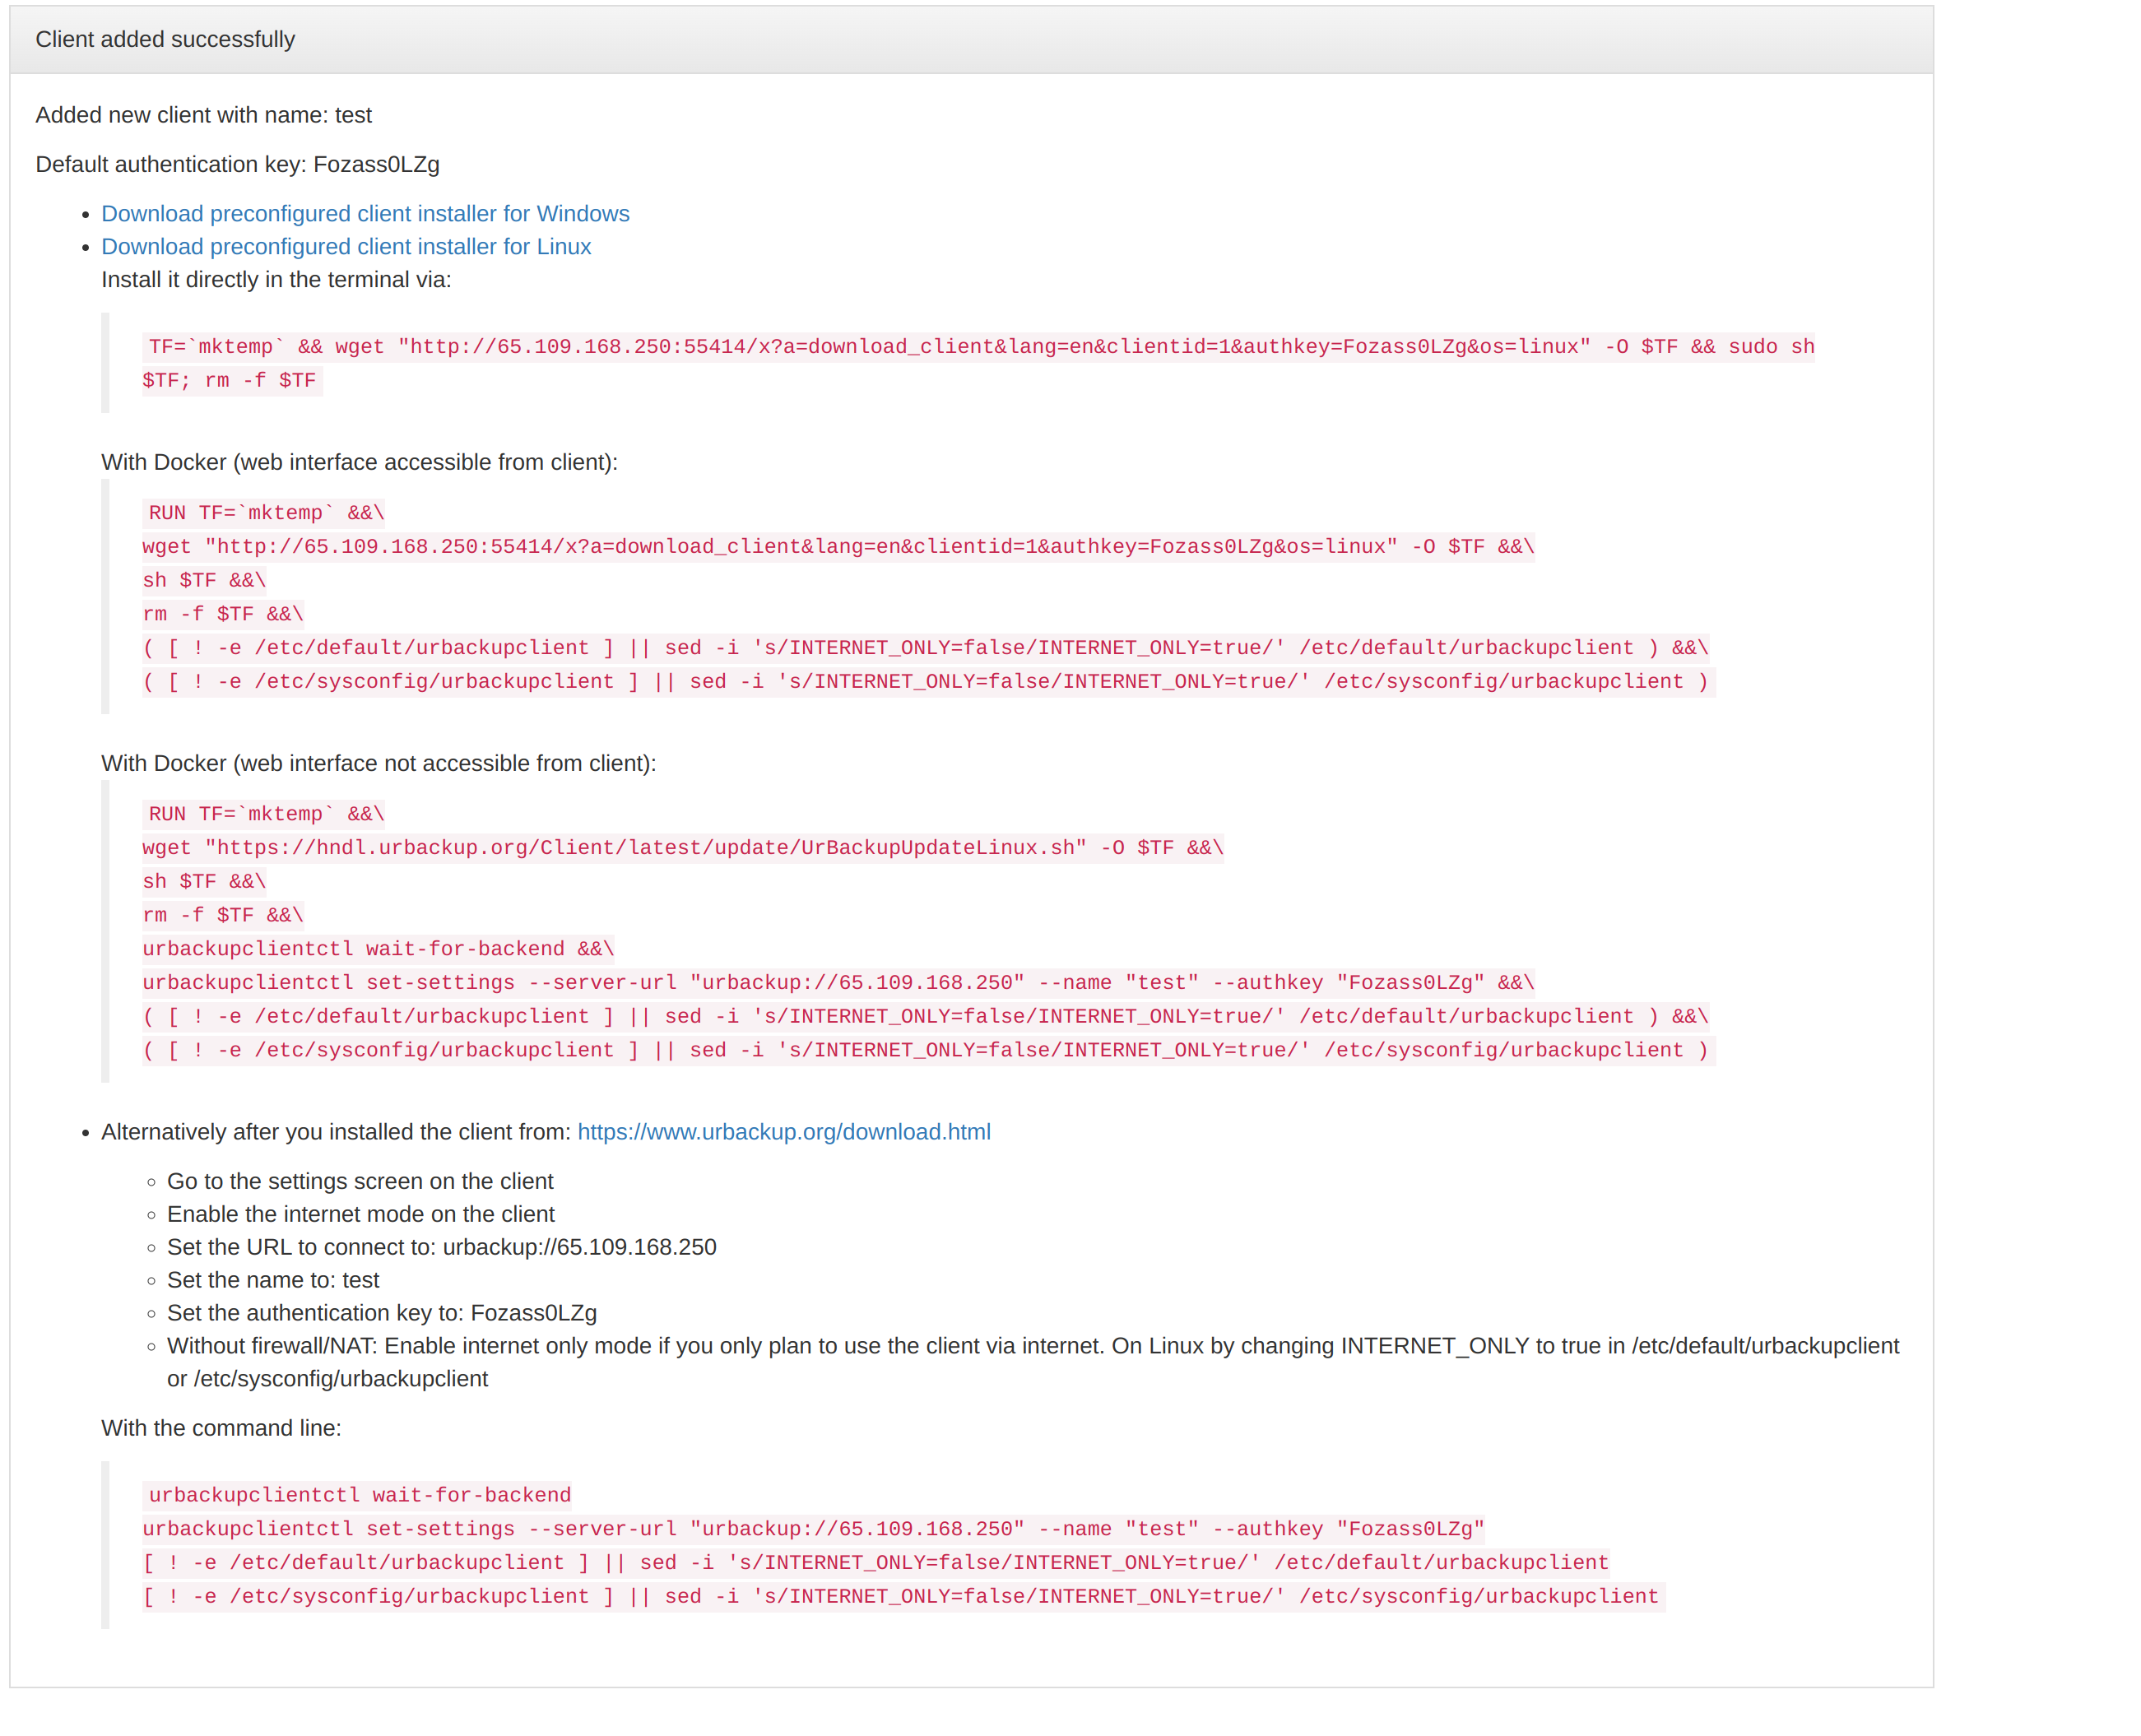
- In the above snap we have options to download clients on different OS like windows, linux, docker..
For Linux:
-
It is easy for linux we just need to run the command under (Install it directly in the terminal via), this will set up the urbackup client in the linux. Make sure the port 55414 and passive port range 49152-65534 are open.
-
Once the above is done we need to setup the directories which has to be backuped up in client server, the below command is used in terminal to check the current backup directory list:
/usr/local/bin/urbackupclientctl list
- To add a backup direcroty you need to run the below command in the terminal:
/usr/local/bin/urbackupclientctl add-backupdir -x -f -d /home/backupdir/
-
The above command will add the /home/backupdir as the directory whcih has to be backedup.
-
To remove a existing direcroty you need to get the direcroty which is added and to be removed from the list command and then need to run the below command replacing your path.
/usr/local/bin/urbackupclientctl remove-backupdir -d /path/to/backup/dir
- Once the above is added we need to restart the urbackup client to do so run the below command:
systemctl restart urbackupclientbackend
- Check urbackup client status
systemctl status urbackupclientbackend
- Install LSB Modules for client
For apt based servers like Ubuntu, Debian:
apt-get install lsb
For yum based servers like Alma, Rocky, RedHat, CentOS:
yum install lsb-core
- You can find the client in the urbackup dashboard as online and last seen as shown in the below snap for example.
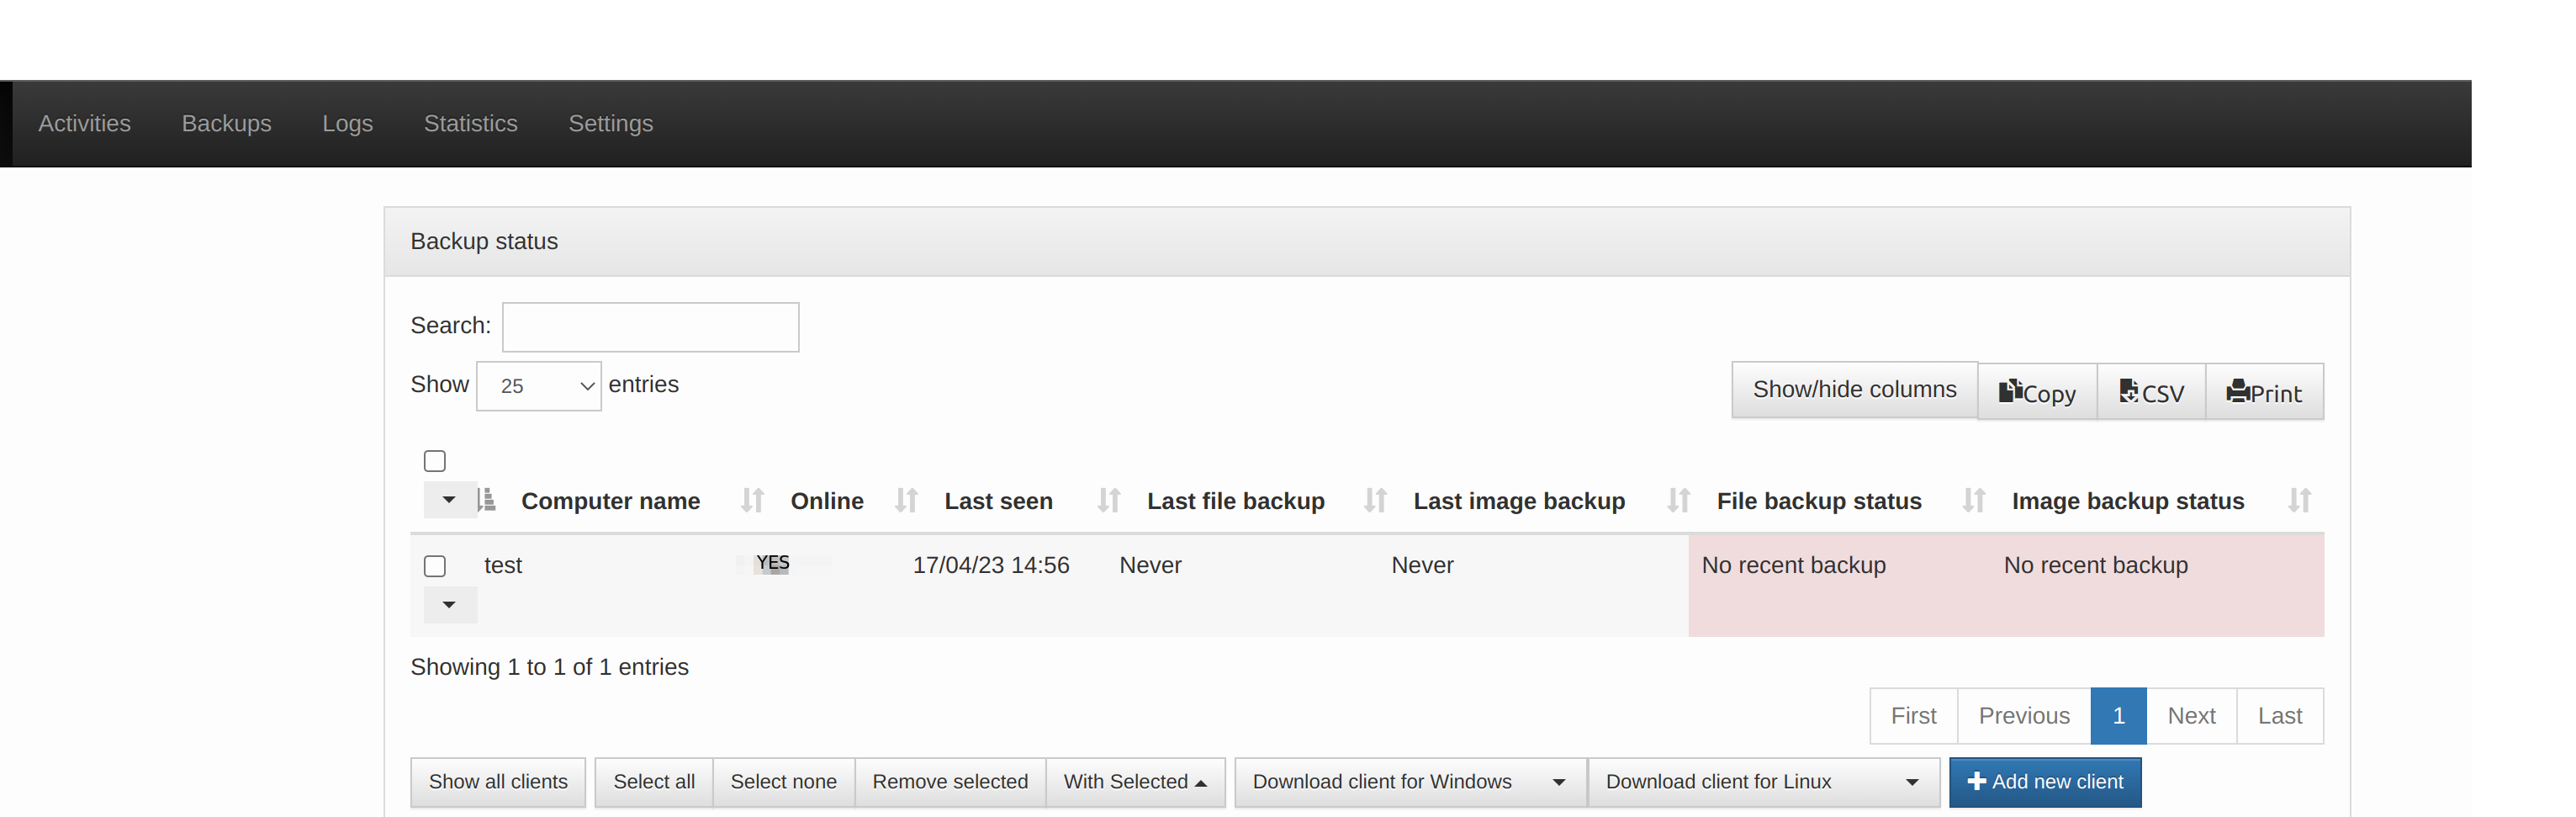
- You can start the backup by clicking the drop down and then you can select whcih type of backup and start it once started it will do the backup as per the intervals setted in the server configuration above.
For Windows:
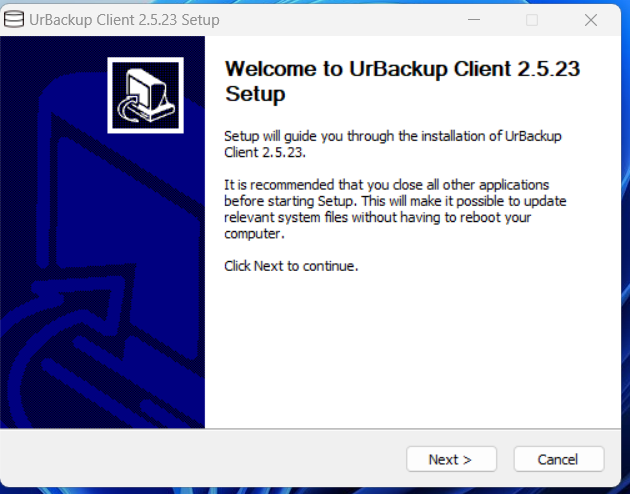
- To setup urbackup client in the windows we need to download the preconfigured windows client from the download page which will be shown while we are adding a client as shown below.
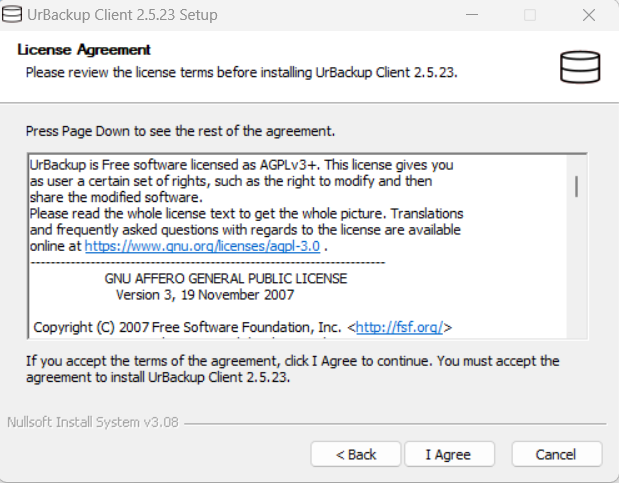
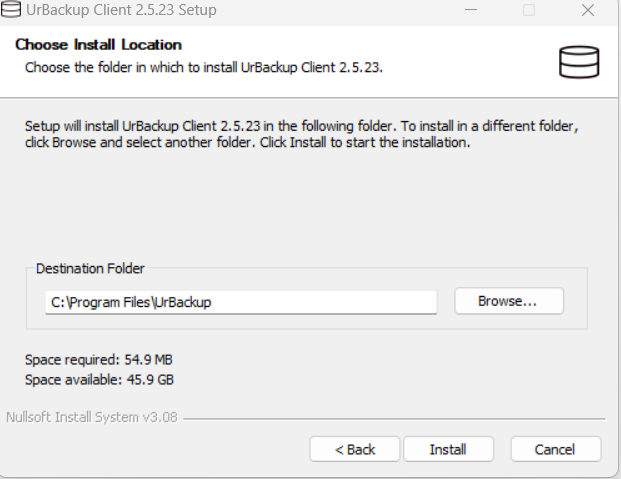
- Once downloaded we need to install the client in the windows machine follow the below snaps.
-
Once you click on the install the installer will install the urbackup client on the windows machine.
-
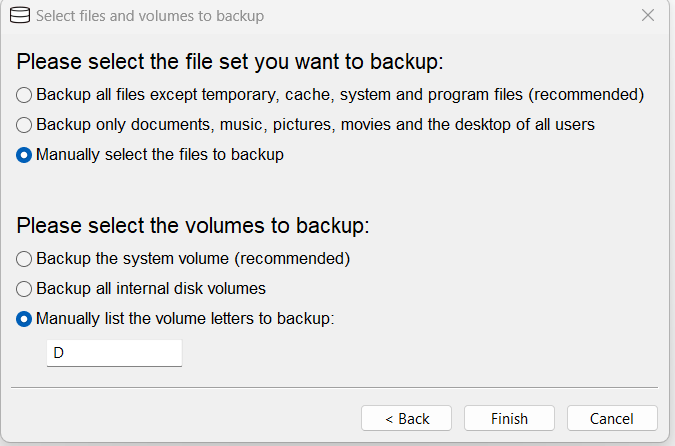
Once it is installed you will open a configuration page like below.
-
In the above tab you can select the mode of backups we can keet the defaults as shown in the above snap and click on finish.
-
once that is done the URBackup client is installed with the selected options.
-
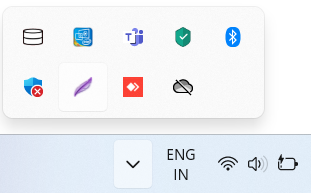
After that you can find the urbackup icon on the tray as shown in below snap.
- Right click on the icon will give you the options as shown in below snap.
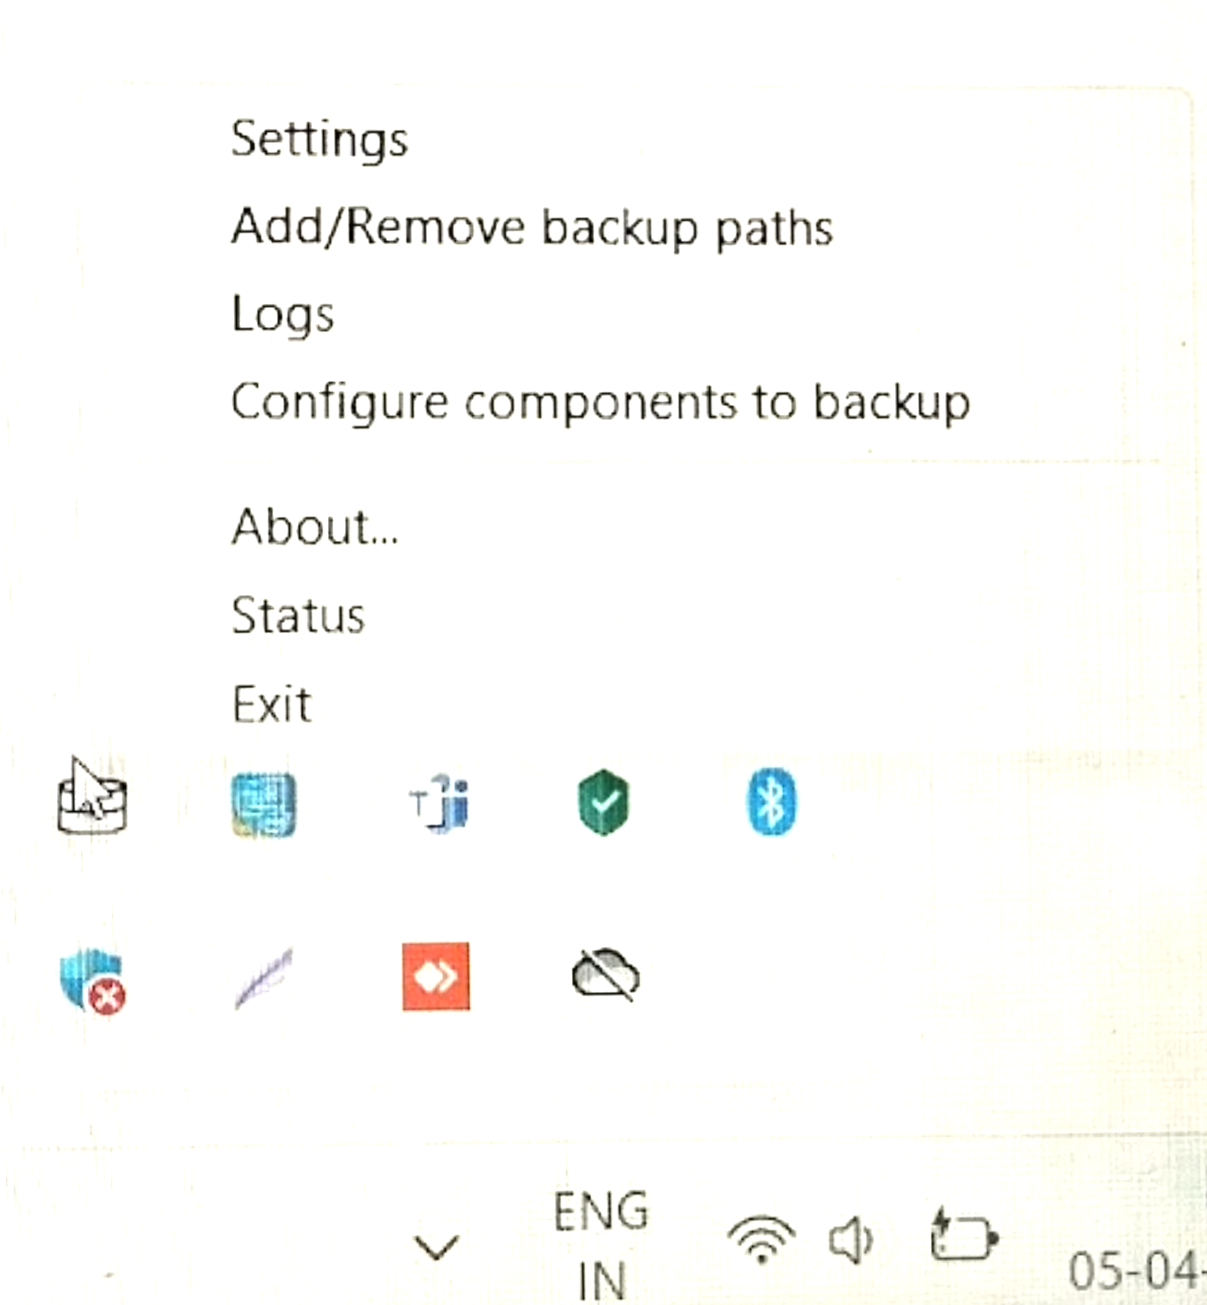
- Click on setting to configure the urbackup client it will open a windows as below.
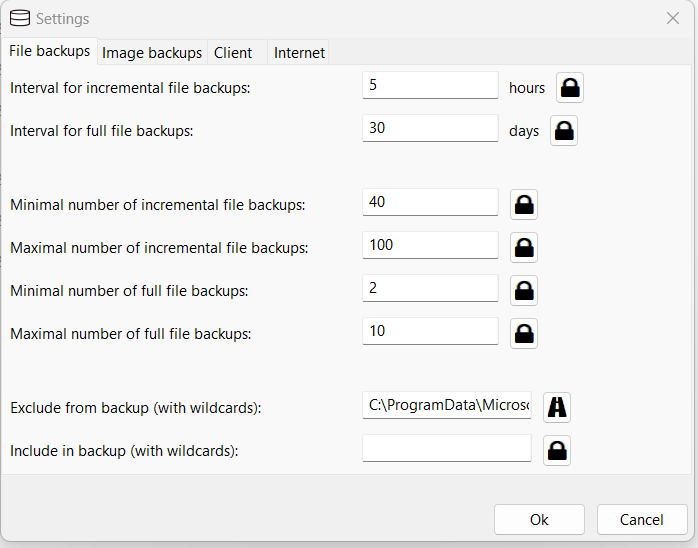
-
It will open a tab similar to above image and here you can set the interval of file backups and the folders to exclude and other options you can configre as per your requrement.
-
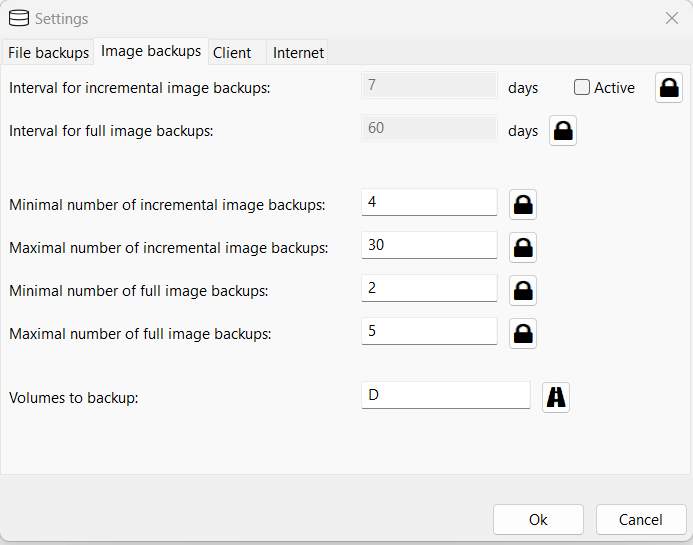
Then click on the Image backups you will get a tab similar to the below snap and you can configure according to your requirements the default is below.
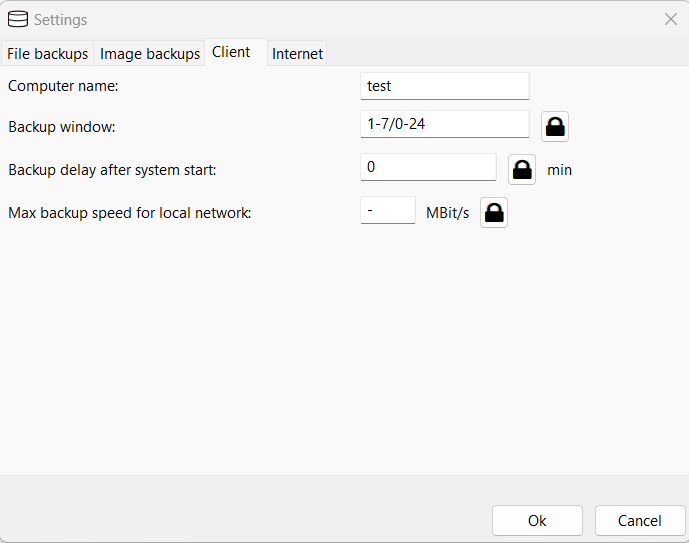
- Once the above is done click on client next to the image backups. As this is a preconfigured windows client, the client section will be configured already so we don’t need to chnage anything over there.
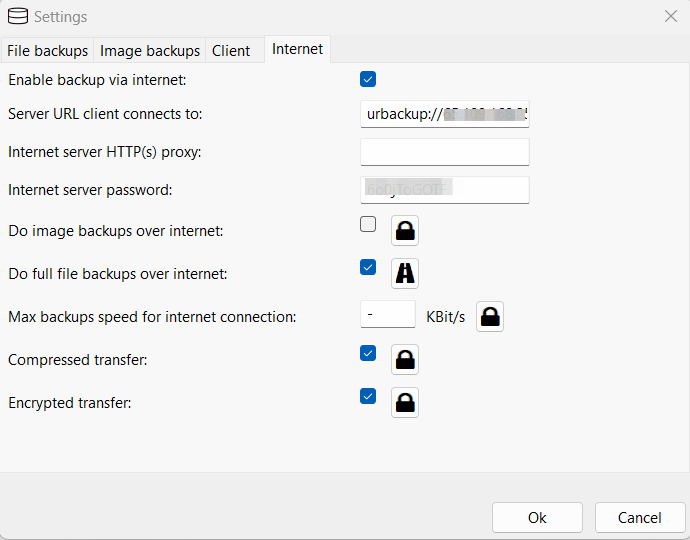
- Once you verify the above, click on the next option Internet, this will also be preconfigured just verify with the server details that we set in the server that tab will be similar to the below.
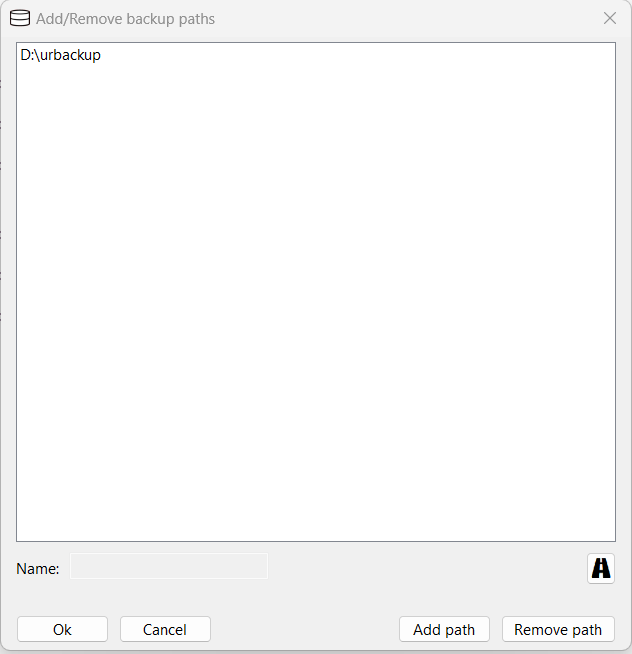
- With the above step the URbackup client configuration on the setting is done. then click on the add/remove backup paths in the tray icon it will open a page similar to the below snap, this we used to set the directory for the backup this is similar to adding directory in the linux. we can also remove the path in the same window.
-
Once the above is done the client configuration will be compeletd, restart the urbackup service from the services in your windows machine.
-
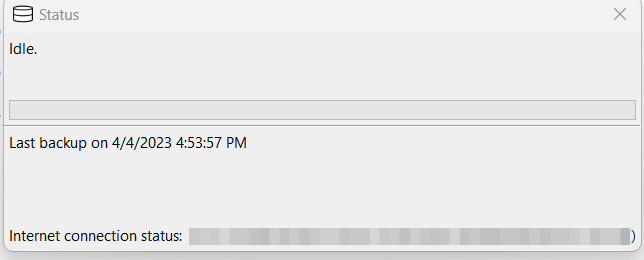
Once this is done you can check the status of the backup client and backup in the status option on the tray icon. it will be similar to below snap but this snap is a test so the connection is still waiting if it is connected it will show you as connected.
To take DB backups
-
On Linux with the binary client: Change 0 to 1, also provide mysql root password in /usr/local/etc/urbackup/mariadbdump.conf. Afterwards file backups will include the dump file of the database at urbackup_backup_scripts/mariadbdump.sql and restart the urbackup client.
-
Once the above is done the urbackup will start taking DB backups also.
-
Configure the client to backup the MySQL data directory. E.g. /var/lib/mysql on Linux and C:\ProgramData\MySQL\MySQL Server 5.5\data on Windows. Make sure you have configured a snapshotting method on Linux and restart the urbackup client
-
This way we will take the entire directory of the mysql.
To Restore:
- We can download the backups for the URbackup server page, to do so go to the backups page in the urbackup server dashboard as shown in the below snap from there we can download the backups.

Conclusion:
Note The URBackup is configured successfully to take File and DB backups.