Creating Custom Domains for Faveo Cloud
This document will guide you on how to create a custom domain for your Faveo Cloud instance.
Custom Domain Creation:
Prerequisites:
-
To create a custom domain, it is necessary to have a registered domain with a reputable vendor such as GoDaddy, Namecheap, Freenom, or other similar providers. If you currently do not possess a domain to create a custom domain, you have the option to register one through our platform at domain.faveohelpdesk.com or through your preferred domain vendor.
-
We understand that acquiring a domain is a crucial step in establishing your online presence. Thus, we offer the convenience of domain registration directly through our platform, ensuring a seamless experience for our global audience. Alternatively, if you have a preferred domain vendor that you trust, you can register a domain through them as well.
-
Please note that a registered domain is a prerequisite for creating a custom domain. Once you have obtained a domain, you can proceed with the necessary steps to create your desired custom domain.
-
Additionally, you will need to have access to the DNS management of the domain. You can obtain this information from the vendor from whom you purchased the domain. This access will enable you to configure the necessary DNS settings for your custom domain.
To create a custom domain, follow the steps below to create a CNAME record:
- Log in to the domain registrar portal that has access to the DNS management. Below is an example of how it looks. Here, we are showing an example with Freenom domain registrar.

- Once logged in, the dashboard may vary with different vendors. Please search for the list of services and find the domain list, as shown below.

- After selecting the services, you will see the domains and services purchased from the vendor. Here, you can see three domains. Select the domain on which you want to create the custom domain.
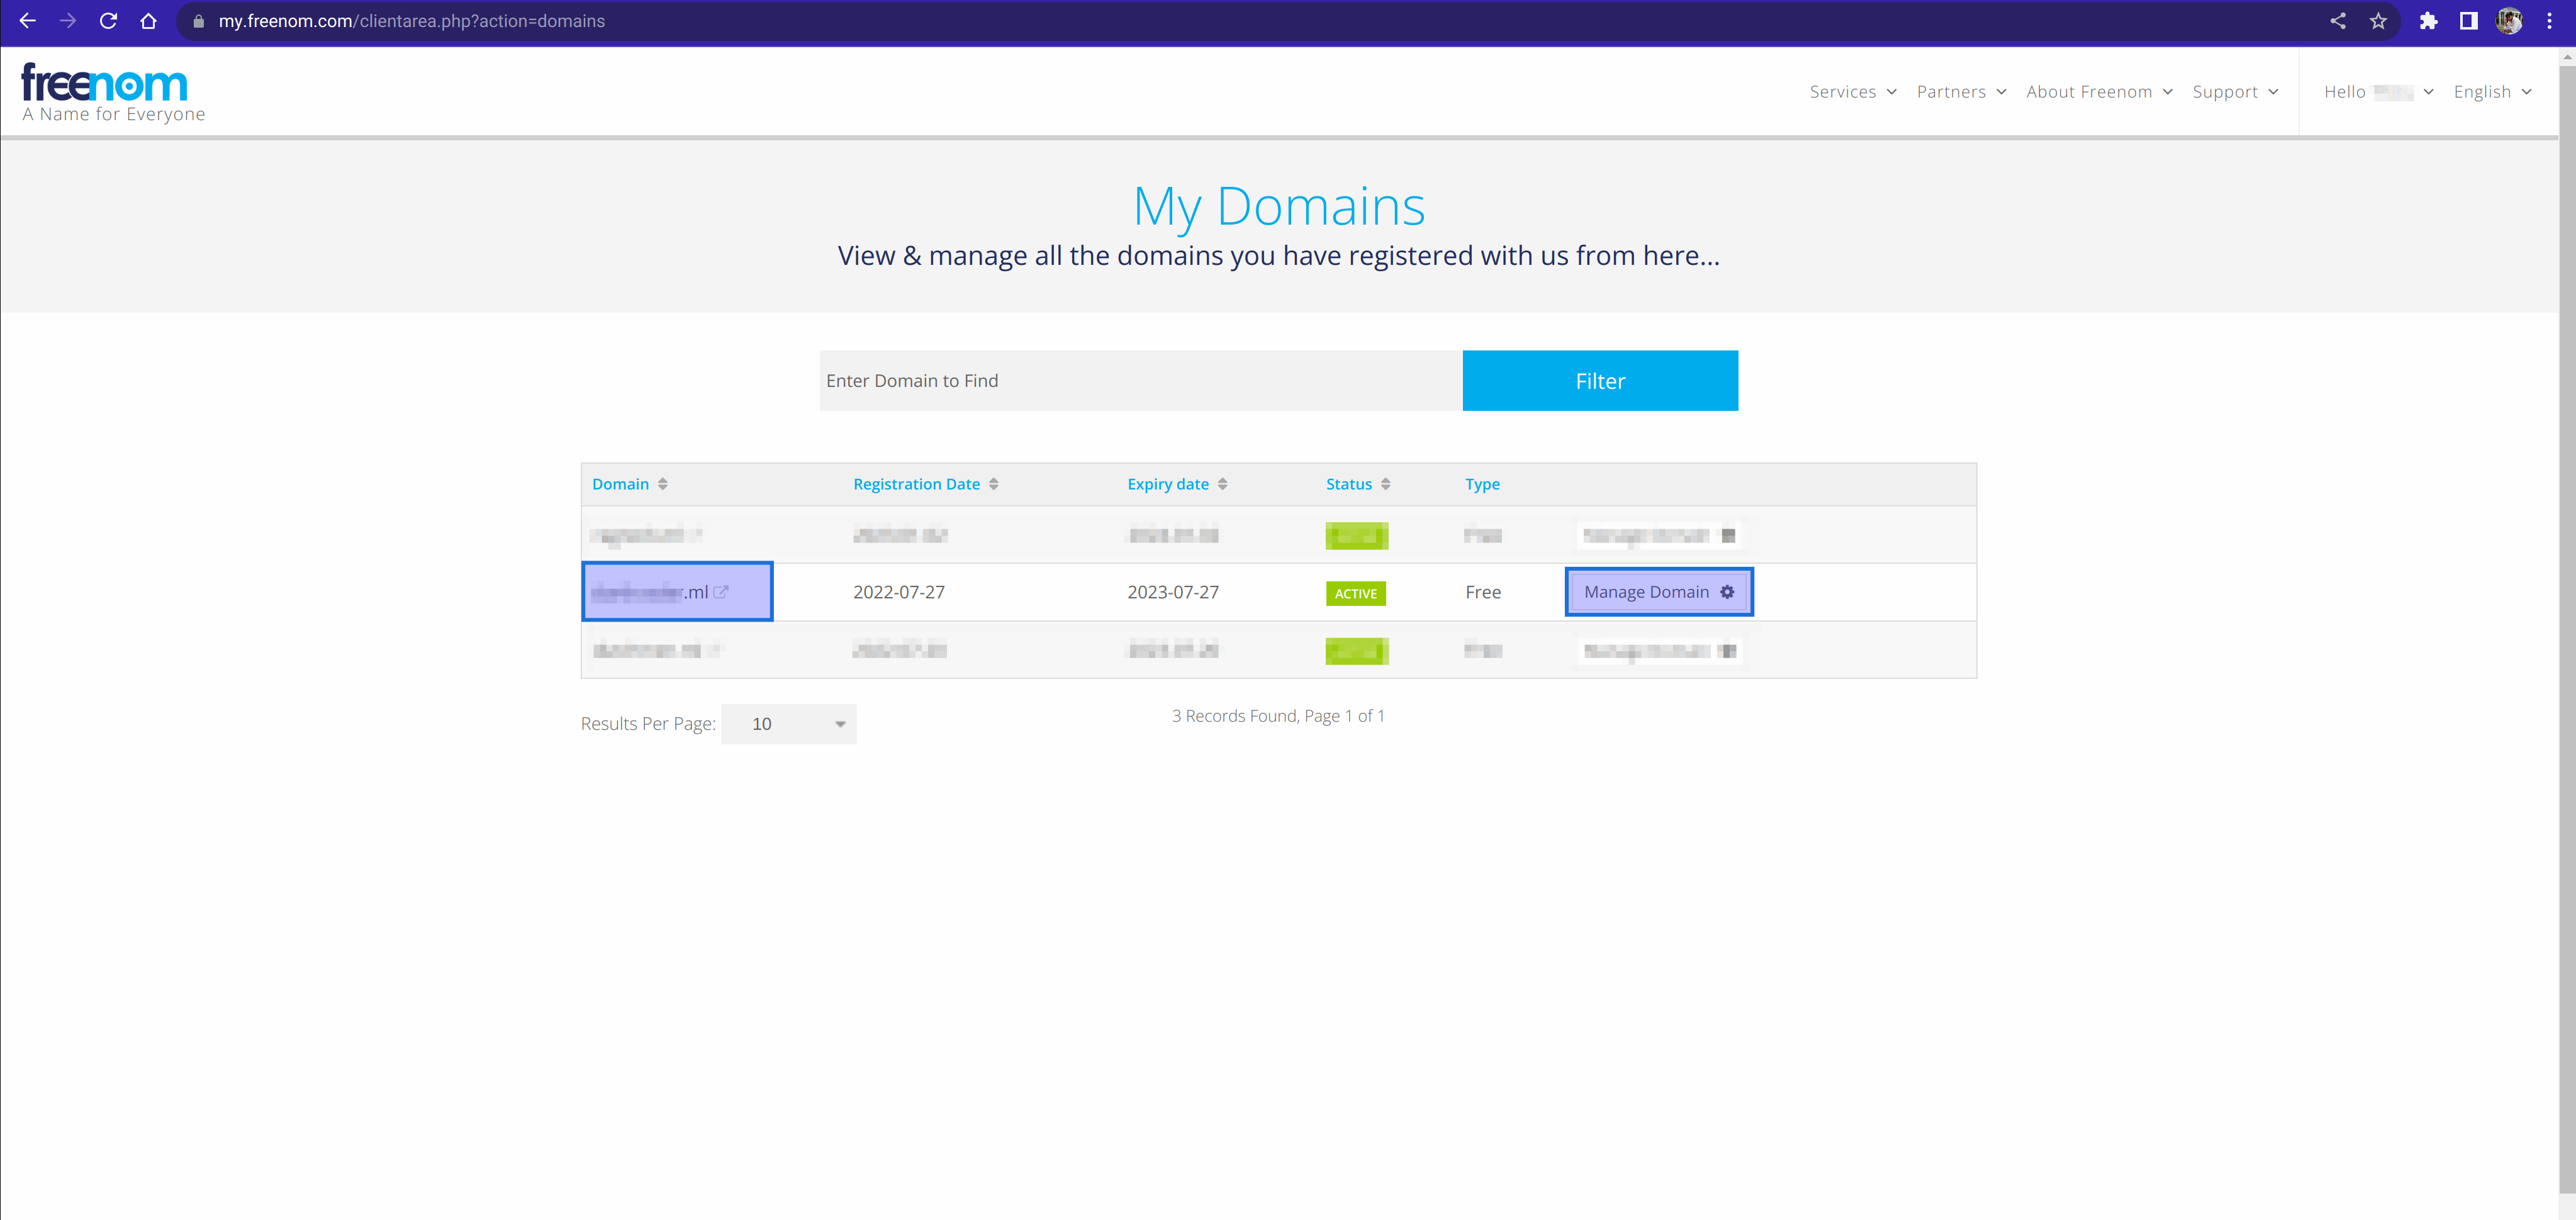
- Click on the manage domain and go to the domain page. You will find an option called “DNS Management.” Click on it.

- This will take you to a page where you can add DNS records, as shown below.

- This is the final step for creating a custom domain. Enter the custom name you want for your domain (e.g., “test.faveocloud.com”). “test” represents the custom domain. Then, select the type from the dropdown menu as “CNAME” record. For some vendors, there may be an option to create the record type with a click button. After selecting the record type, enter the value for the record. The value should be “faveocloud.com,” as shown in the snapshot below.
- Once the record is added, you will receive a success message on your dashboard, as shown below.

-
The propagation of the custom domain may take 2 to 4 hours, depending on your vendor’s DNS speed. You can check the status of propagation using any DNS checker in your browser, such as dnschecker.
-
Once the domain is propagated, you are good to go.
Custom domain created successfully.