Faveo Installation on Windows with Xampp Server
![]()
Faveo Installation on Windows with Xampp Server
1. Download and Install Xampp Server
- Download the latest version of XAMPP for your Windows operating system. Click here
2. Upload Faveo
- Download the Faveo Helpdesk from https://billing.faveohelpdesk.com and upload it to the below directory.
C:\xampp\htdocs\faveo
3. Setting up the Database
-
Visit http://localhost/phpmyadmin/ from browser to log on the database management panel.
-
Once you are in phpMyAdmin, you can create a new database by following these steps:
-
Click on the “Databases” tab in the top menu.
-
In the “Create database” section, enter a name for your new database in the “Database name” field.
-
Click the “Create” button.
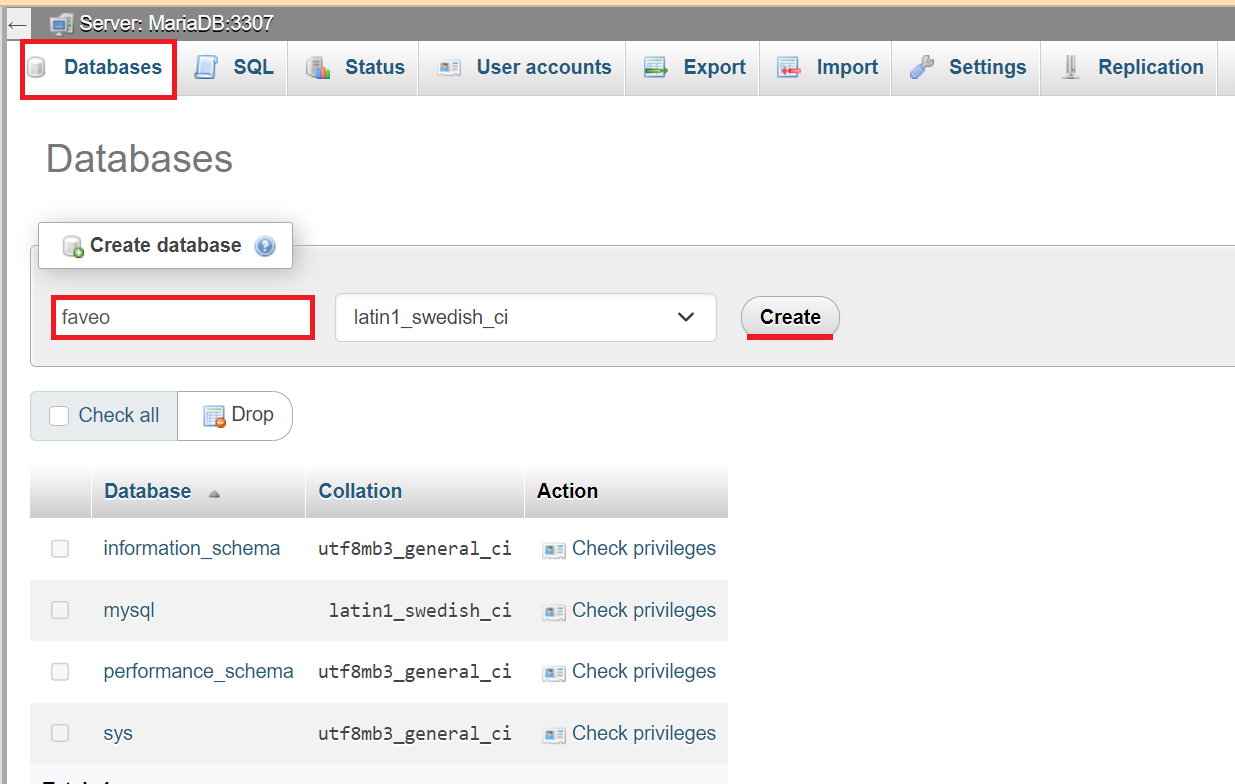
- Your new database should now be created.
4. Install Ioncube Loader
Click Here to download IonCube Loader zip file.
-
Step 1: Extract the IonCube Loader file downloaded.
-
Step 2: Copy the
ioncube_loader_win_8.4.dllfile and paste it into the PHP extensions directoryC:\xampp\php\ext. -
Step 3: Copy the “loader-wizard.php” from the extracted Ioncube folder and paste it into the
C:\xampp\htdocs. -
Step 4: Edit the
C:\xampp\php\php.inifile and below the last line enter the path to the extension within thezend_extensionparameter:
zend_extension = "C:\xampp\php\ext\ioncube_loader_win_8.4.dll"
- Step 5: Run the below URL to verify the ionCube Installation.
- Note: If you didn’t get the below output try restarting the Apache Server.
http://127.0.0.1\loader-wizard.php
5. Install wkhtmltopdf
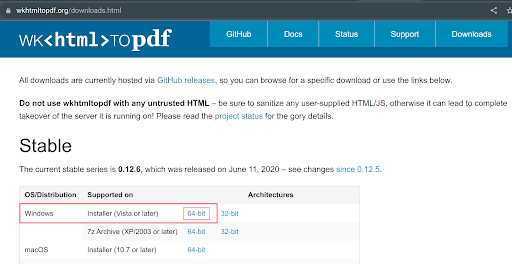
Wkhtmltopdf is an open source simple and much effective command-line shell utility that enables user to convert any given HTML (Web Page) to PDF document or an image (jpg, png, etc). It uses WebKit rendering layout engine to convert HTML pages to PDF document without losing the quality of the pages. It is really very useful and trustworthy solution for creating and storing snapshots of web pages in real-time.
- Click Here to download 64-bit wkhtmltopdf-0.12.6-1.exe installer file.
-
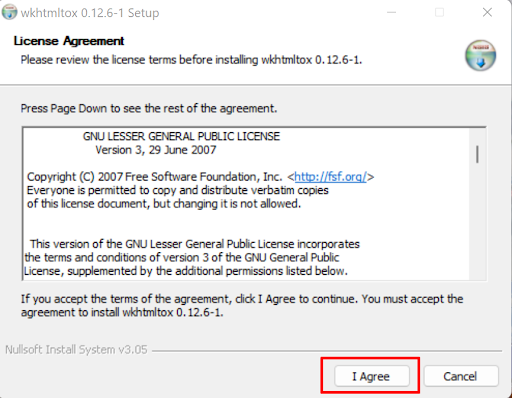
Run the downloaded
wkhtmltopdf-0.12.6-1.exe installer. -
Click
I Agreeon the license agreement screen.
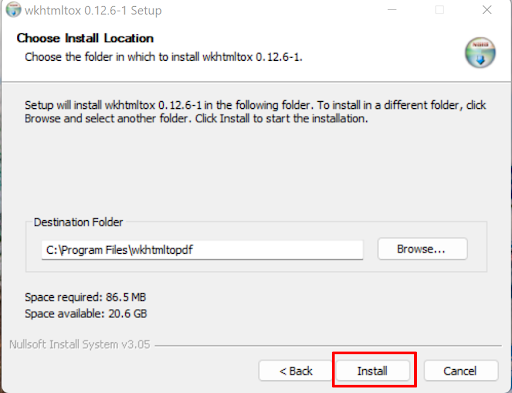
- Specify the installation destination folder or leave it as default location and click
Install
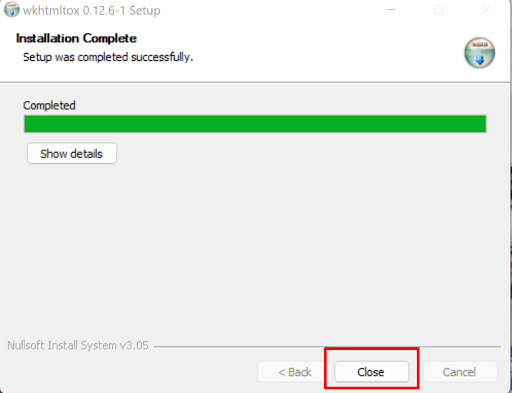
- When the installation is complete, click the
Closebutton.
-
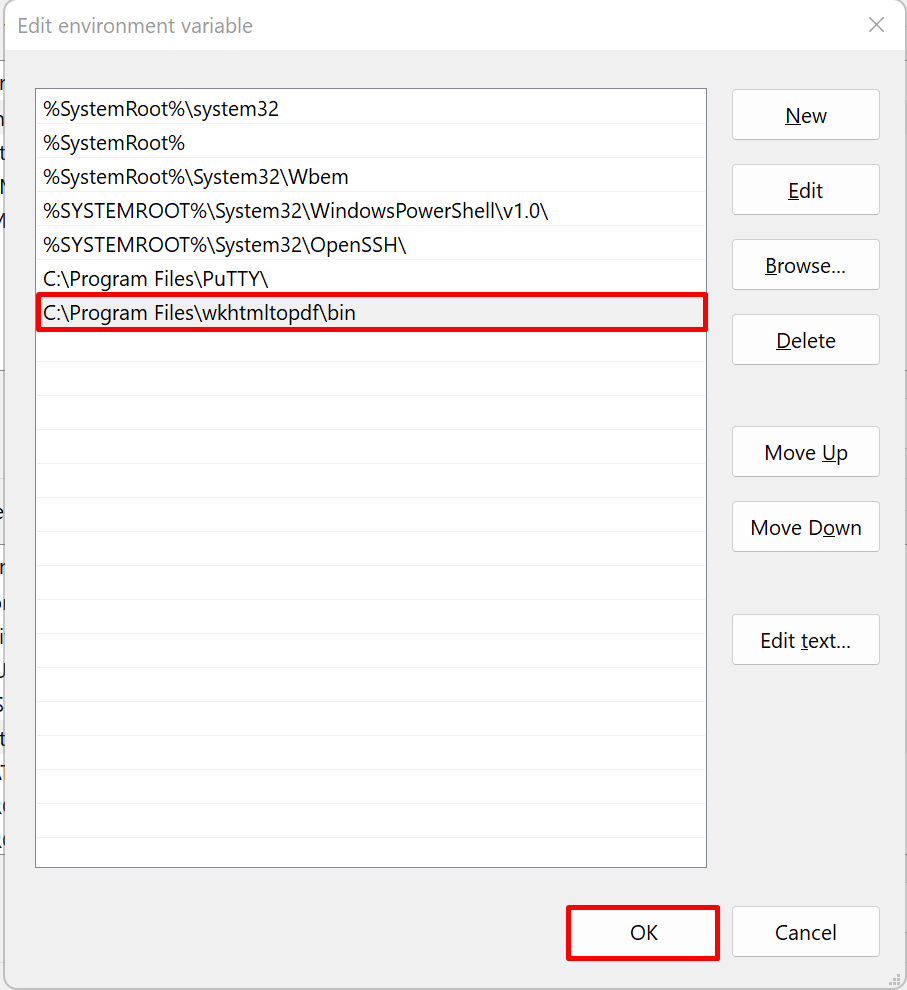
Now copy
wkhtmltox.dlllocated atC:\Program Files\wkhtmltopdf\binand paste it inC:\xampp\php\ext -
Update the Environment variable for
wkhtmltopdf.
6. Configure the PHP 8.4
- Step 1: Edit the
C:\xampp\php\php.inifile and Enable the extensions listed below, by uncommenting them (Remove the semicolon ; at beginning of line).
Default Extensions
extension=bz2
extension=ldap
extension=curl
extension=fileinfo
extension=gd
extension=gettext
extension=imap
extension=mbstring
extension=exif
extension=mysqli
extension=openssl
extension=pdo_mysql
extension=soap
extension=sockets
extension=sodium
- Step 2: Set the recommended minimum value of these PHP directives listed below for Faveo to work properly.
- Search for the directives and assign the value according to this example:
max_execution_time = 360
max_input_time = 360
max_input_vars = 10000
memory_limit = 256M
post_max_size = 1024M
upload_max_filesize = 100M
max_file_uploads = 100
short_open_tag = On
-
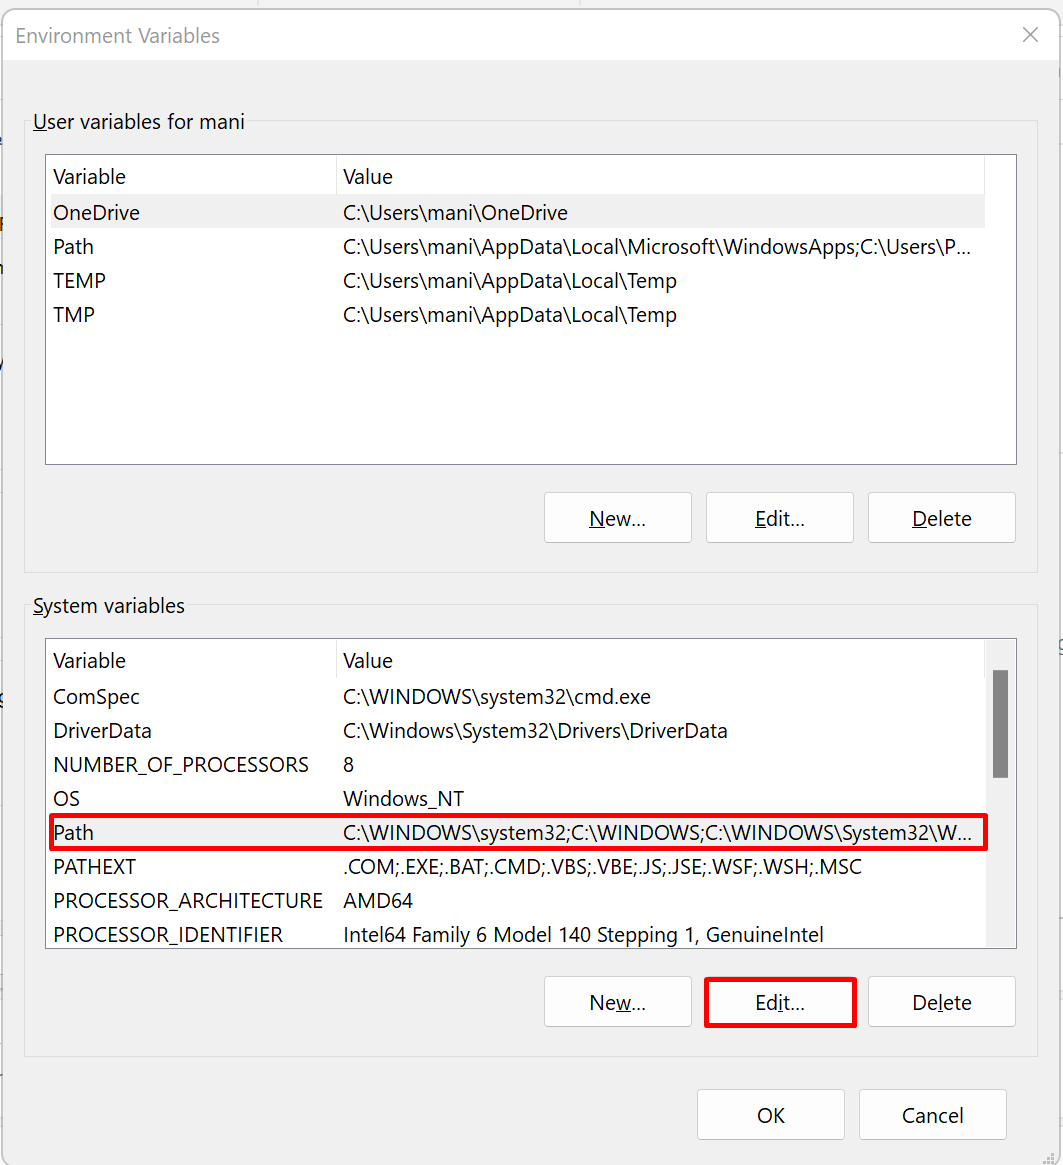
Update the Environment Variable for PHP Binary.
-
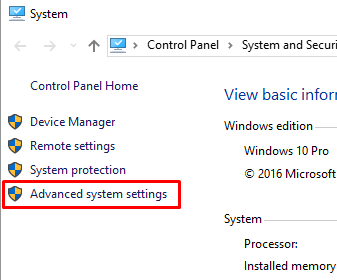
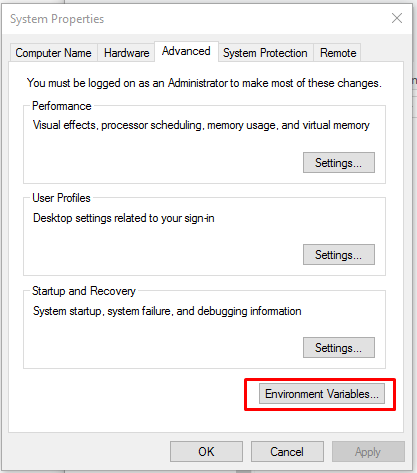
Right click on This PC, go to
Properties > Advanced System Settings >Environment Variables.
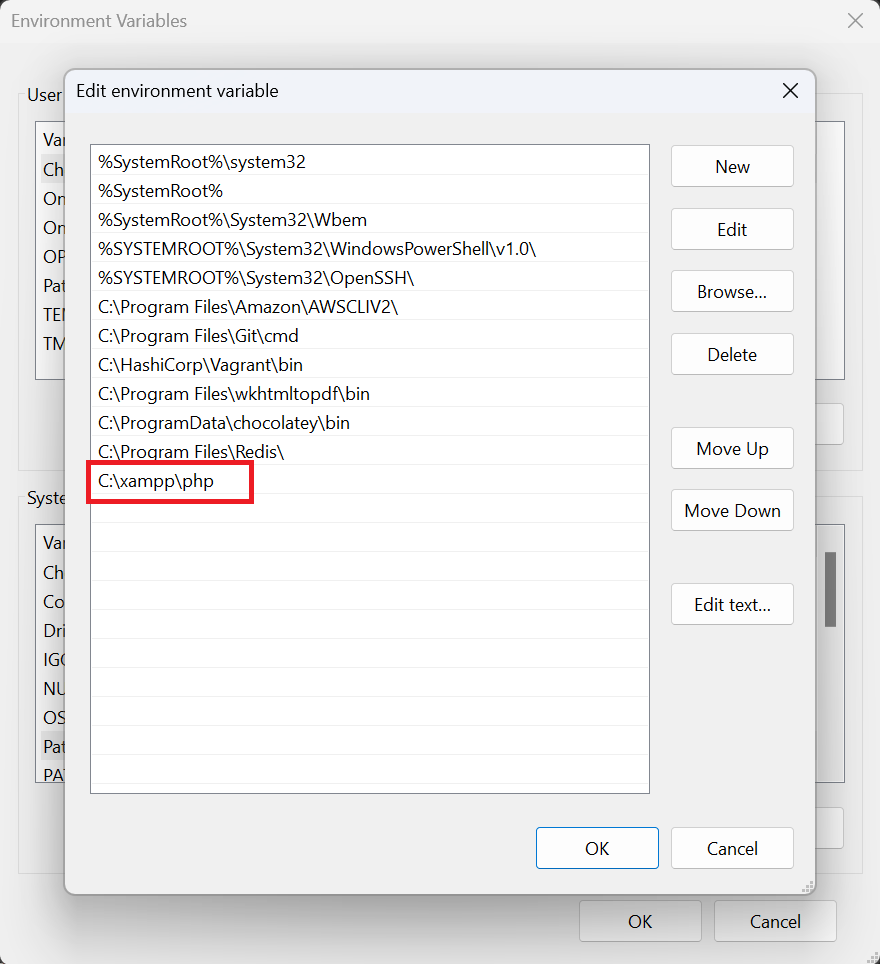
- Now click on Path > Edit > New & add copied path
C:\phphere and click OK in all 3 tabs.
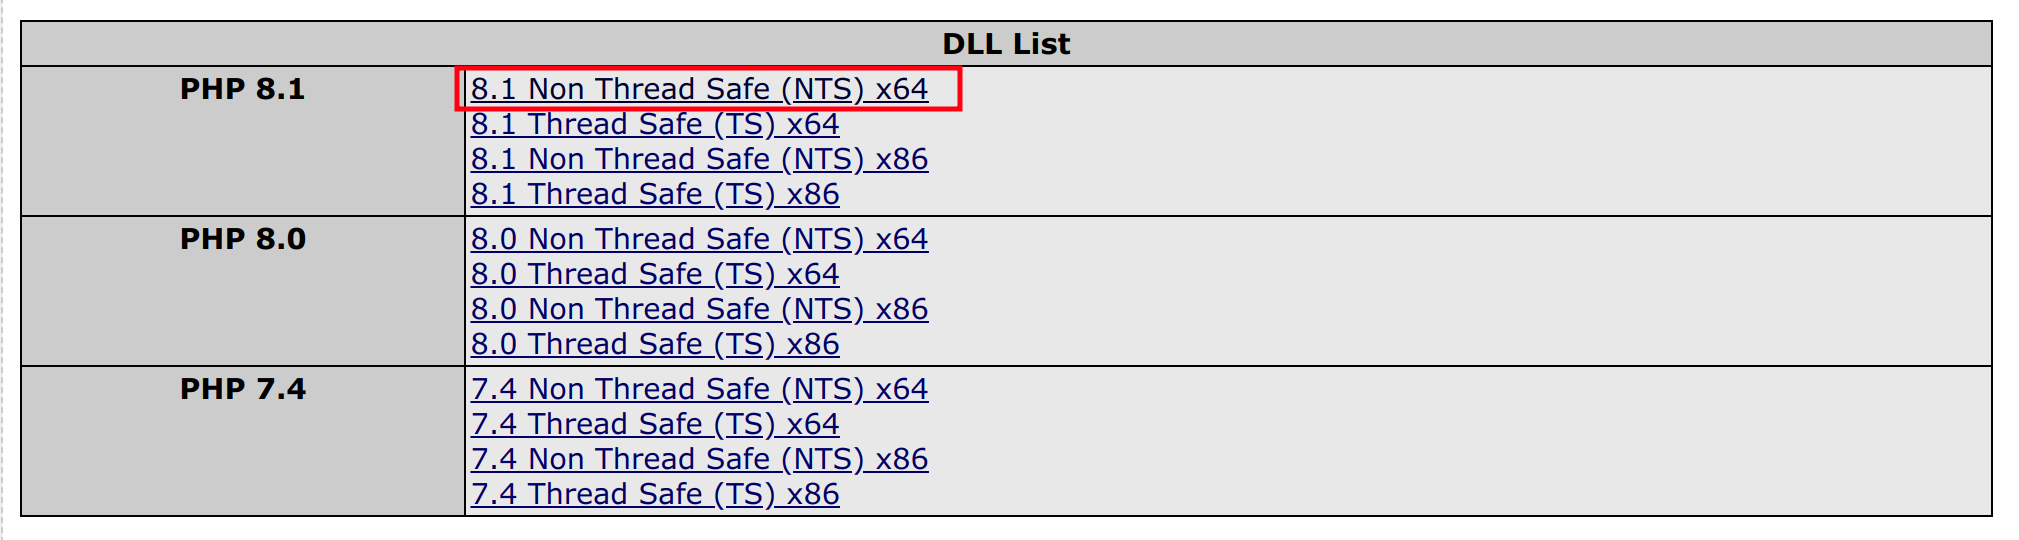
7. Install Redis Extension
Click Here to download PHP 8.4 Non Thread Safe (TS) x64 zip file.
- Unzip the php-redis zip file, a folder will be created, go inside the folder, copy the
php_redis.dllfile and paste it inC:\xampp\php\ext. (C:\xampp\php incase of Apache WebServer). - Now enable php redis extension in
php.iniconfiguration located inC:\xampp\php.
extension=php_redis.dll
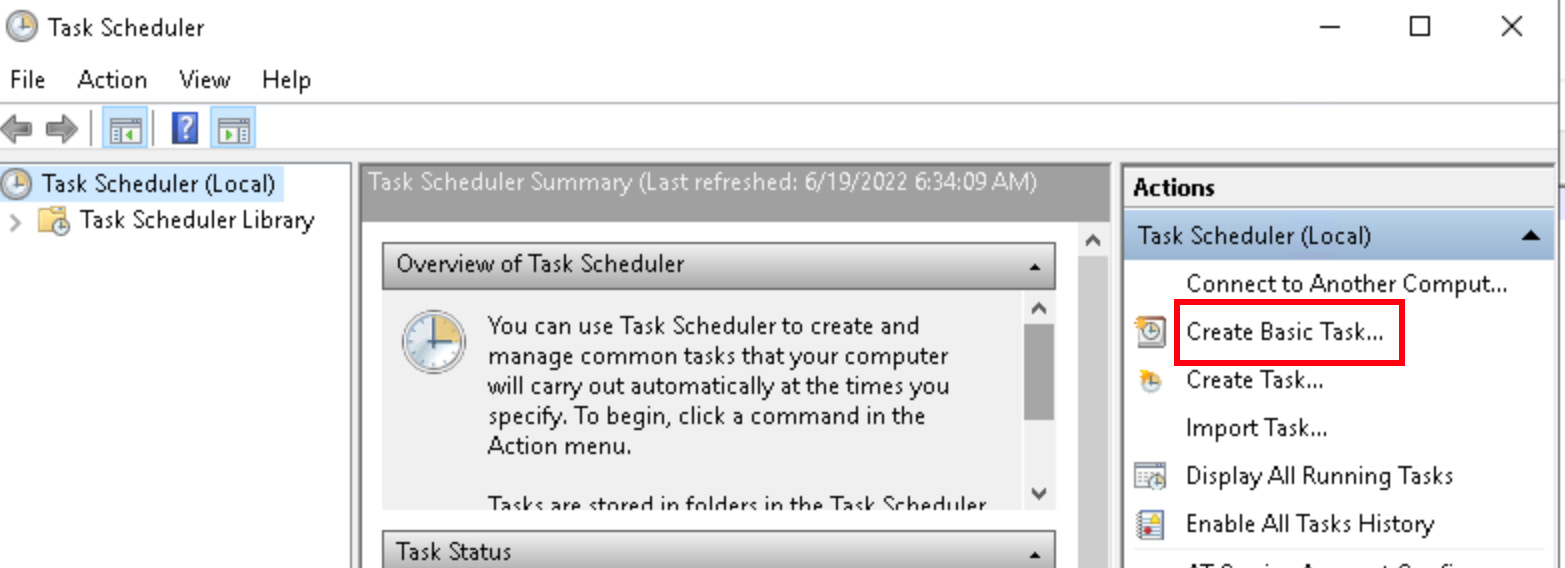
8. Cron in Task Scheduler
- To open Task scheduler press Win+R and type
taskschd.msc. - On the Right pane of the Task scheduler select
Create Basic Taskenter aNamefor the task and clickNext.
-
Under
Task Trigger, section selectDailyand clickNextand leave the default values inDailysection tick theSynchronize across time zonesand proceedNext. -
Now under the
Actionsection selectStart a programand clickNext. - In
Start a programcopy the below value into theprogram/script field.C:\Windows\System32\cmd.exe -
Add the following highlighted values to the Argument :
- This is for faveo incoming mail, esacalation, faveo update check.
/c php "C:\xampp\htdocs\faveo\artisan" schedule:run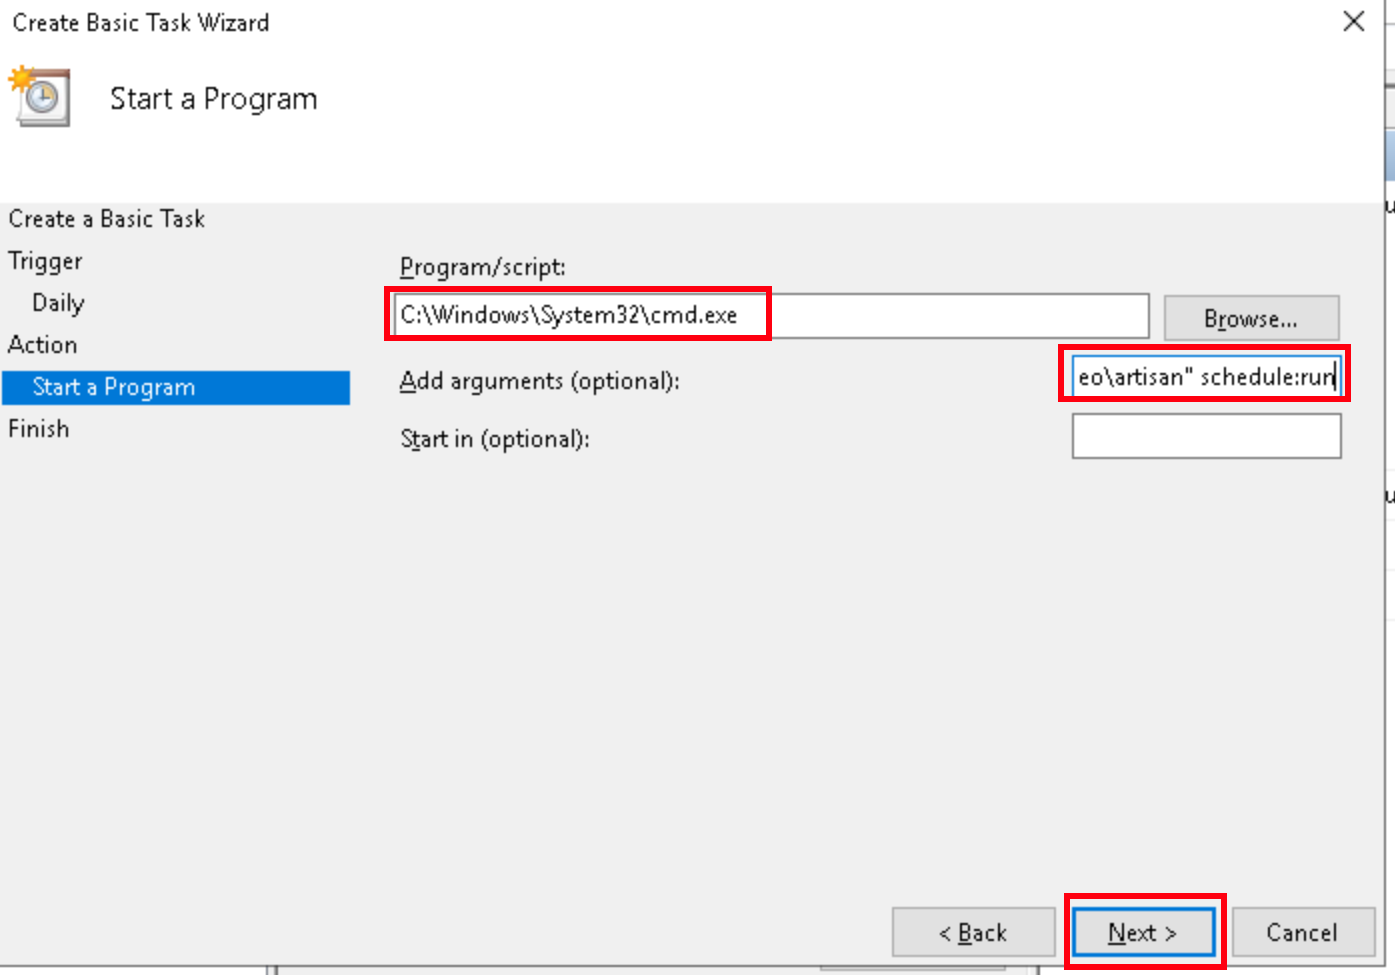
-
Finally under the
Finishsection select thecheckboxto open the properties window after finish and click theFinishbutton. - In the properties window, select the
Triggerstab, click onEditand select the checkbox forRepeat task everyset values to run every5 minutes, for a duration ofindefinitelyand click onOK.
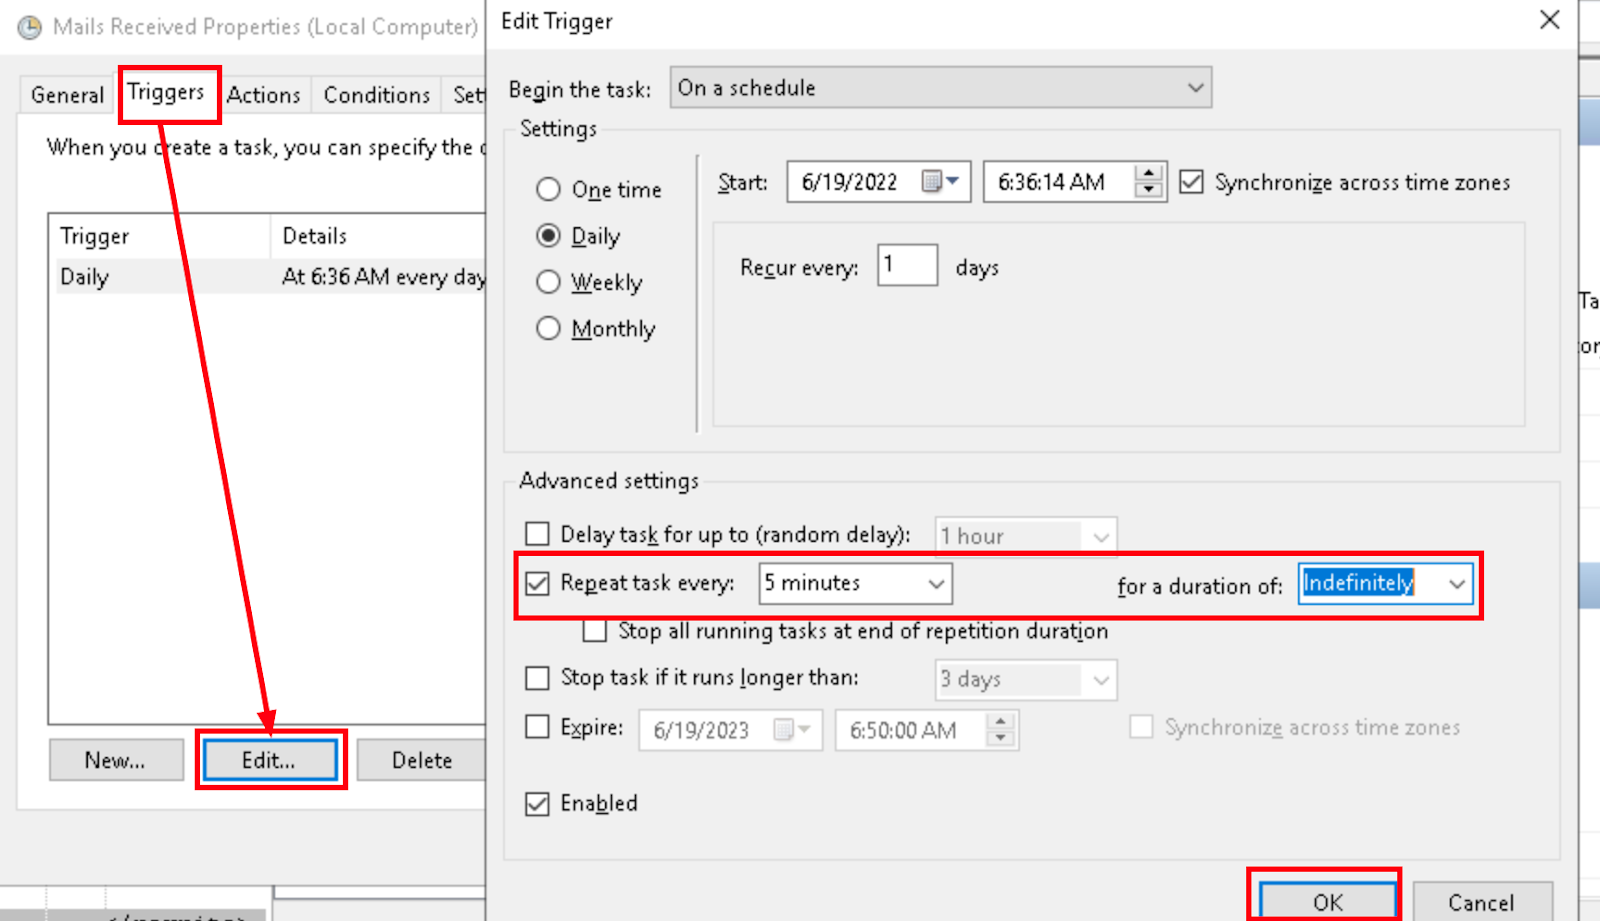
- Similarly add two more triggers
At log on&At startup up, set values to run every5 minutes, for a duration ofindefinitelyand click onOK.

9. Self-Signed SSL
This document will list how to install Self-Signed SSL certificates on Windows servers.
-
We will be using the tool OpenSSL for creating a Self-Signed SSL certificate on a windows machine.
-
The OpenSSL is an open-source library that provides cryptographic functions and implementations.
-
OpenSSL is a defacto library for cryptography-related operations and is used by a lot of different applications.
-
OpenSSL is provided as a library and application.
-
OpenSSL provides functions and features like SSL/TLS, SHA1, Encryption, Decryption, AES, etc.
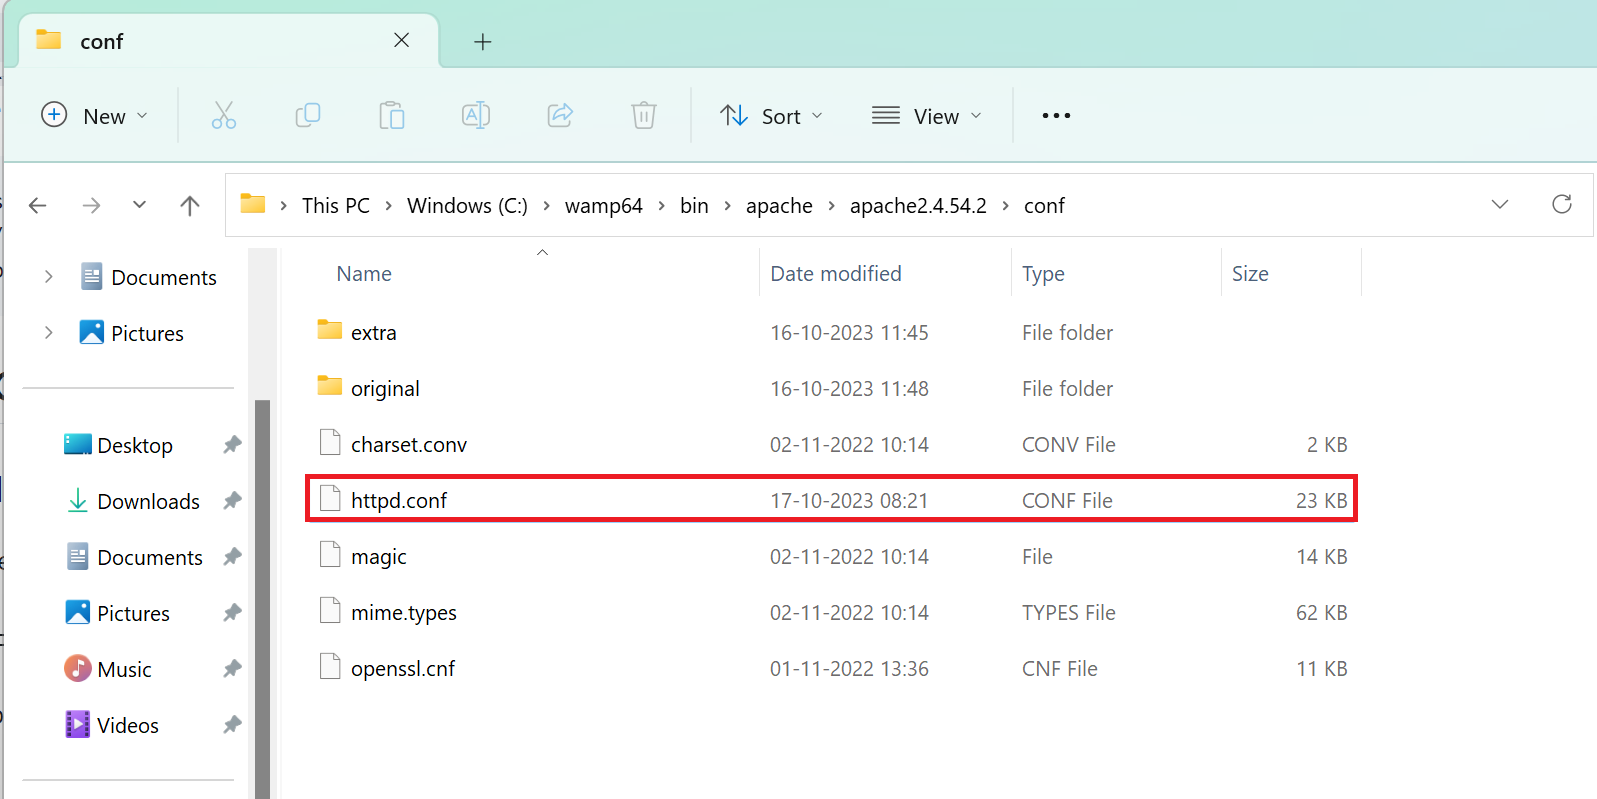
- Edit the
httpd.conffile Open the fileC:\xampp\apache\conf\httpd.confand un-comment (remove #) from the following 3 lines
LoadModule ssl_module modules/mod_ssl.so
Include conf/extra/httpd-ssl.conf
LoadModule socache_shmcb_module modules/mod_socache_shmcb.so
Step 1: Install Chocolatey
-
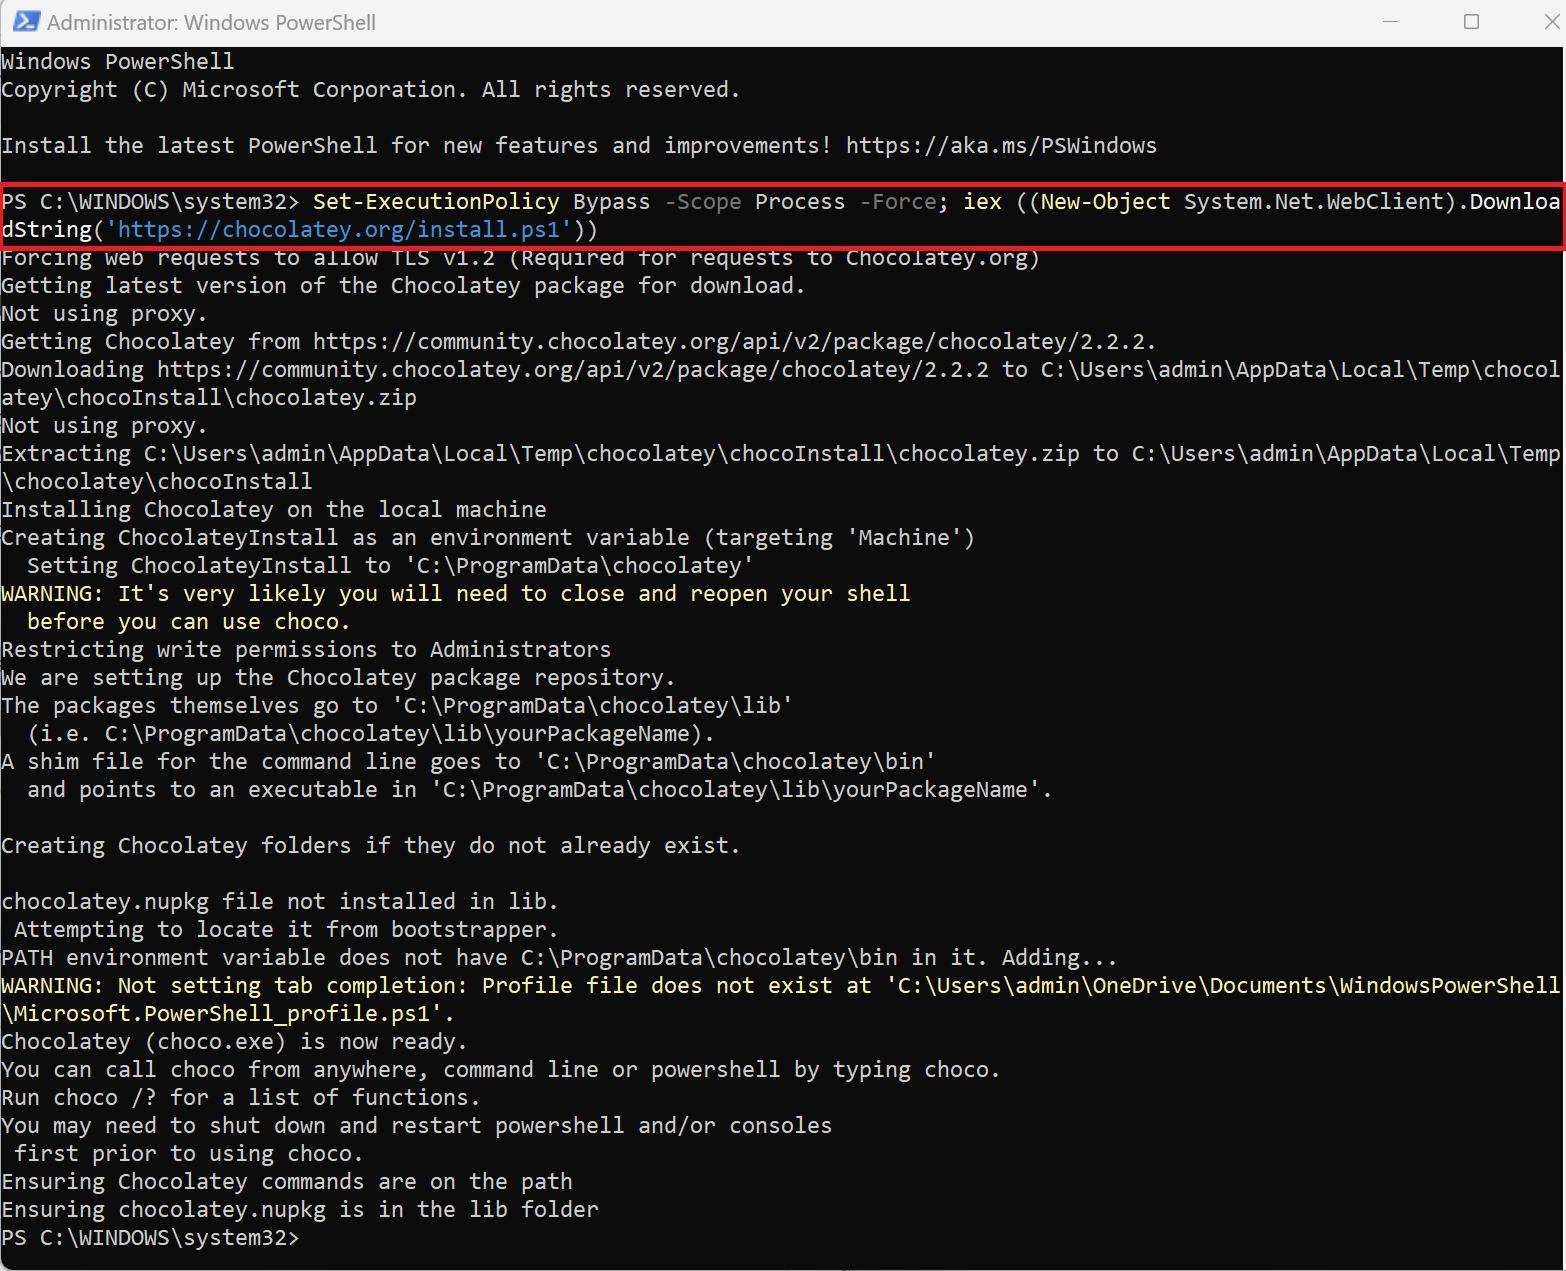
Open an elevated Command Prompt or PowerShell. Right-click on the “Start” button and select “Windows Terminal (Admin)” or “Command Prompt (Admin)” or “Windows PowerShell (Admin)”.
-
Copy and paste the following command to download and run the Chocolatey installation script:
Set-ExecutionPolicy Bypass -Scope Process -Force; iex ((New-Object System.Net.WebClient).DownloadString('https://chocolatey.org/install.ps1'))
-
You may be prompted to confirm the execution of scripts. Enter
"A"and press Enter to allow the script to run. -
Wait for the installation to complete. Chocolatey will be installed in the
"C:\ProgramData\chocolatey"directory by default. -
To verify the installation, open a new Command Prompt or PowerShell window and run:
choco --version

Step 2: Install OpenSSL
-
After successfully installing Chocolatey, you can proceed to install OpenSSL.
-
Open a new Command Prompt or PowerShell window with administrator privileges.
-
To install OpenSSL, run the following Chocolatey command:
choco install openssl
-
Follow the on-screen prompts to confirm the installation. You can typically accept the default options by pressing Enter
"A". -
Wait for the installation to complete. Chocolatey will download and install OpenSSL and its dependencies.

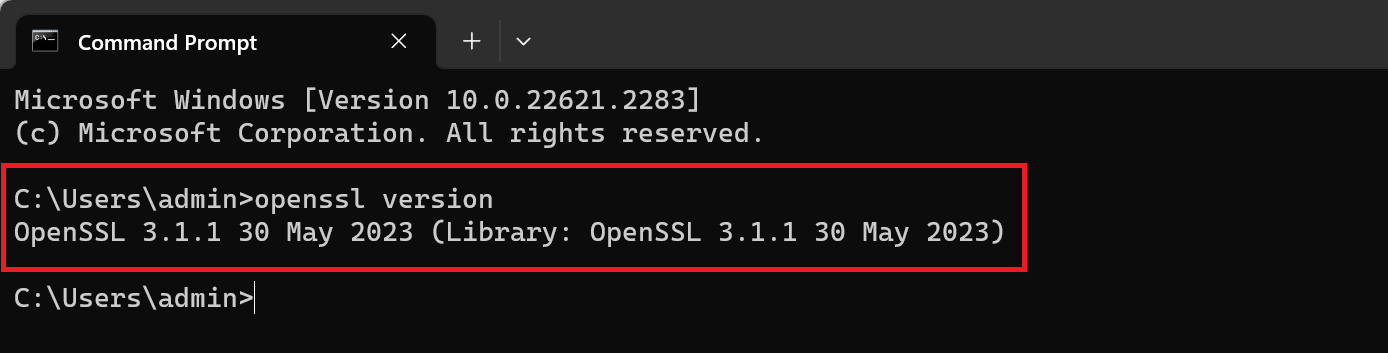
- To verify the OpenSSL installation, run:
openssl version
Generate a private key for the CA
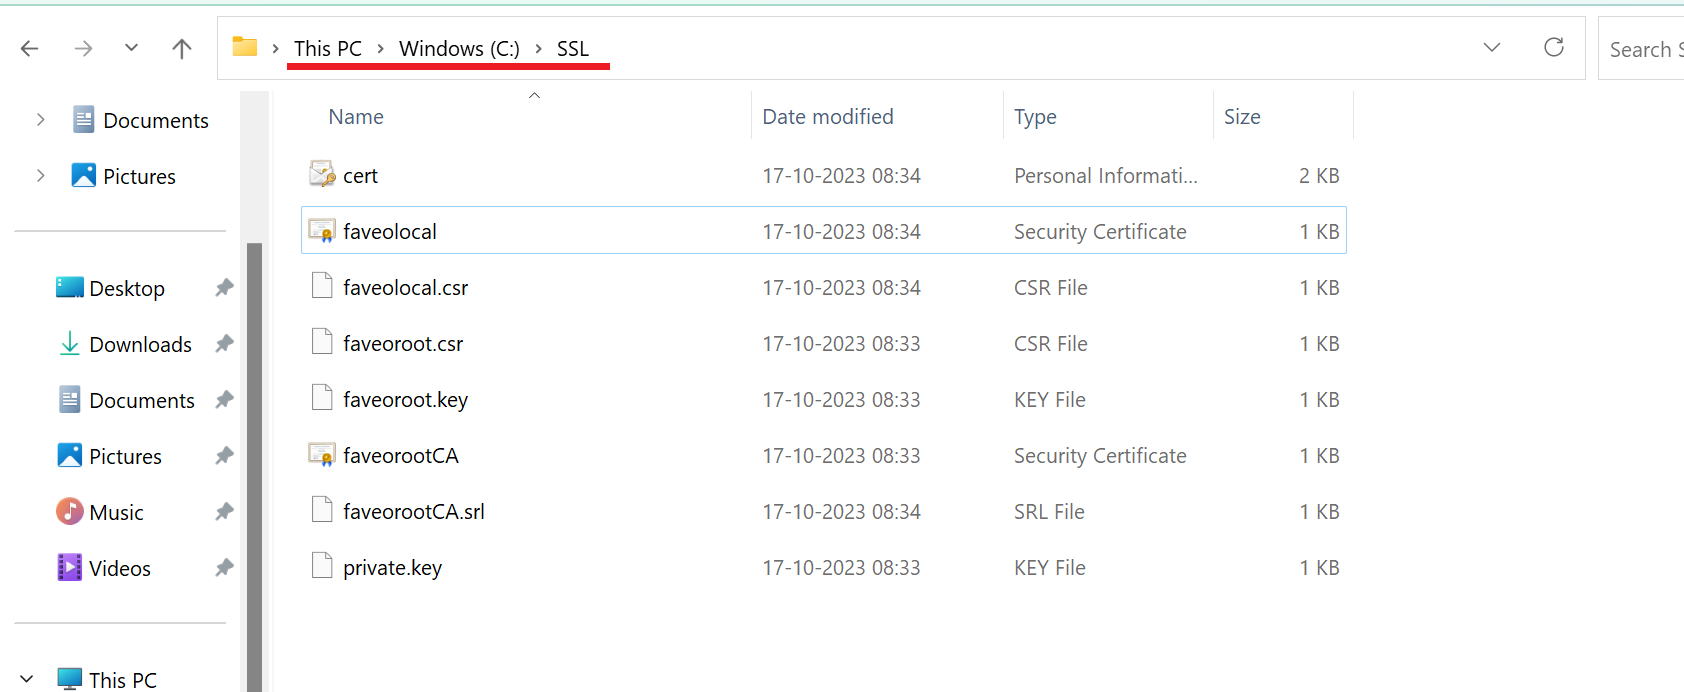
Create a directory named SSL under C directory like C:\SSL, the following commands will create the SSL files those files will be saved in the directory which we create.
-
Open Command Prompt from the SSL directory that we created,
-
Run the below command to create a Private key for the rootCA this command will save a file name faveoroot.key in the SSL folder.
openssl ecparam -out faveoroot.key -name prime256v1 -genkey

Generate a certificate signing request for the CA
From the command prompt run the below command which will create a CSR (certificate signing request) for the Root CA.
openssl req -new -sha256 -key faveoroot.key -out faveoroot.csr
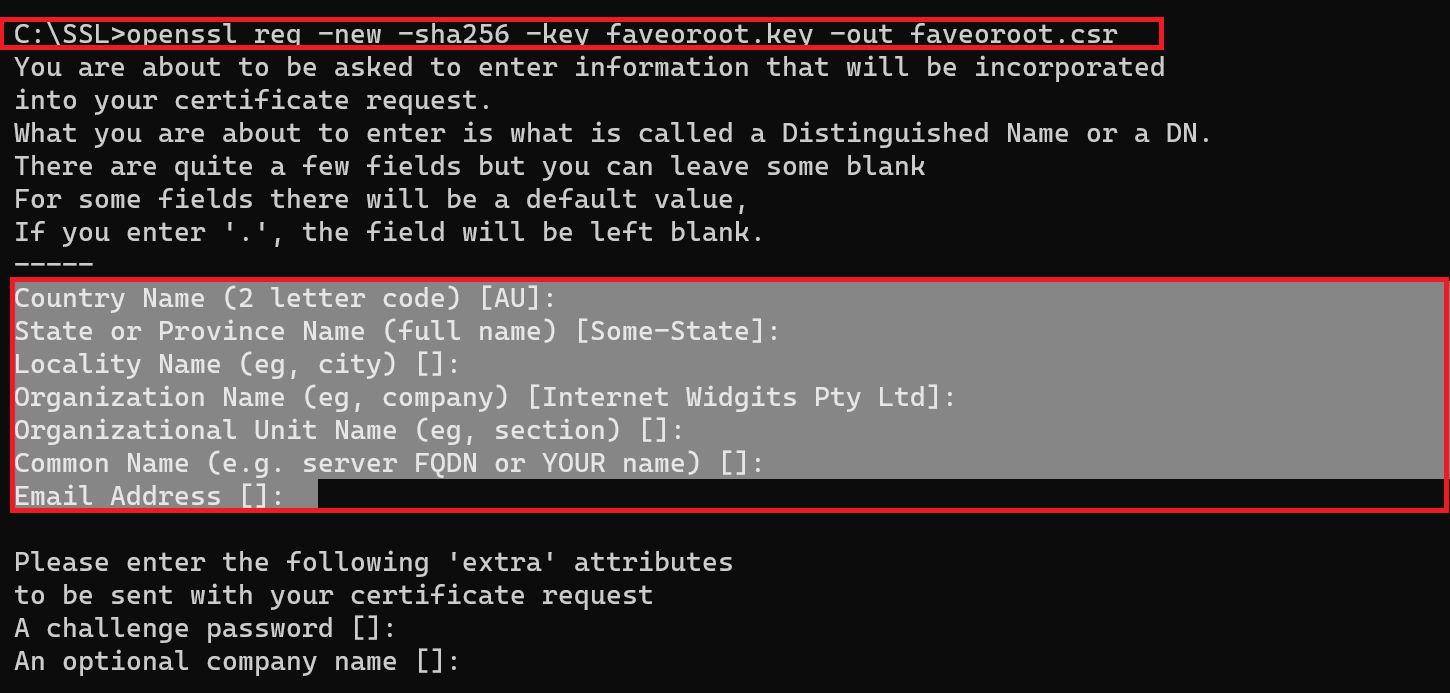
The above command will ask for the below information if needed you can provide them or you can just hit enter and skip them but it is recommended to give the meaningful details.
- Country Name.
- State Name.
- Organization.
- Common name (Leave this as blank or provide the company domain not the faveo domain).
- Email address.
The above command will save a file in the name faveoroot.csr in the SSL directory.
Generate a root certificate
The below command will create the Root CA certificate which we will use to sign the SSL certificates.
openssl x509 -req -sha256 -days 3650 -in faveoroot.csr -signkey faveoroot.key -out faveorootCA.crt

The above command will create a file and save it as faveorootCA.crt in the SSL directory.
Create a private key for the certificate
The below command will create a private key file for the server SSL certificate.
openssl ecparam -out private.key -name prime256v1 -genkey

The above command will save a key file with the name private.key for the server SSL certificate.
Create a certificate signing request for the server SSL
The below command will create a Certificate Signing Request for the Server SSL.
openssl req -new -sha256 -key private.key -out faveolocal.csr
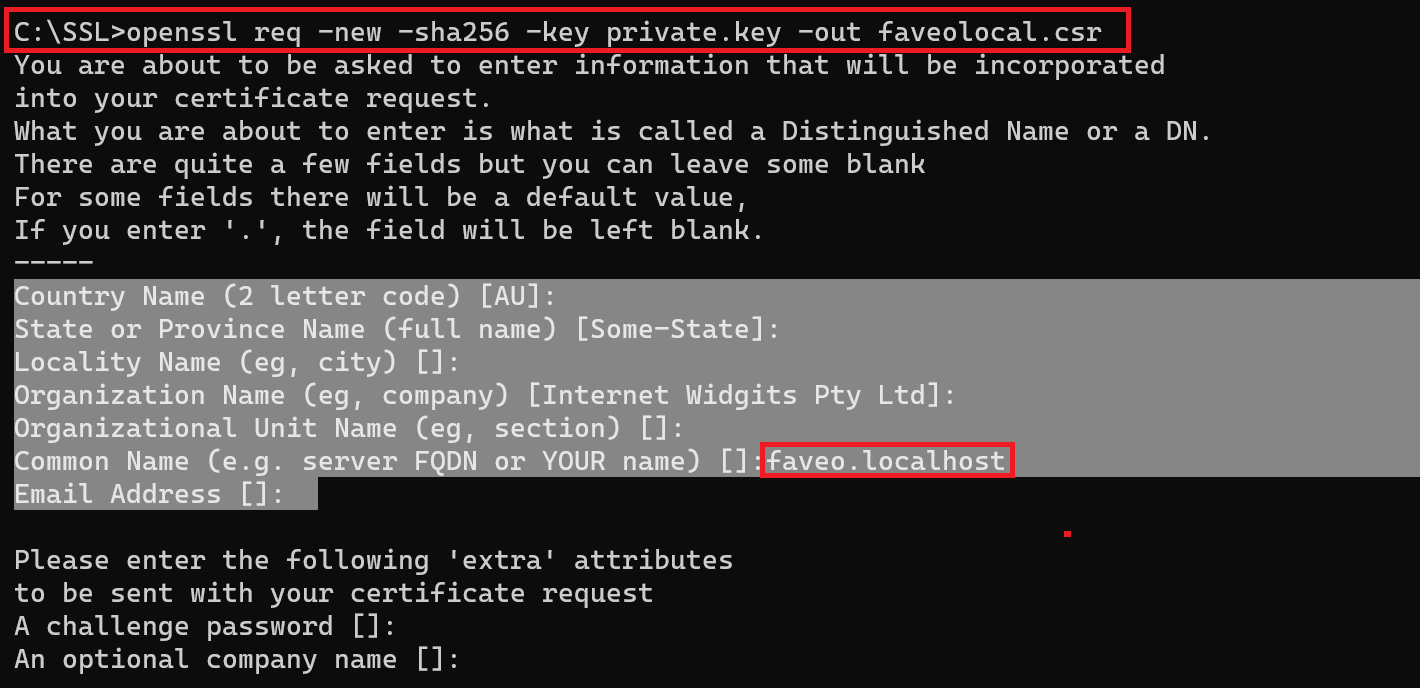
It will ask for the details below we should give the details as shown below.
- Country Name.
- State Name.
- Organization.
- Common name (Here please provide the Domain or the IP through which you need to access faveo).
- Email address.
The rest can be left blank and after this is completed it will create the CSR file and save it with the name faveolocal.csr in the SSL directory.
Create a certificate and sign it with the CA private key
The below command will create the server SSL certificate which is signed by the Root CA that we created above.
openssl x509 -req -in faveolocal.csr -CA faveorootCA.crt -CAkey faveoroot.key -CAcreateserial -out faveolocal.crt -days 3650 -sha256

The above command will create a server SSL file and save it in the name faveolocal.crt, this certificate will be valid for 3650 days which is ten years.
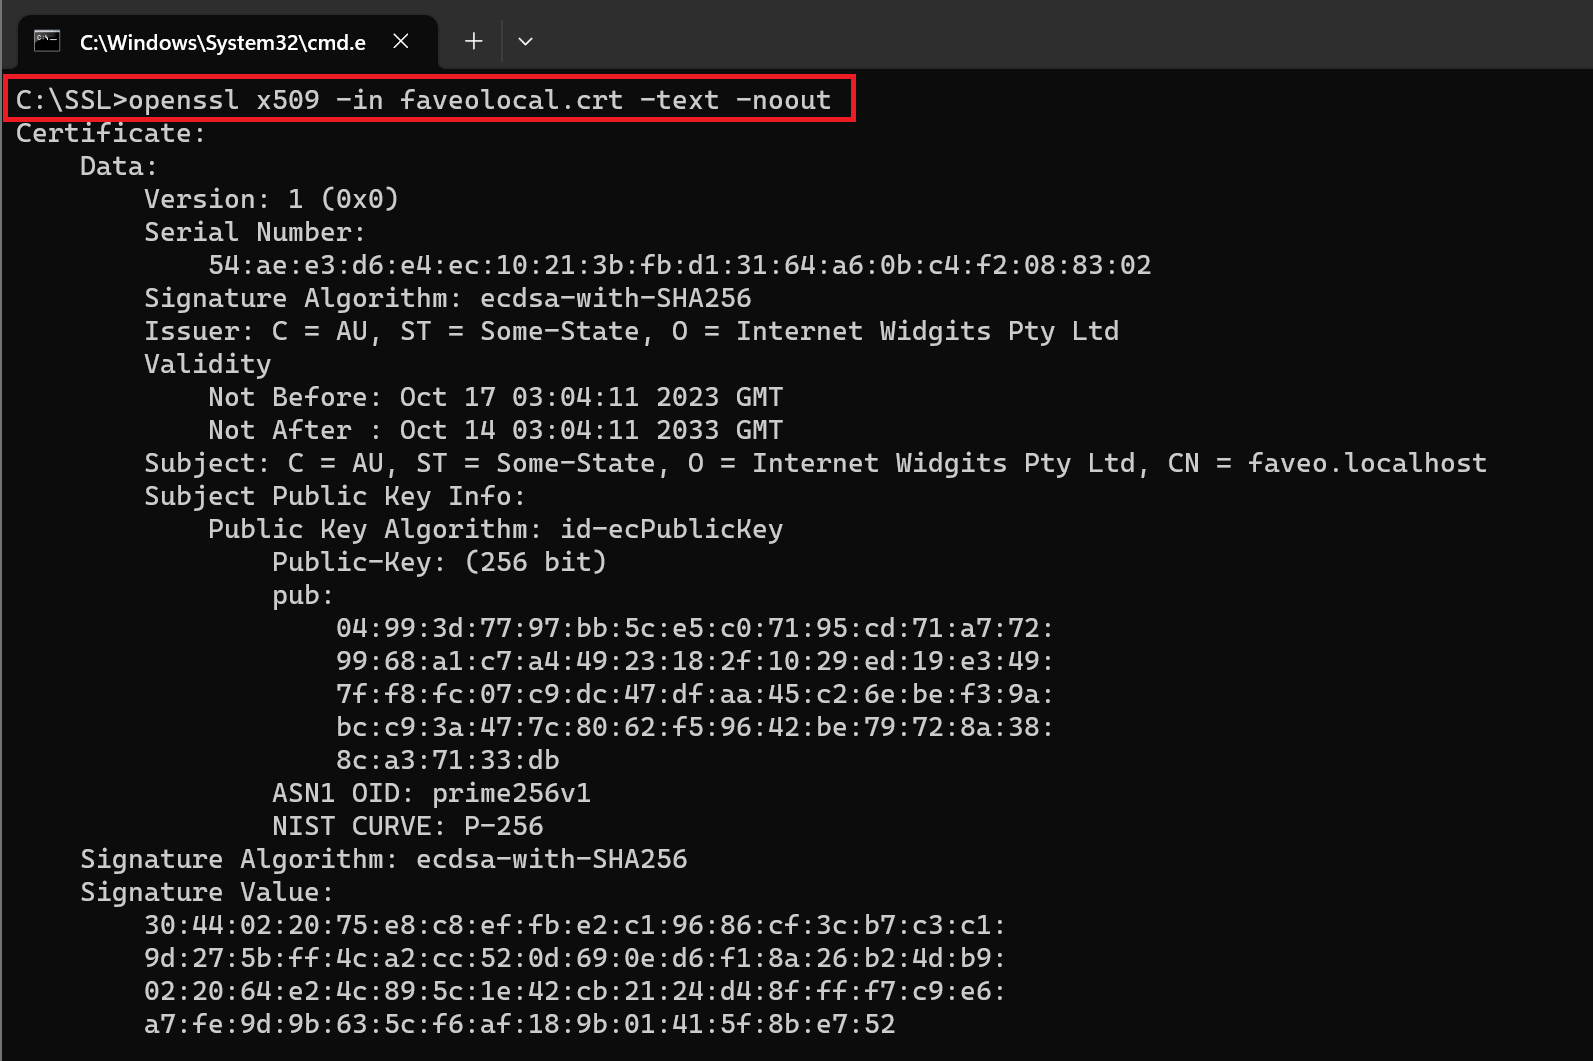
Verify the newly created certificate
openssl x509 -in faveolocal.crt -text -noout
Compiling the created certificate and key file as .pfx file
As windows need the certificate file in .pfx format which will contain the both certificate and the key file and the CA file for the installation, so we need to convert the created files to .pfx format, this can be done with the below command.
openssl pkcs12 -export -out cert.pfx -inkey private.key -in faveolocal.crt -certfile faveorootCA.crt

The above command will create a .pfx file with the name cert.pfx in the SSL directory.
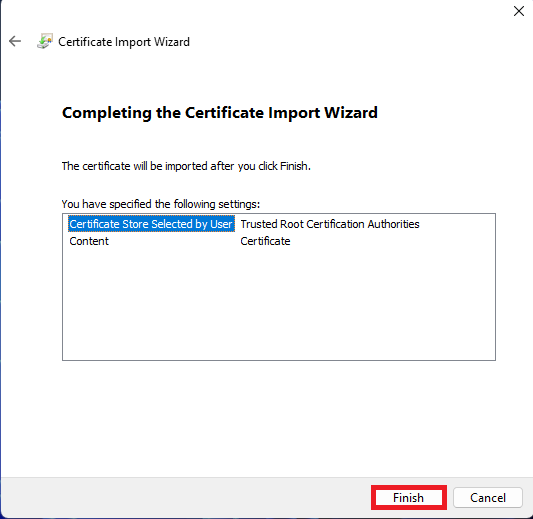
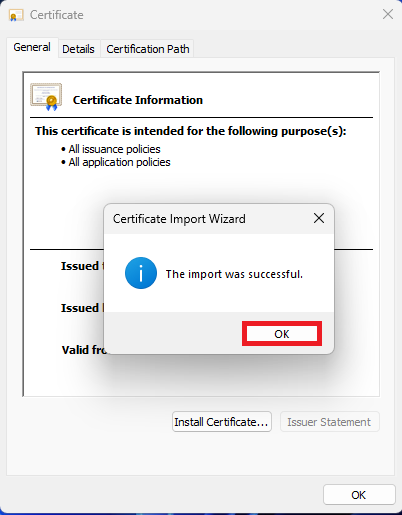
Installing the SSL certificate
- Navigate inside your SSL directory and double click on faveorootCA.crt
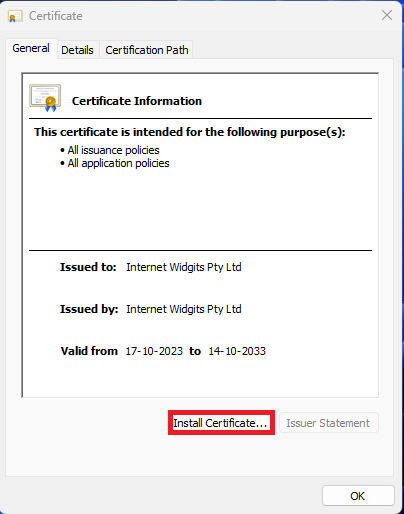
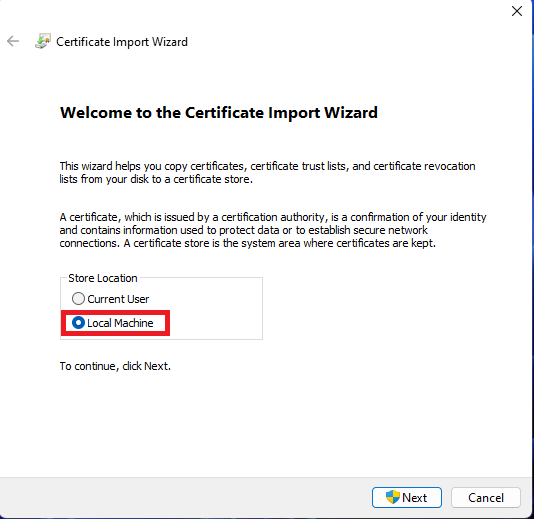
- Click on Install Certificate → Select local machine → Click on next
- Select “Trusted Root Certification Authorities” directory and click on OK.
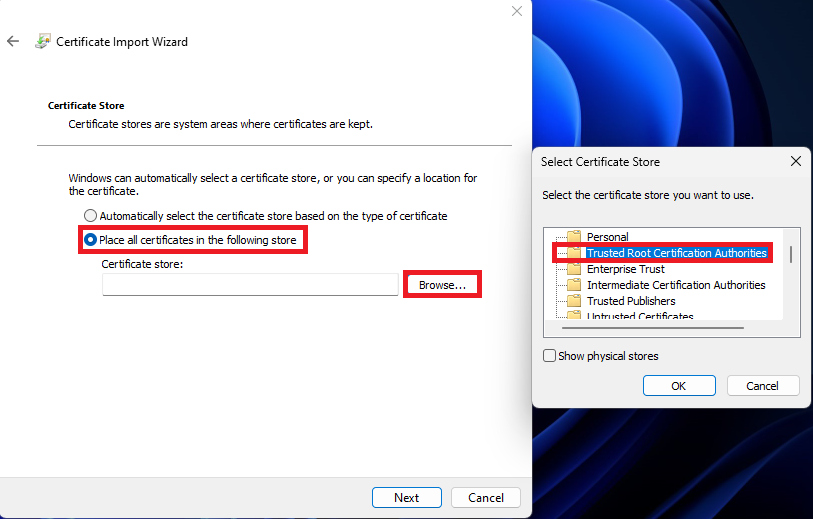
- Click Next and Finish. You should get imported successful .
Step 3: Download & Enable cacert.pem File in PHP Configuration File
- Click Here to download
cacart.pemfile. This is required to avoid the “cURL 60 error” which is one of the Probes that Faveo checks. -
Extract the
cacert.pemfile and copy it toC:\xampp\phppath. - Edit the
php.ini, Uncommentcurl.cainfoand add the location ofcacert.pemto it as below:curl.cainfo = "C:\xampp\php\cacert.pem" - Edit the faveorootCA.crt and copy the content.
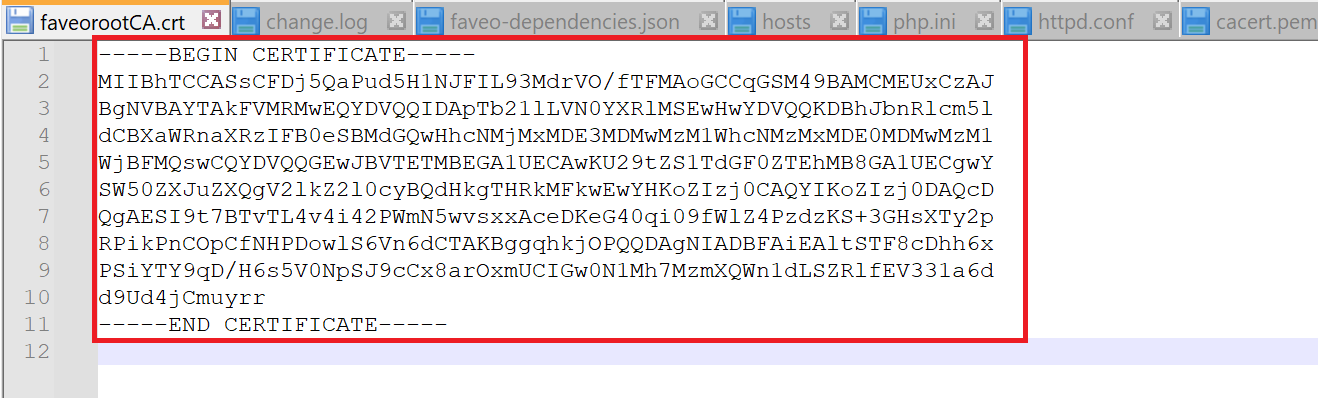
- Edit the cacert.pem file and append the content copied from faveorootCA.crt in this file.
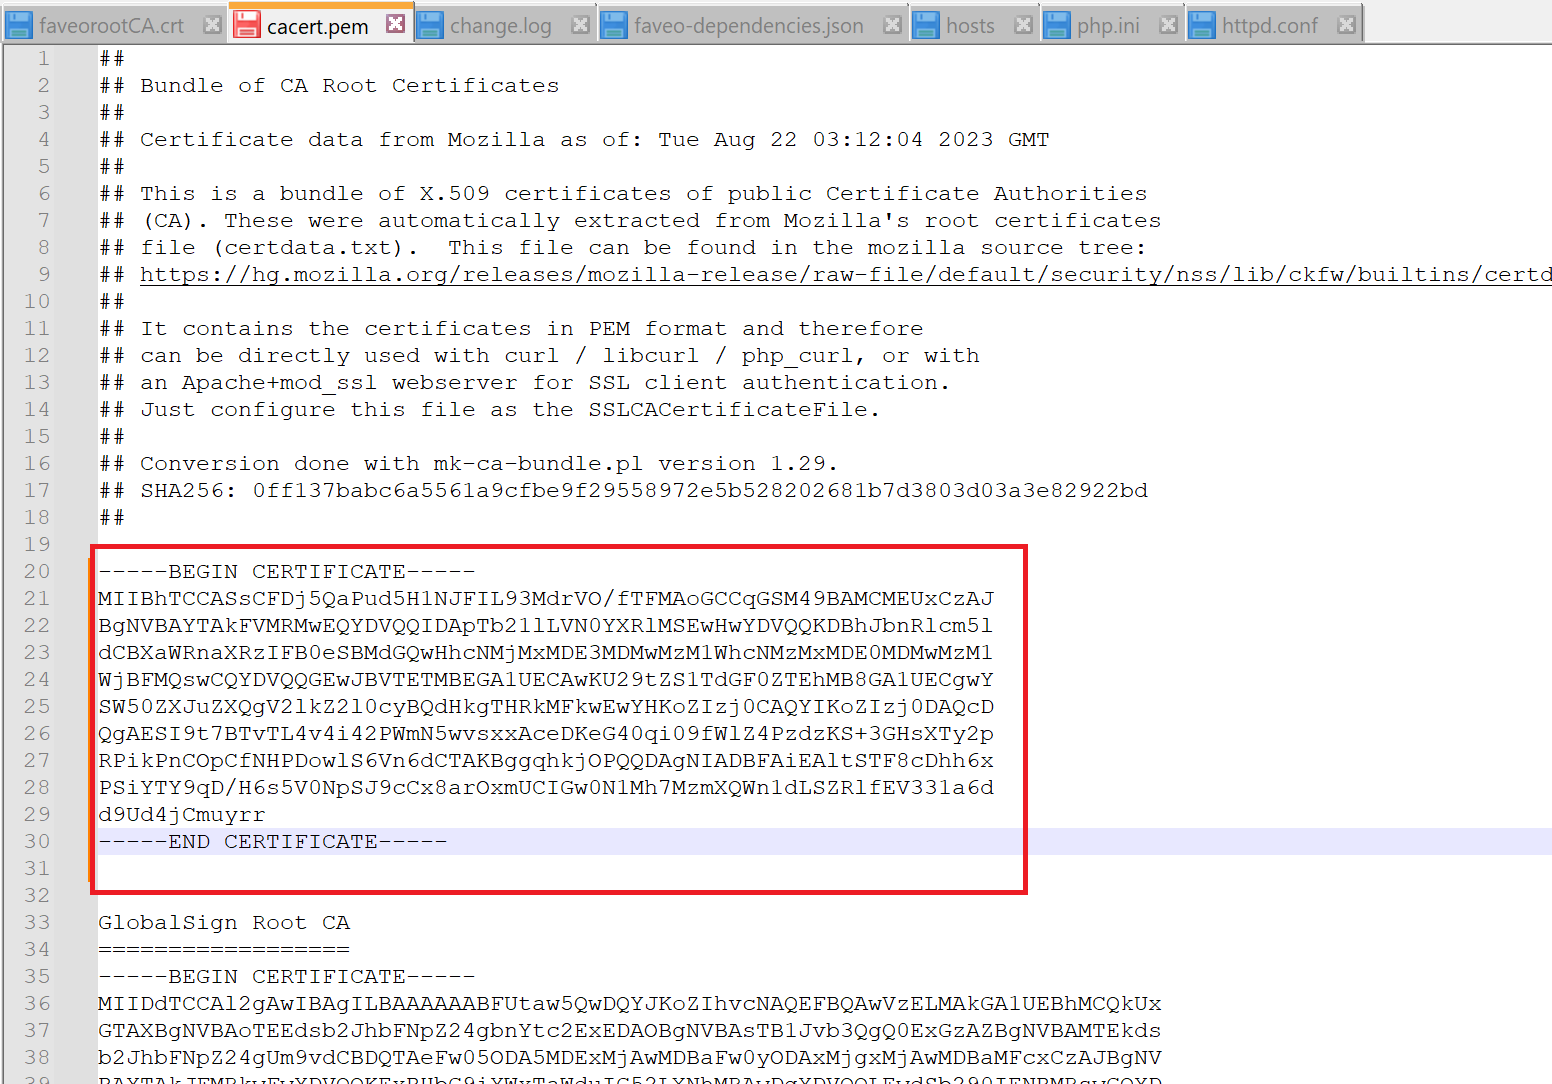
- Save and Close the File.
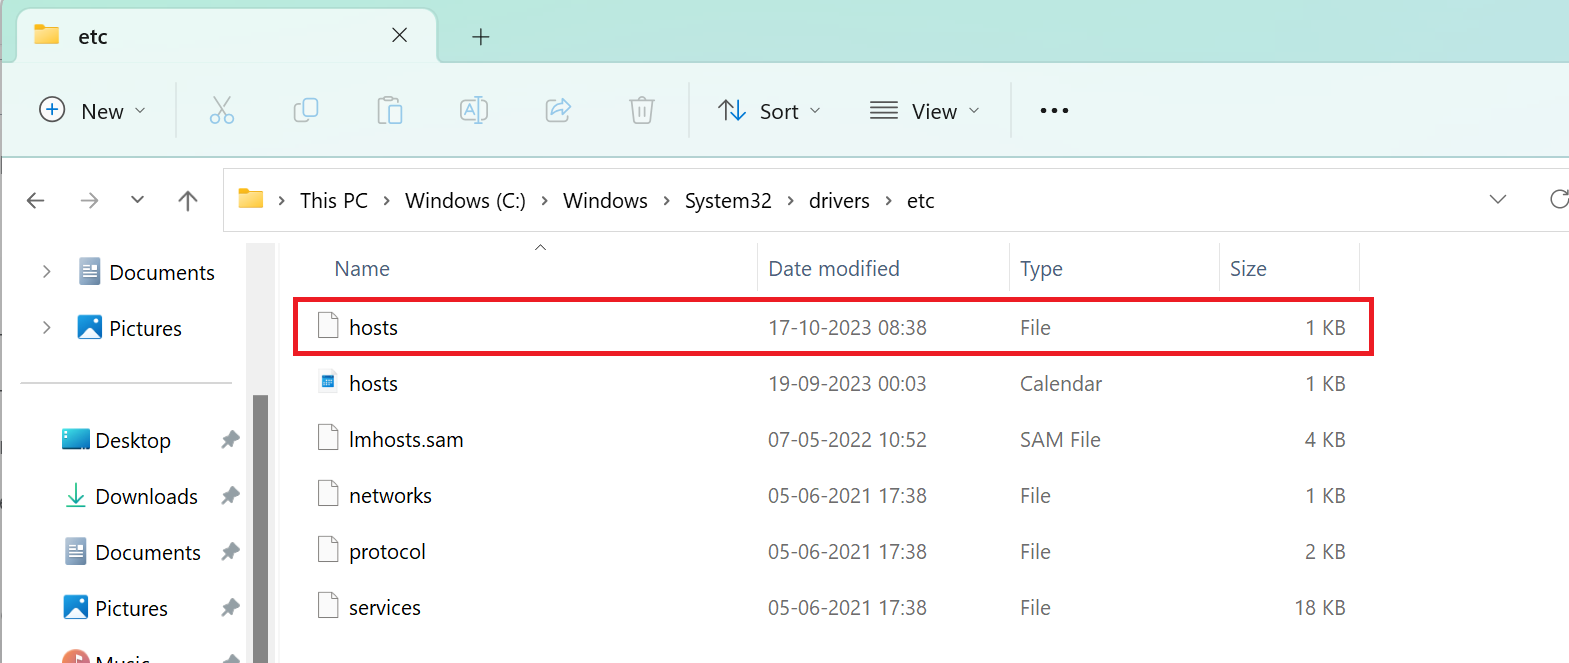
Step 4: Edit the “hosts” file on the OS to Map the Custom Domain to Loopback Address.
- Open the hosts file from the path
C:\Windows\System32\drivers\etc
- Map your custom domain to 127.0.0.1

-
Save and Close the File.
- if the above is done we need to edit the php.ini file which is found inside the PHP root directory. Uncomment and add the location of
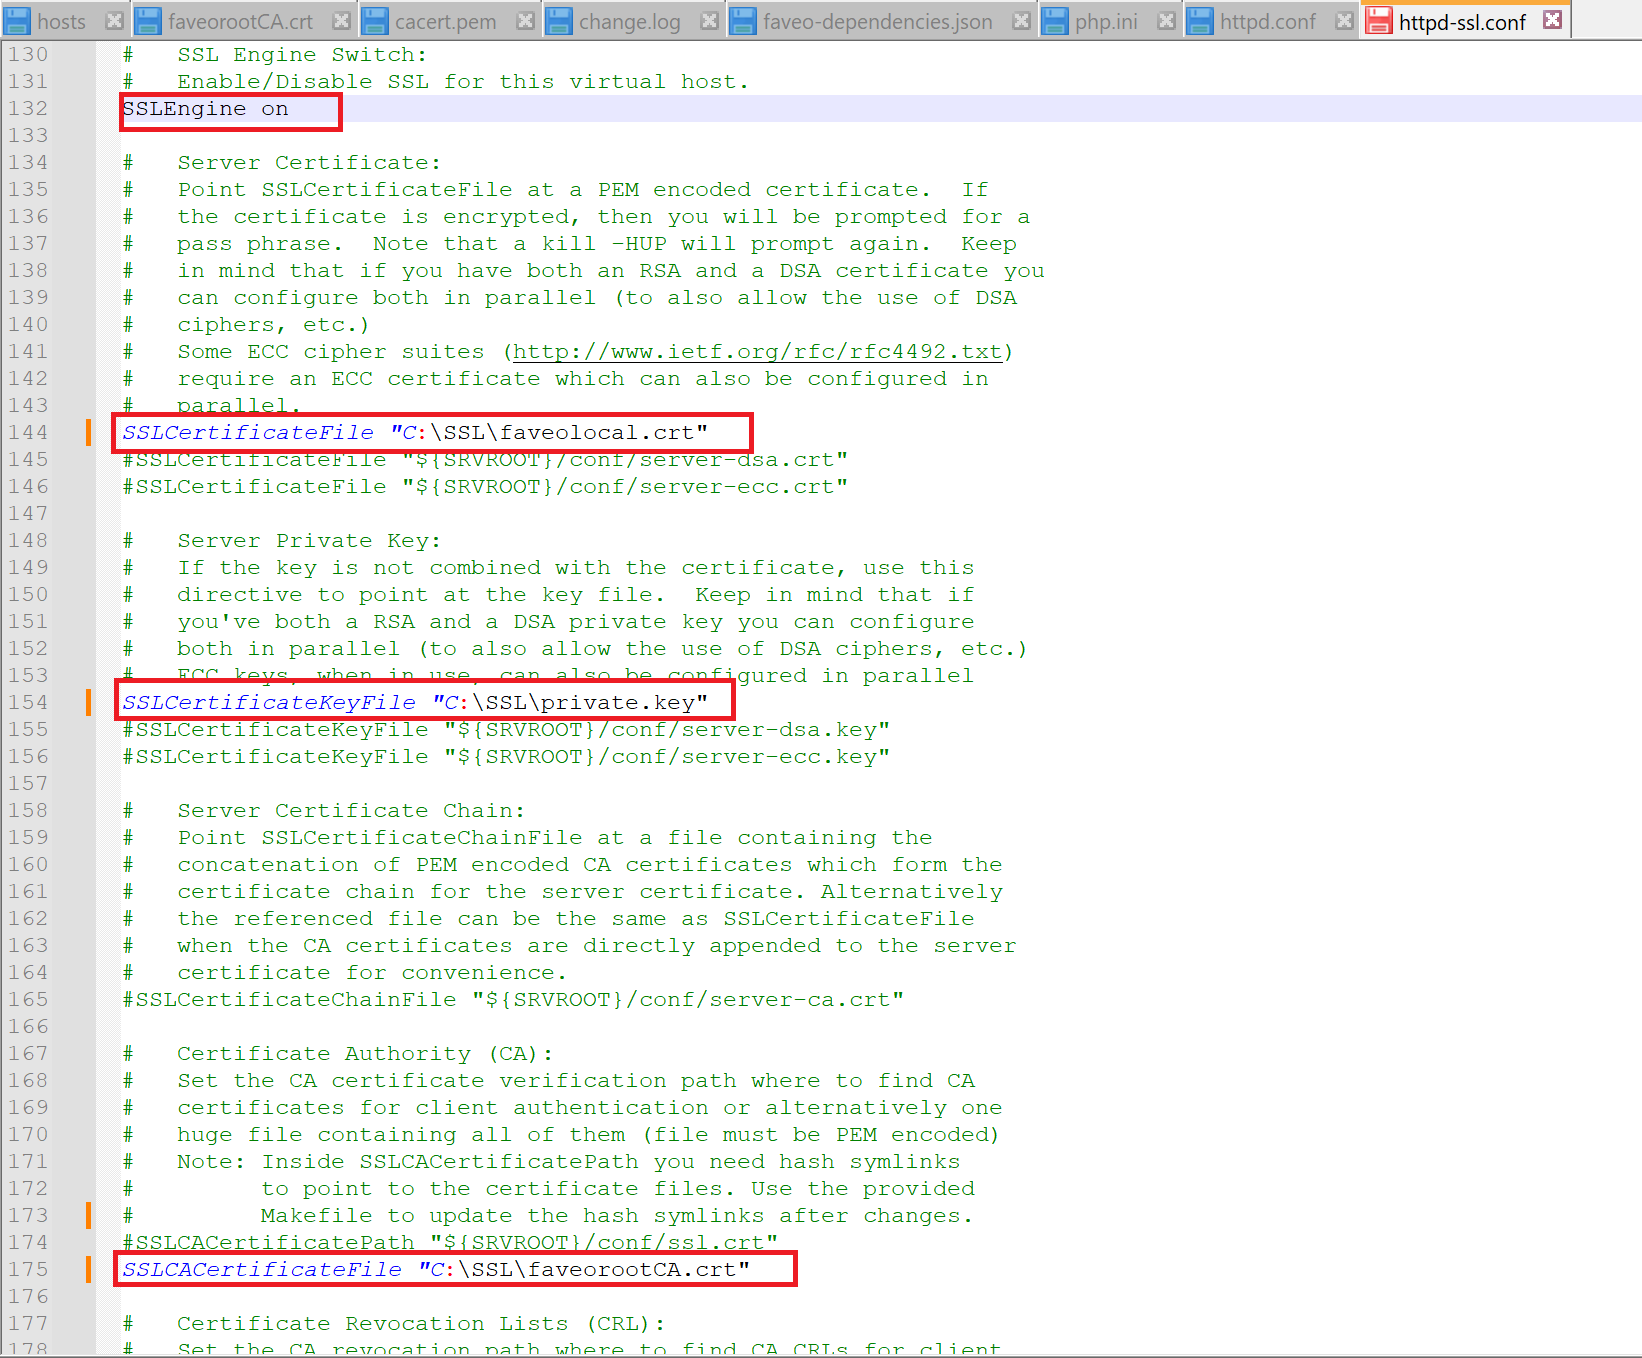
cacert.pemto“openssl.cafile”like.openssl.cafile = "C:\xampp\php\cacert.pem" - Edit the
C:\xampp\apache\conf\extra\httpd-ssl.conffile, search for <VirtualHost default:443> - Turn SSL Engine on & add the certificate paths respectively as shown below:
SSLEngine on
SSLCertificateFile "C:\SSL\faveolocal.crt"
SSLCertificateKeyFile "C:\SSL\private.key"
SSLCACertificateFile "C:\SSL\faveorootCA.crt"
Restart the apache service from XAMPP tray and visit https://faveo.localhost from your browser and Self Sign the certificate.