Install Self-Signed SSL for Faveo on Windows
![]()
Introduction
This document will list how to install Self-Signed SSL certificates on Windows servers.
-
We will be using the tool OpenSSL for creating a Self-Signed SSL certificate in a windows machine.
-
The OpenSSL is an open-source library that provides cryptographic functions and implementations.
-
OpenSSL is a defacto library for cryptography-related operations and is used by a lot of different applications.
-
OpenSSL is provided as a library and application.
-
OpenSSL provides functions and features like SSL/TLS, SHA1, Encryption, Decryption, AES, etc.
Setting up OpenSSL for Windows
With the below commands we can install OpenSSL in the windows server:
Open SSL is not available for windows in .exe format the easiest way to install is by using a third-party software CHOCOLATEY.
Install “Chocolatey” a package management software for windows by using the below command.
Open Powershell.exe with Administrator Privilege, Paste the below command and hit enter
Set-ExecutionPolicy Bypass -Scope Process -Force; [System.Net.ServicePointManager]::SecurityProtocol = [System.Net.ServicePointManager]::SecurityProtocol -bor 3072; iex ((New-Object System.Net.WebClient).DownloadString('https://community.chocolatey.org/install.ps1'))
It may ask for permission please select yes for all and when the installation is over then enter the below command.
Open the command prompt with Administrator privilege and enter the below command to install OpenSSL.
choco install openssl
It will prompt and ask for yes give yes and wait till the installation gets done.
Steps
- Create OpenSSL Configuration File
- Generate Certificate and Private Key
- Export to .pfx format for IIS
- Install the Certificate
Create OpenSSL Configuration File
Create a directory named SSL under the desktop or on any directory.
Create a file openssl.cnf inside the SSL directory created above and save the below content to the file.
[req]
default_bits = 2048
prompt = no
default_md = sha256
distinguished_name = dn
x509_extensions = v3_req

[dn]
C = IN
ST = Karnataka
L = Banglore
O = Faveo
OU = IT
CN = faveo-helpdesk.local

[v3_req]
basicConstraints = CA:FALSE
keyUsage = digitalSignature, keyEncipherment
extendedKeyUsage = serverAuth
subjectAltName = @alt_names

[alt_names]
DNS.1 = faveo-helpdesk.local
Note: Please provide the below details according to your need:
C = IN
ST = Karnataka
L = Banglore
O = Faveo
OU = IT
CN = faveo-helpdesk.local
DNS.1 = faveo-helpdesk.local
Generate Certificate and Private Key
Open the command prompt from the SSL Directory and run the below command which will create the certificate and the private key.
openssl req -x509 -nodes -days 3650 -newkey rsa:2048 -keyout private.key -out faveo.crt -config openssl.cnf -extensions v3_req
Compiling the created certificate and key file as .pfx file
As windows need the certificate file in .pfx format which will contain the both certificate and the key file, so we need to convert the created files to .pfx format, this can be done with the below command.
openssl pkcs12 -export -inkey private.key -in faveo.crt -out faveo.pfx
The above command will create a .pfx file with the name faveo.pfx in the SSL directory.
Installing the SSL certificate
-
The installation of the SSL certificate is simple in windows machines we need to double click on the faveo.pfx file that we created from the above step which will open the certificate installation wizard.
-
Click on install certificates and all the settings to be left default and once the installation is successful it will prompt the installation is successful.
-
Once the Certificate is installed we need to add the faveo.crt file content to the cacert.pem file which will be in the below location:
C:\php8.2
- After adding that we need to edit the host file which will be in this location
C:\Windows\System32\drivers\etc
- And add the below line by replacing the yourdomain with the domain that we used to create the server SSL certificate.
127.0.0.1 yourdomain
- If the above is done we need to edit the php.ini file which is found inside the PHP root directory. Uncomment and add the location of cacert.pem to openssl.cafile like.
curl.cainfo = "C:\php8.2\cacert.pem"
openssl.cafile = "C:\php8.2\cacert.pem"
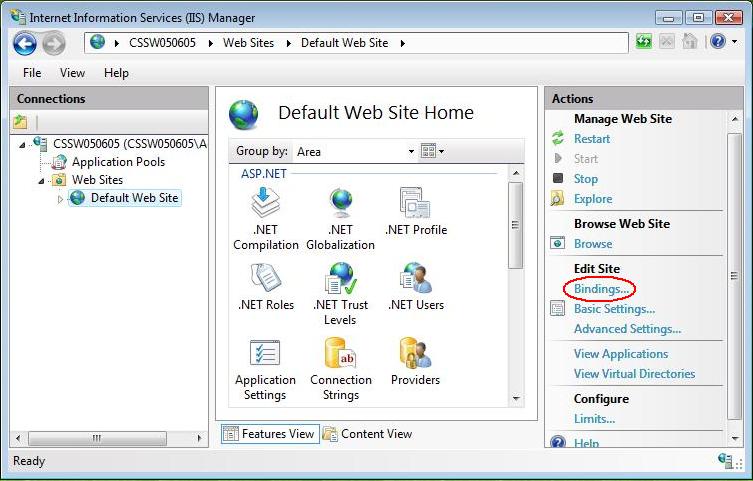
- After updating the above, the last part is to add bindings for the SSL.
-
As shown below open the IIS manager and click on the site and on the right pane select Bindings.
-
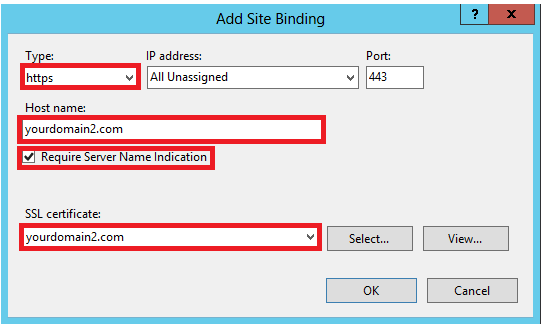
As shown below there will be a prompt, there select Add option.

-
As shown below change the HTTP to HTTPS and add the domain name in the Hostname section and select the SSL certificate which we installed and click OK.
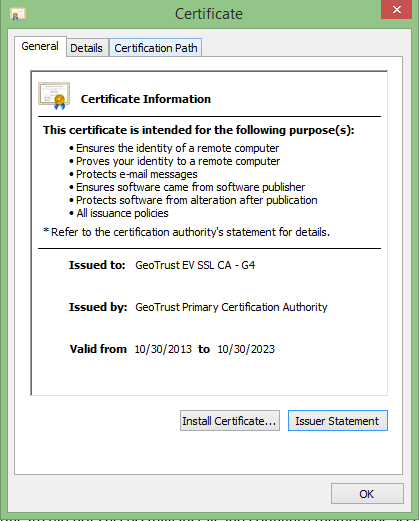
The certificate is installed successfully, since this is a self-signed certificate the browser will show not valid since the faveo considers the server-side SSL certificates in the probe page Domain SSL will be valid.
Note: If the SSL certificate is not shown in the Bindings tab then follow the below steps:
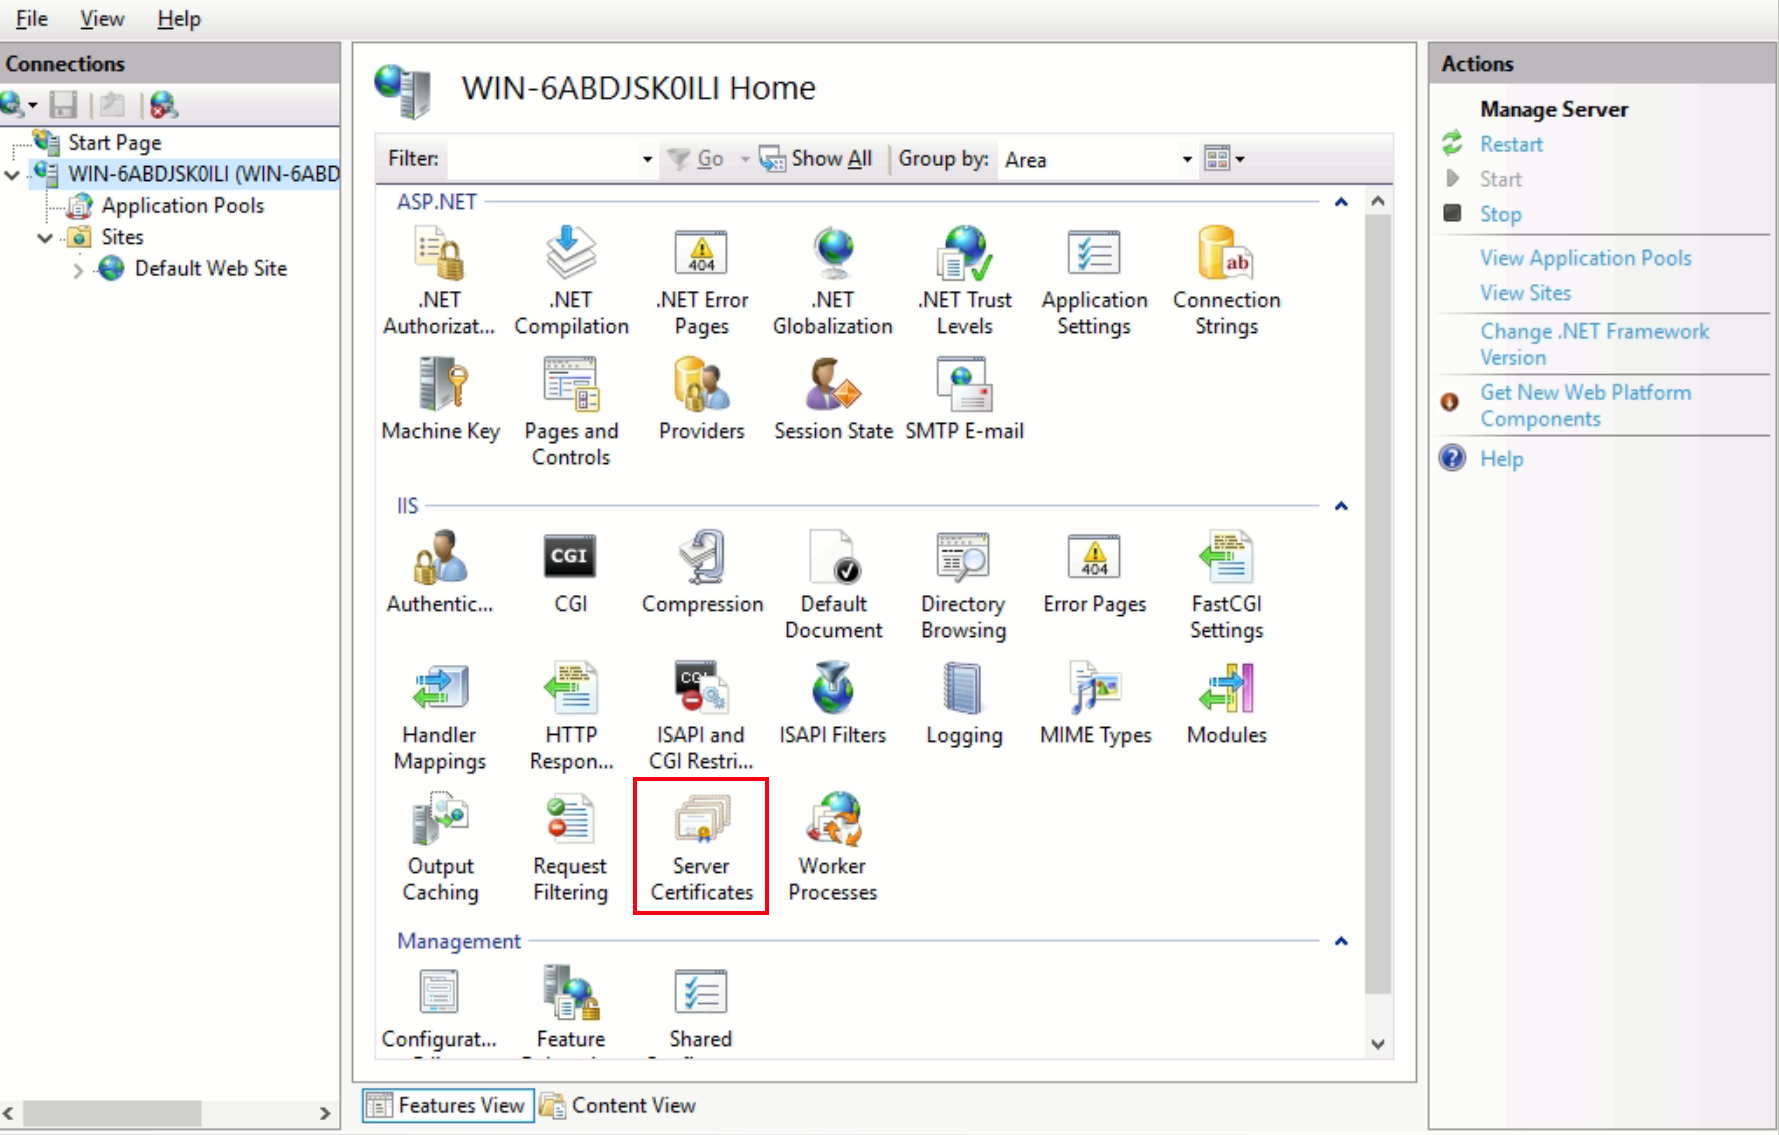
- Open IIS manager and go to Server Certificates, double click on it a new tab will appear.
- Click on Import, a small tab will open, click on three dots and navigate to the faveo.pfx file, select the faveo.pfx file and enter the password if the certicate is password protected, then click on OK, the SSL certificate will be exported.

- Now add Bindings for the certificate as shown as shown above.