Faveo Web GUI Installer
Faveo comes with a web-based installer to help and guide you through the installation process. While the installer provides step by step guide during the installation, it’s important and helpful to have general knowledge about Web servers, PHP and MySQL.
Before getting started make sure your server meets following minimum requirement required to install and use Faveo
Getting Started
Download the latest version of Faveo from https://billing.faveohelpdesk.com and upload the .zip files in the folder/directory on your server.
Faveo Community version can also be downloaded directly from Github
Basic knowledge of using FTP is an added advantage at this stage. If you don’t know how to use FTP, we would recommend you read the documentation supplied with your FTP client and learn the basics of uploading and setting permissions on files.
You can get the installer by simply browsing the Faveo URL (Faveo Hosted URL). Faveo installation script will attempt to auto-detect paths and any permission issues. By following the given instructions, you can complete the installation and basic setup in a web browser. If the installation spots any configuration errors then it will not allow you to continue until the errors are corrected.
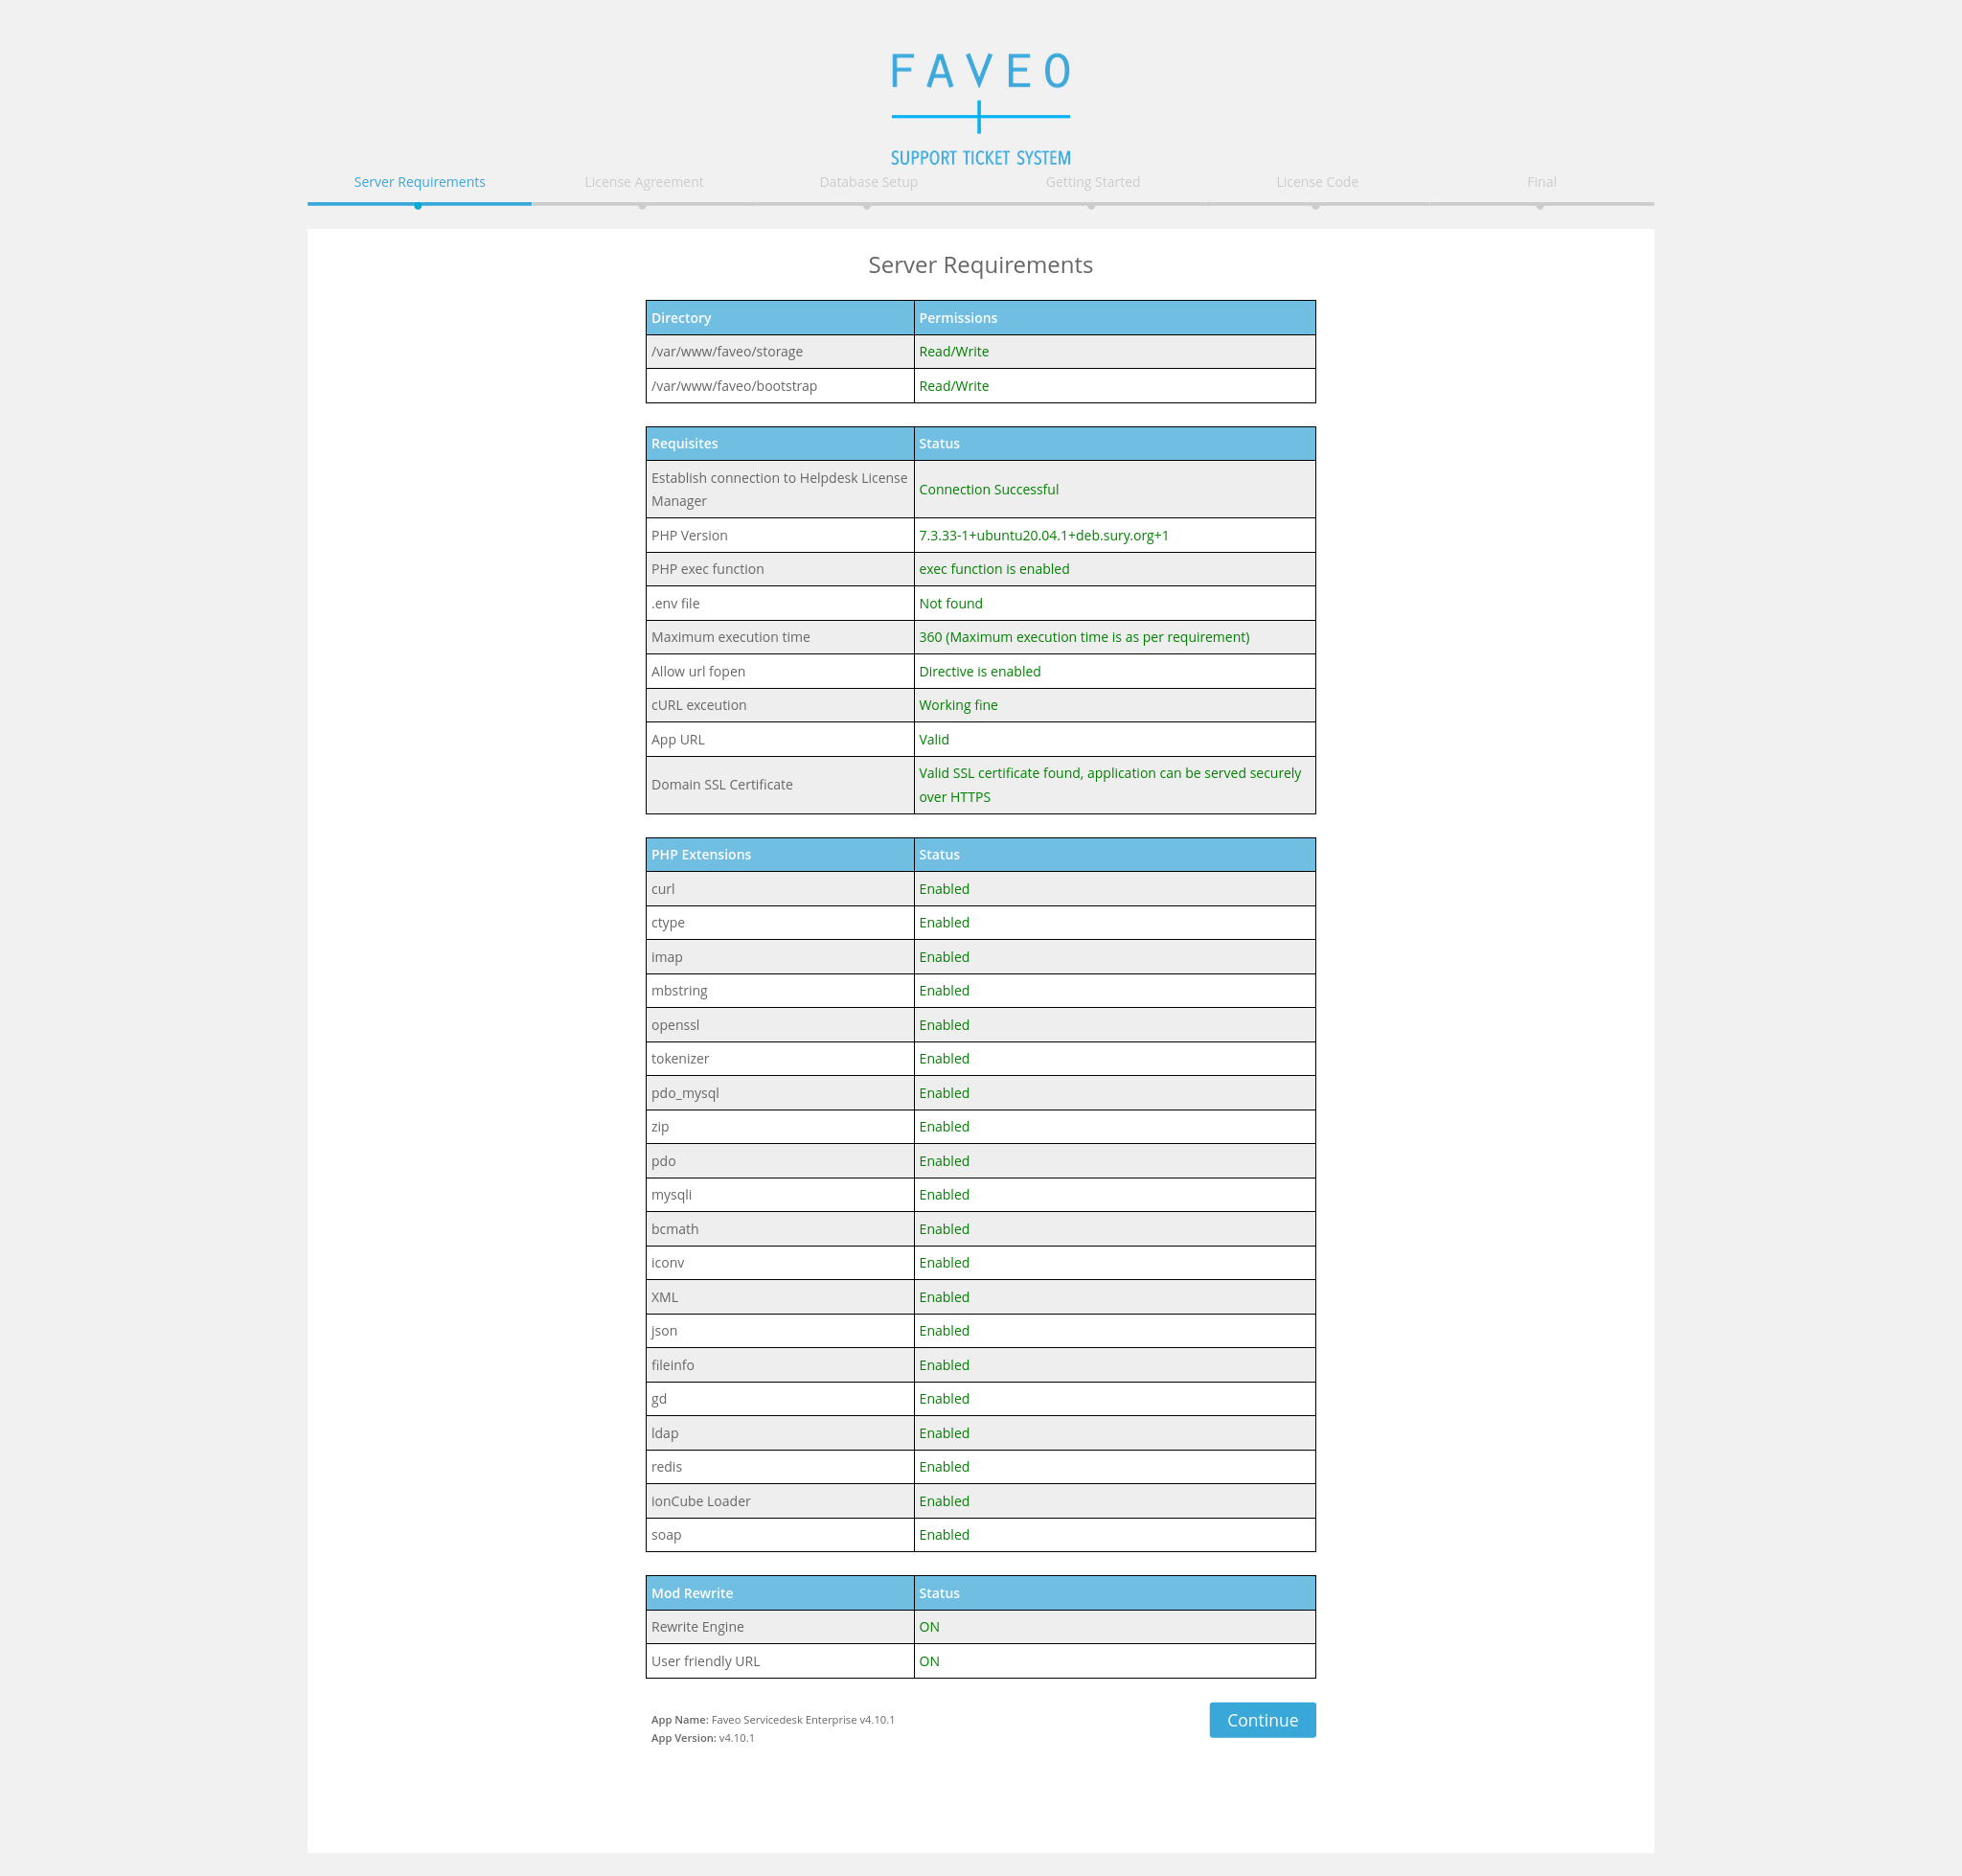
Step 1: Server Requirements
The installer will perform the system requirement test and if it spots any errors then it will not allow you to continue until all the requirements are met. When all your server checklists are configured correctly it displays as “Enabled” and you click on the Continue button to move on with the installation process.
Step 2: License Agreement
Accept the License Agreement and click on Continue to proceed with the installation.

Step 3: Database Setup
Establish the database connection by providing the database details.
Fill the Database Name, Database username, and password in the specified boxes like below.
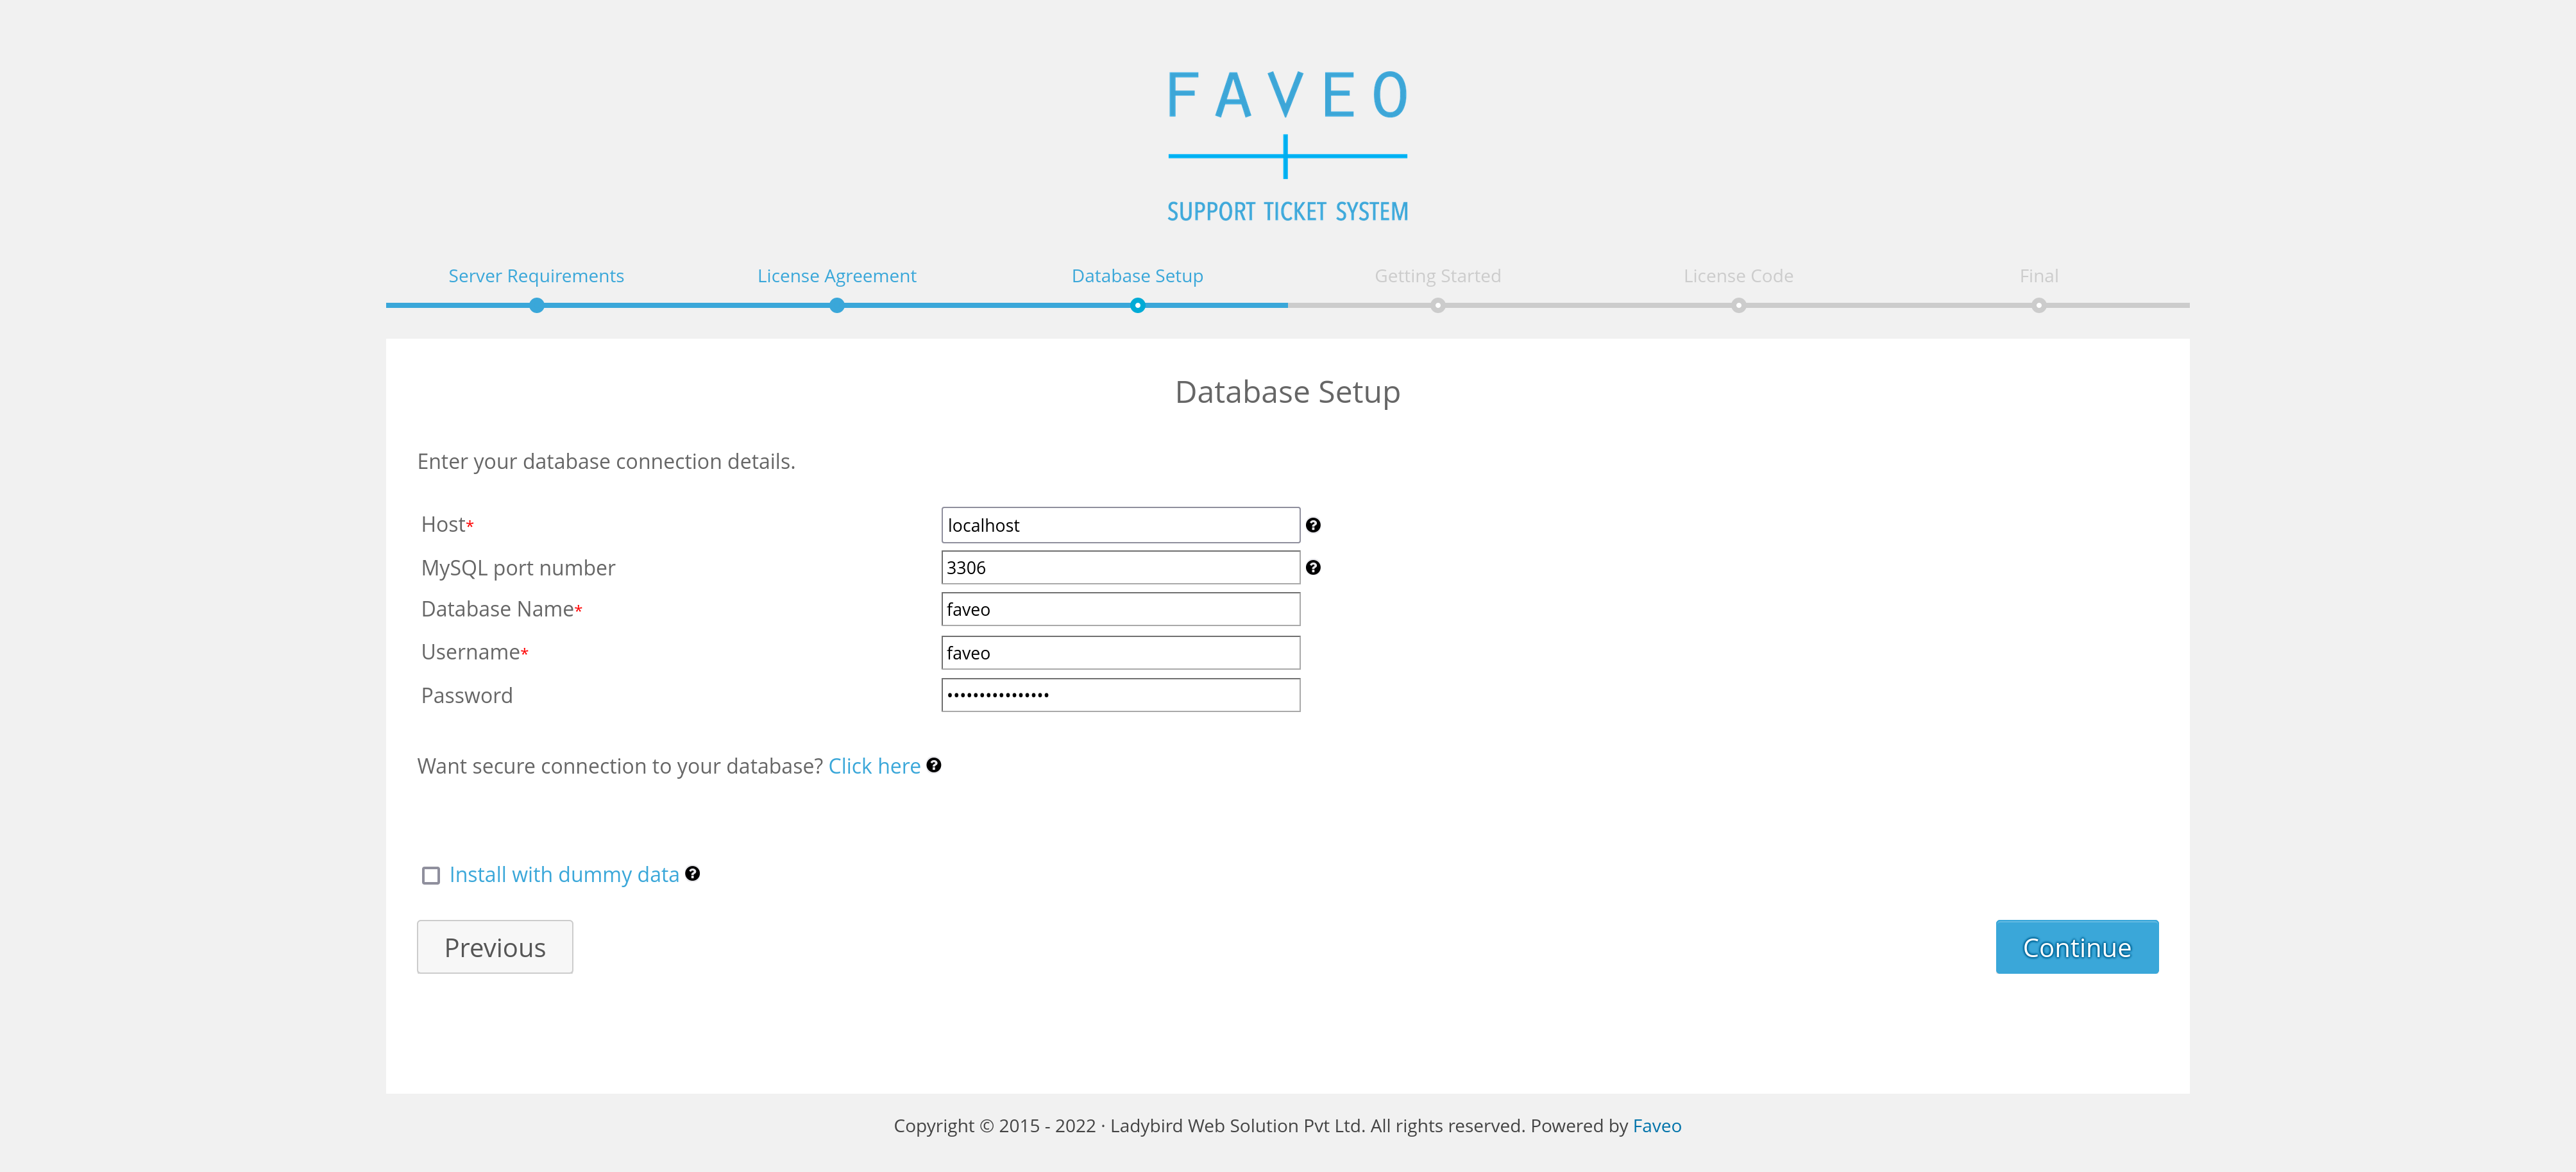
If you need to use SSL for a secured connection to the DB, click on the click here option and you can add the SSL details on the respective feilds like below.

Click on the Continue button. If the given database details are valid it will show the “Database connection successful” message as below. If any error message is received refill the details and retry the connection of the database.

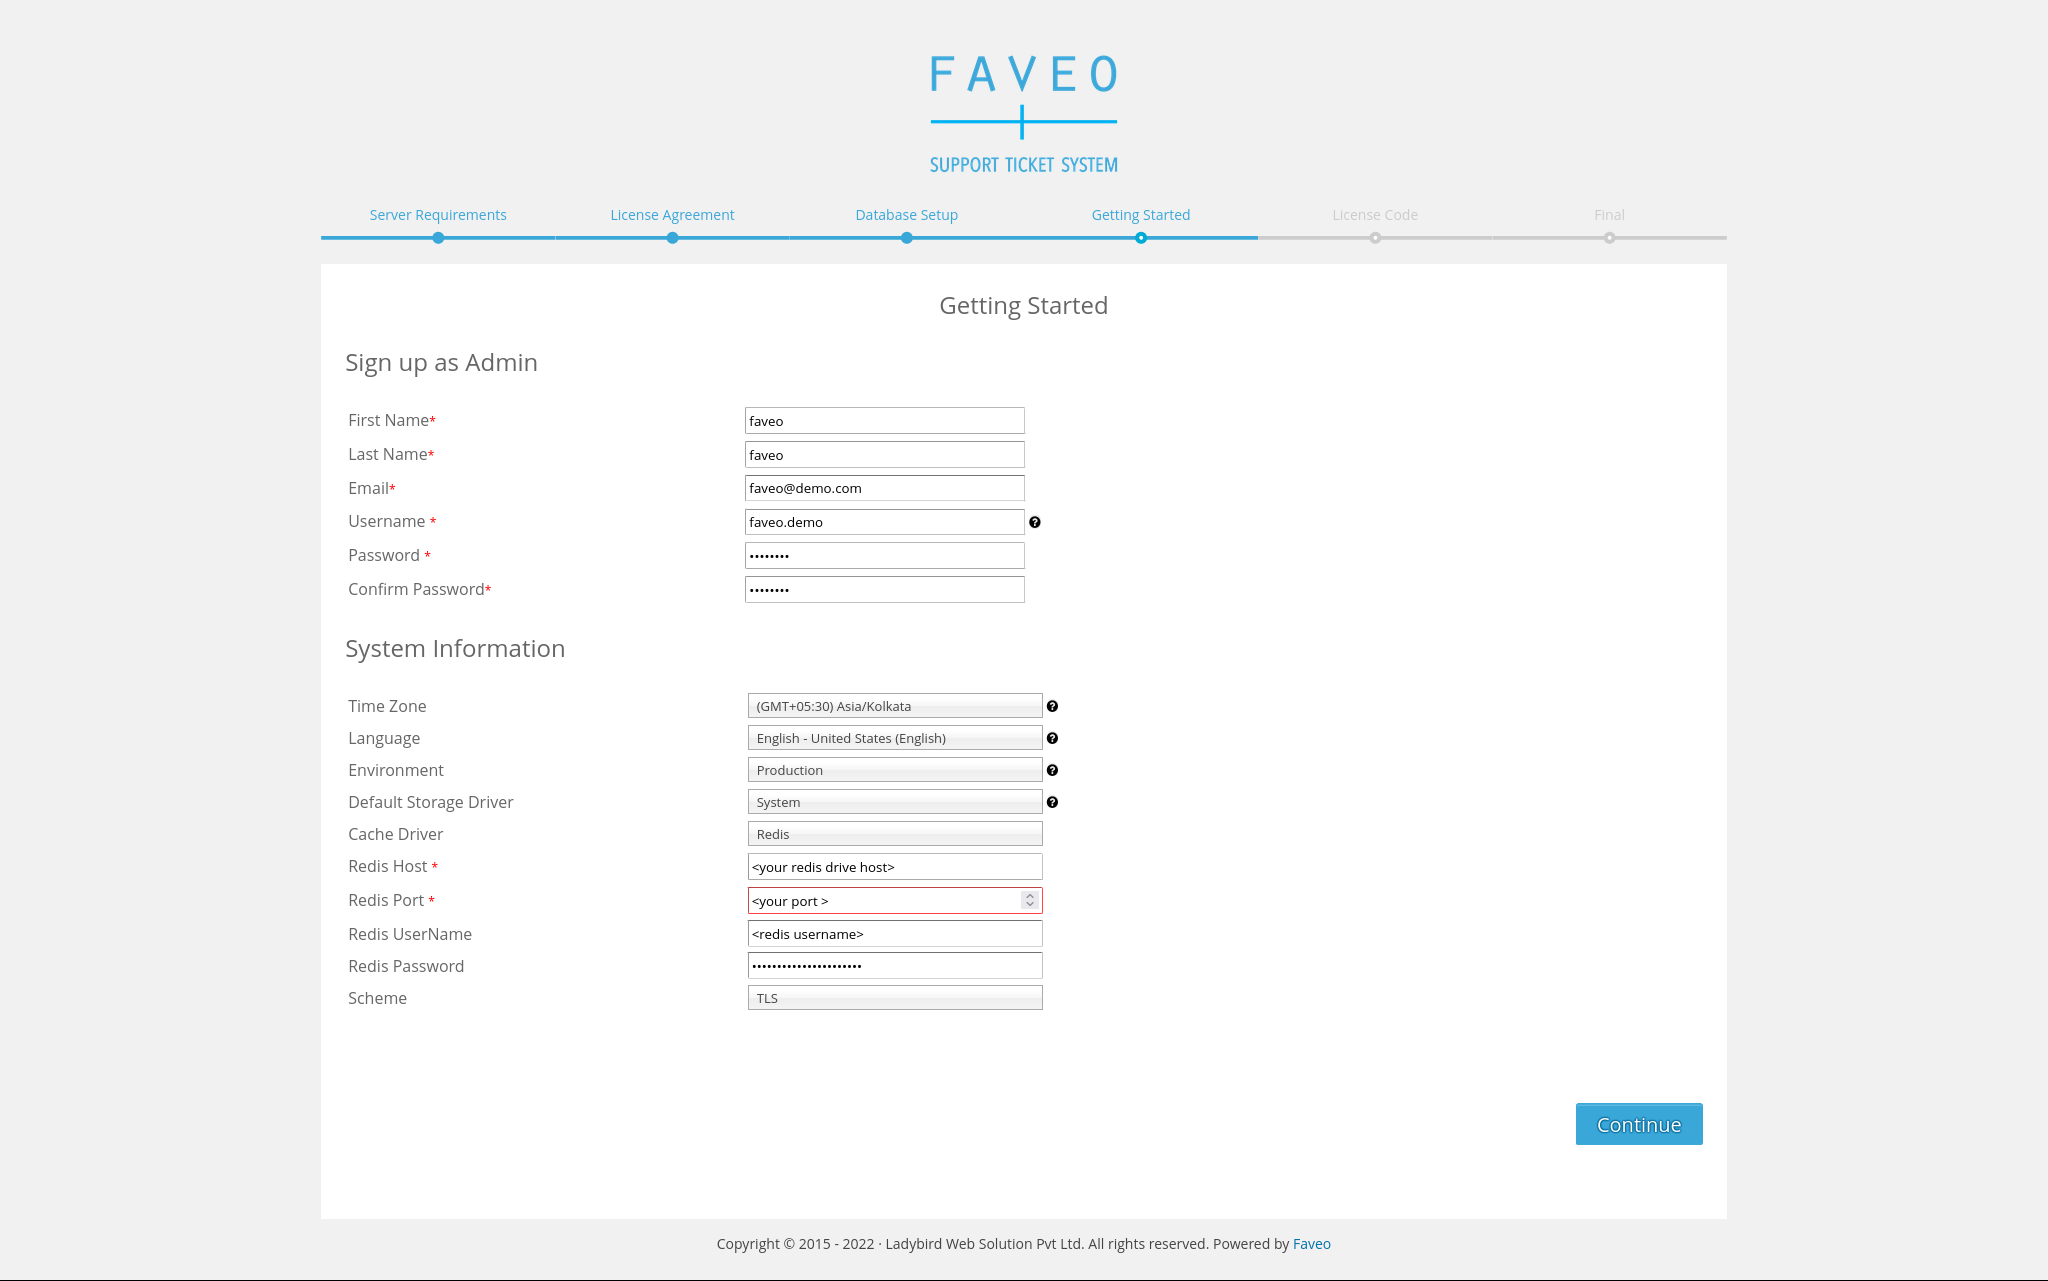
Step 4: Locale Information
Provide the system locale information as system login details and system language, system time.

And we have an option to change queue, storage drive and enviornment to redis as shown in below snaps.

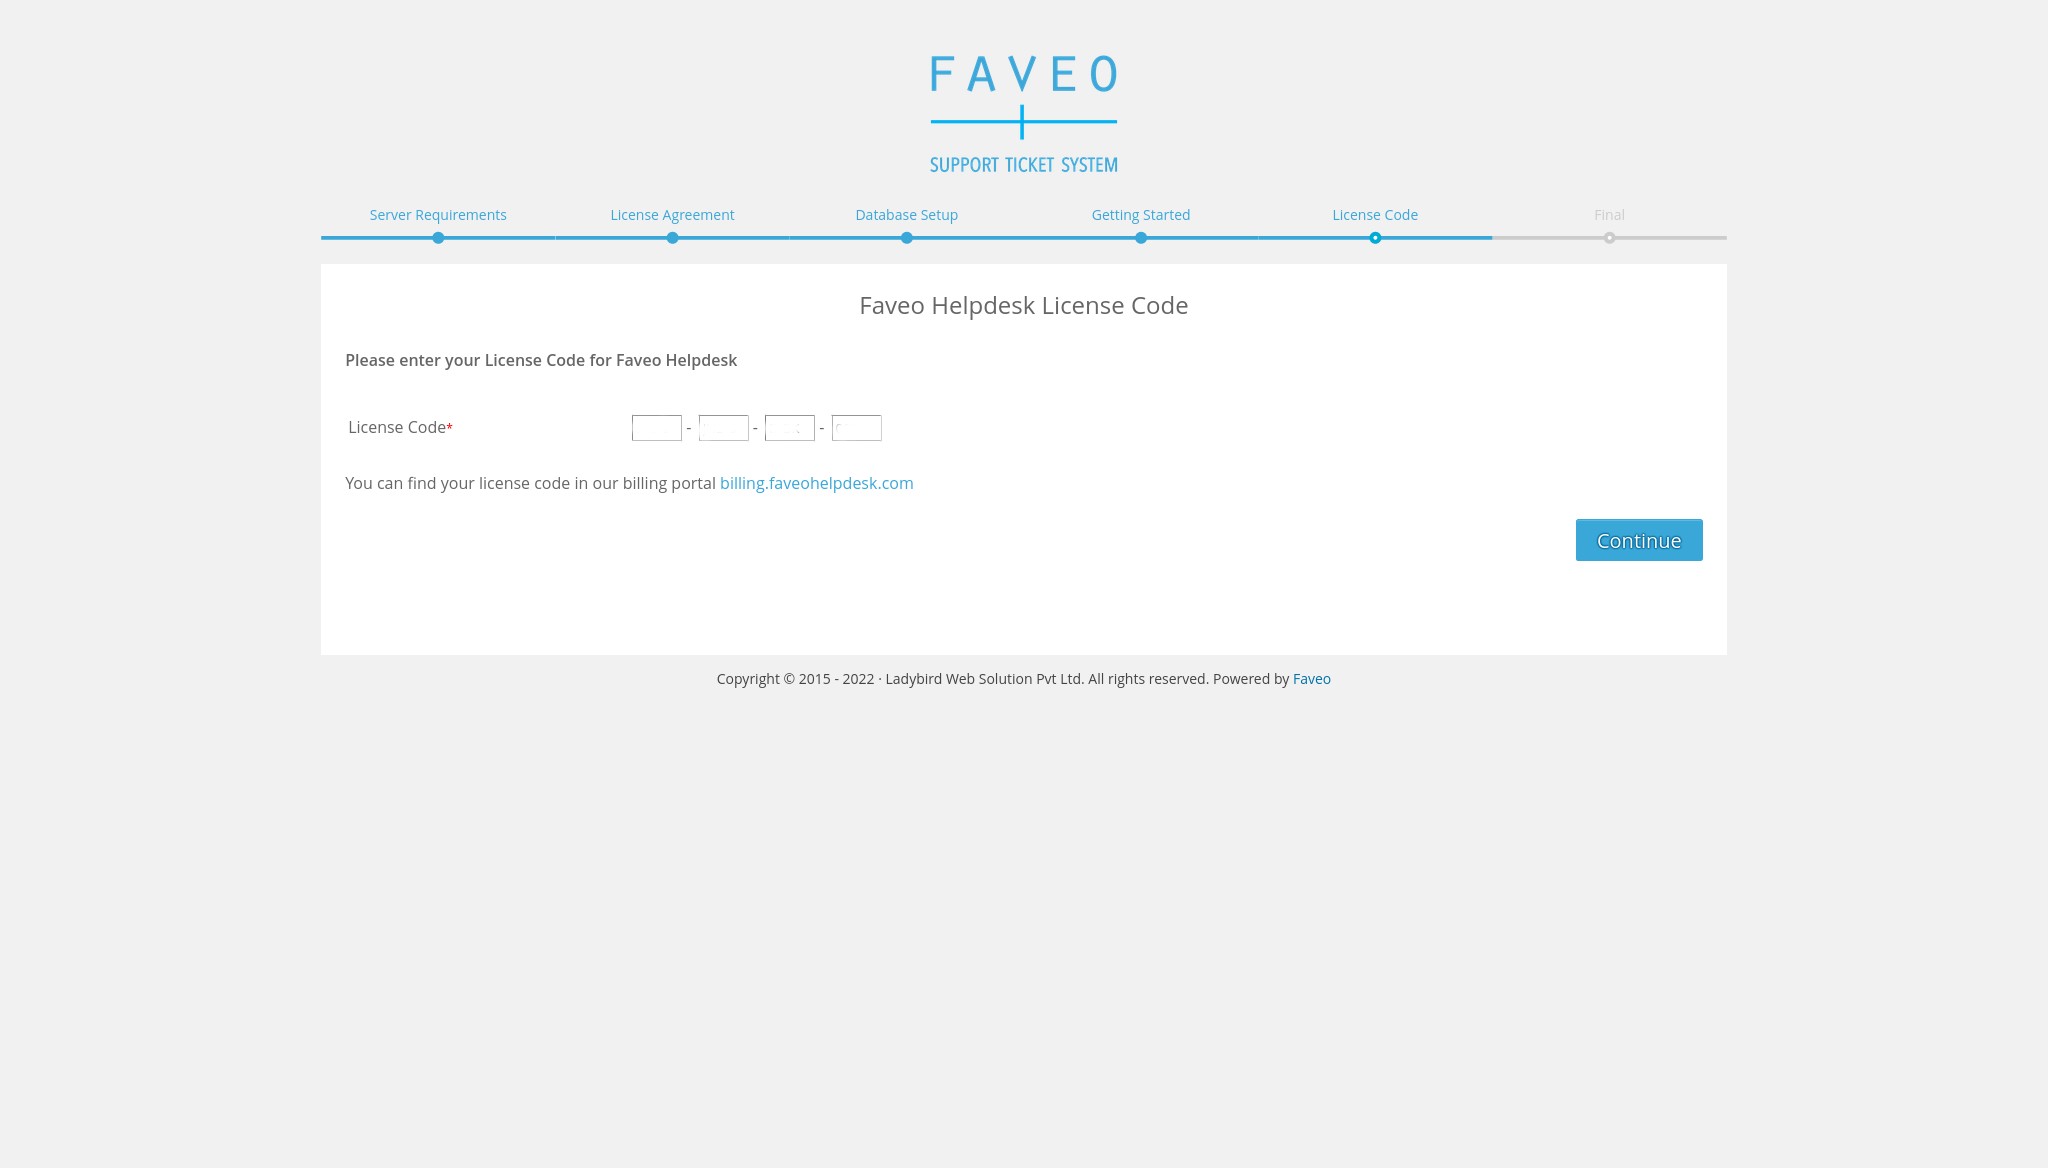
Step 5: License Key
Product License Key: Provide the license key received for the purchased product and click on the Continue button. Refer the link How to get the product license key?
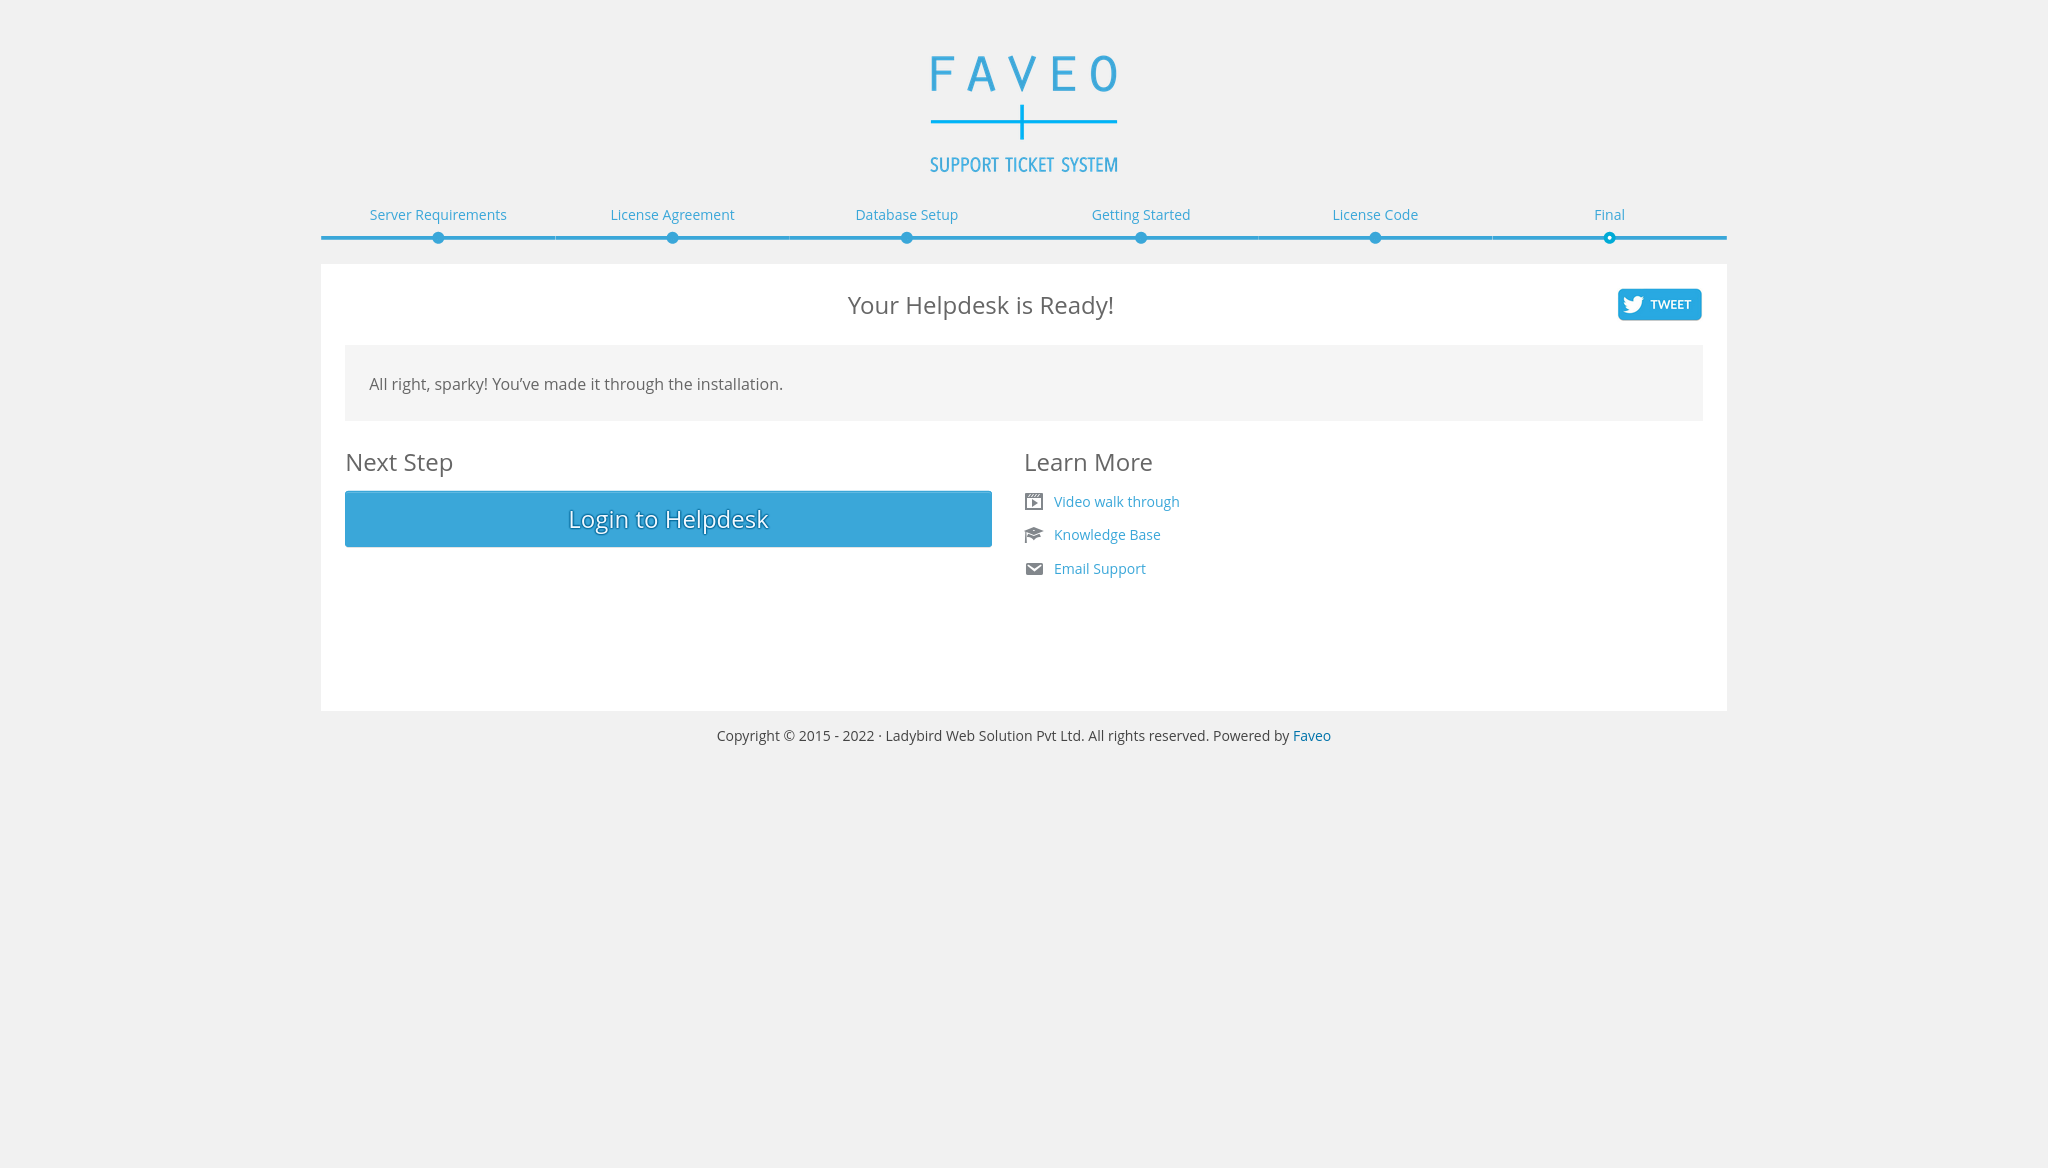
Congratulations! Faveo is installed and operational!
Step 6: Start using Faveo
Go to the browser and hit the Faveo URL to login and start using faveo
Note: Installer performs basic configuration, required to get Faveo up and running. Further configuration is required post-install, to make the system fully functional like
- Email configuration
- Setting Cron Job URL
Faveo can be also installed via a CLI installer.