Faveo Installation on Plesk Panel Windows Server
This document will guide you on how to install Faveo Helpdesk on a Plesk Panel Windows Server.
Note: Need Windows fresh server to Install Plesk Panel.
1.Download and Install Plesk Panel
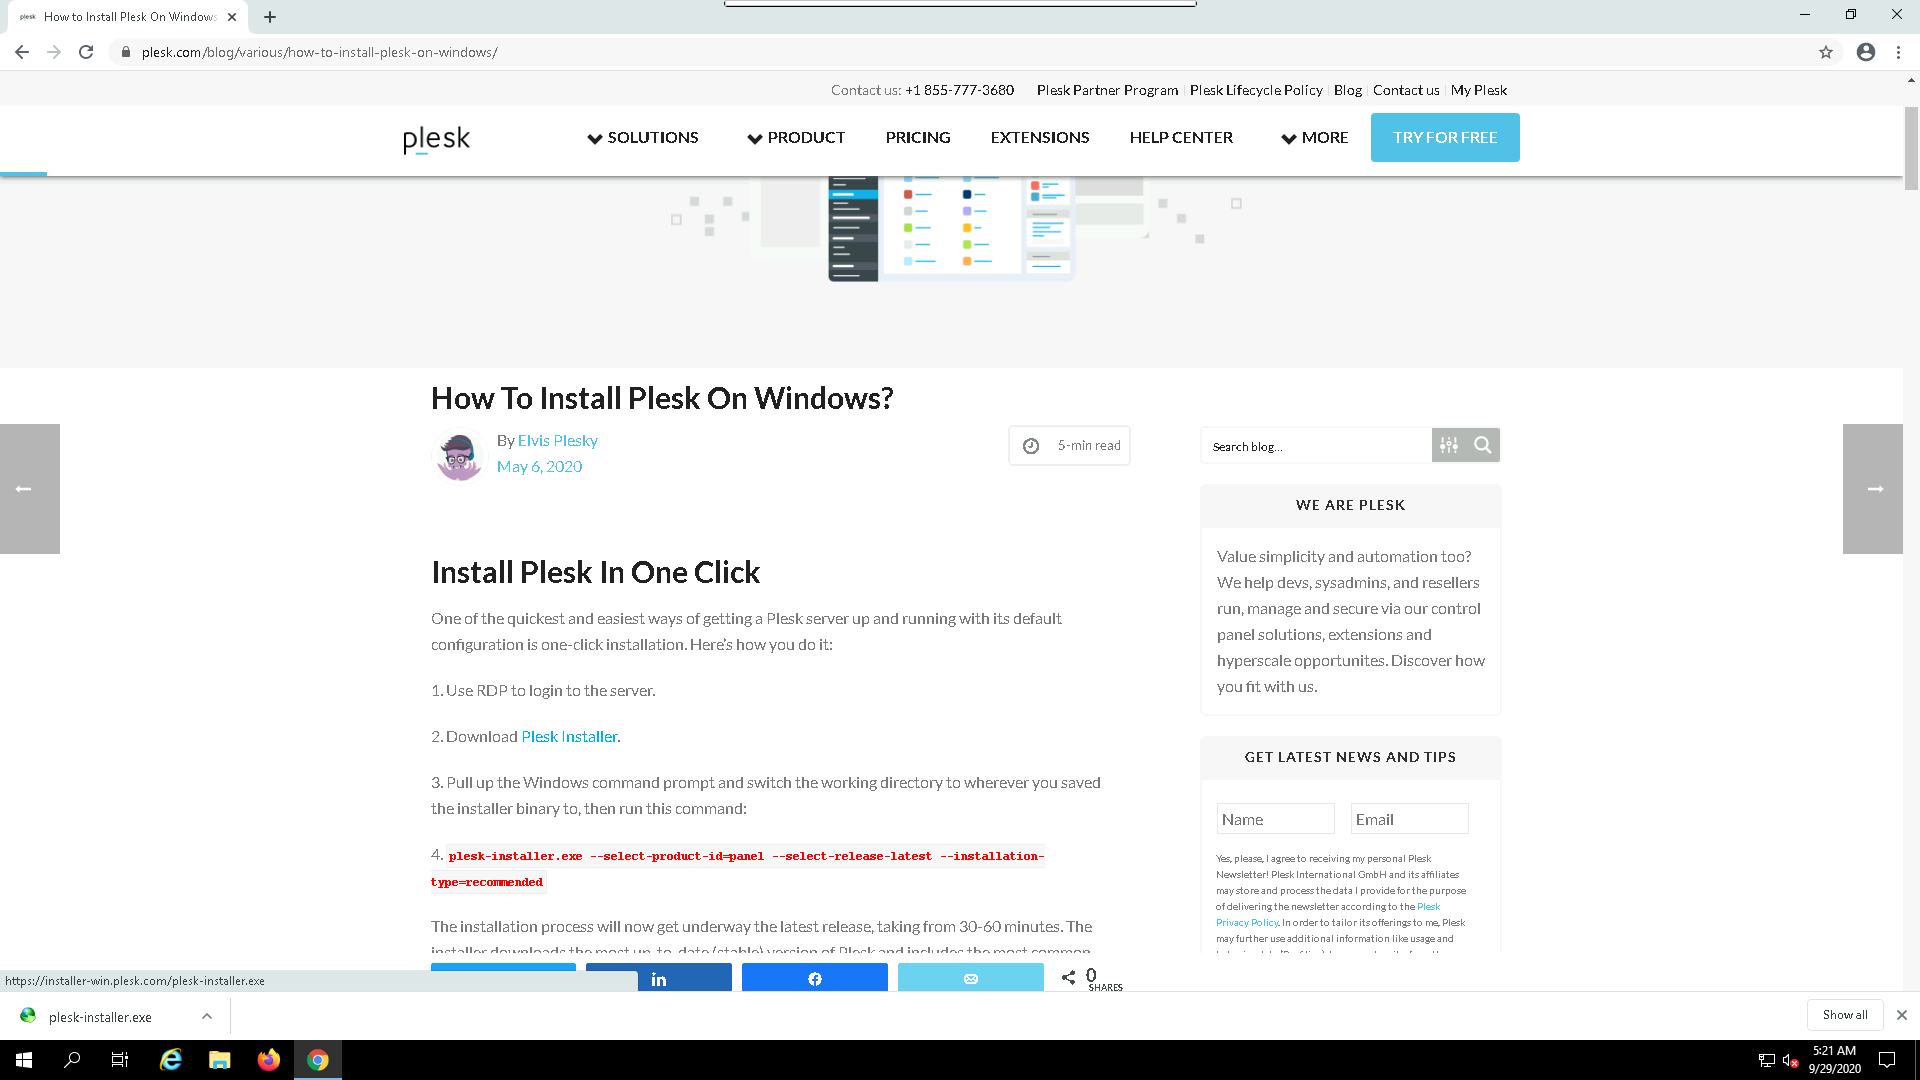
Download the one click Plesk installer by visiting the official plesk site. you can download from the below link
https://www.plesk.com/blog/various/how-to-install-plesk-on-windows/
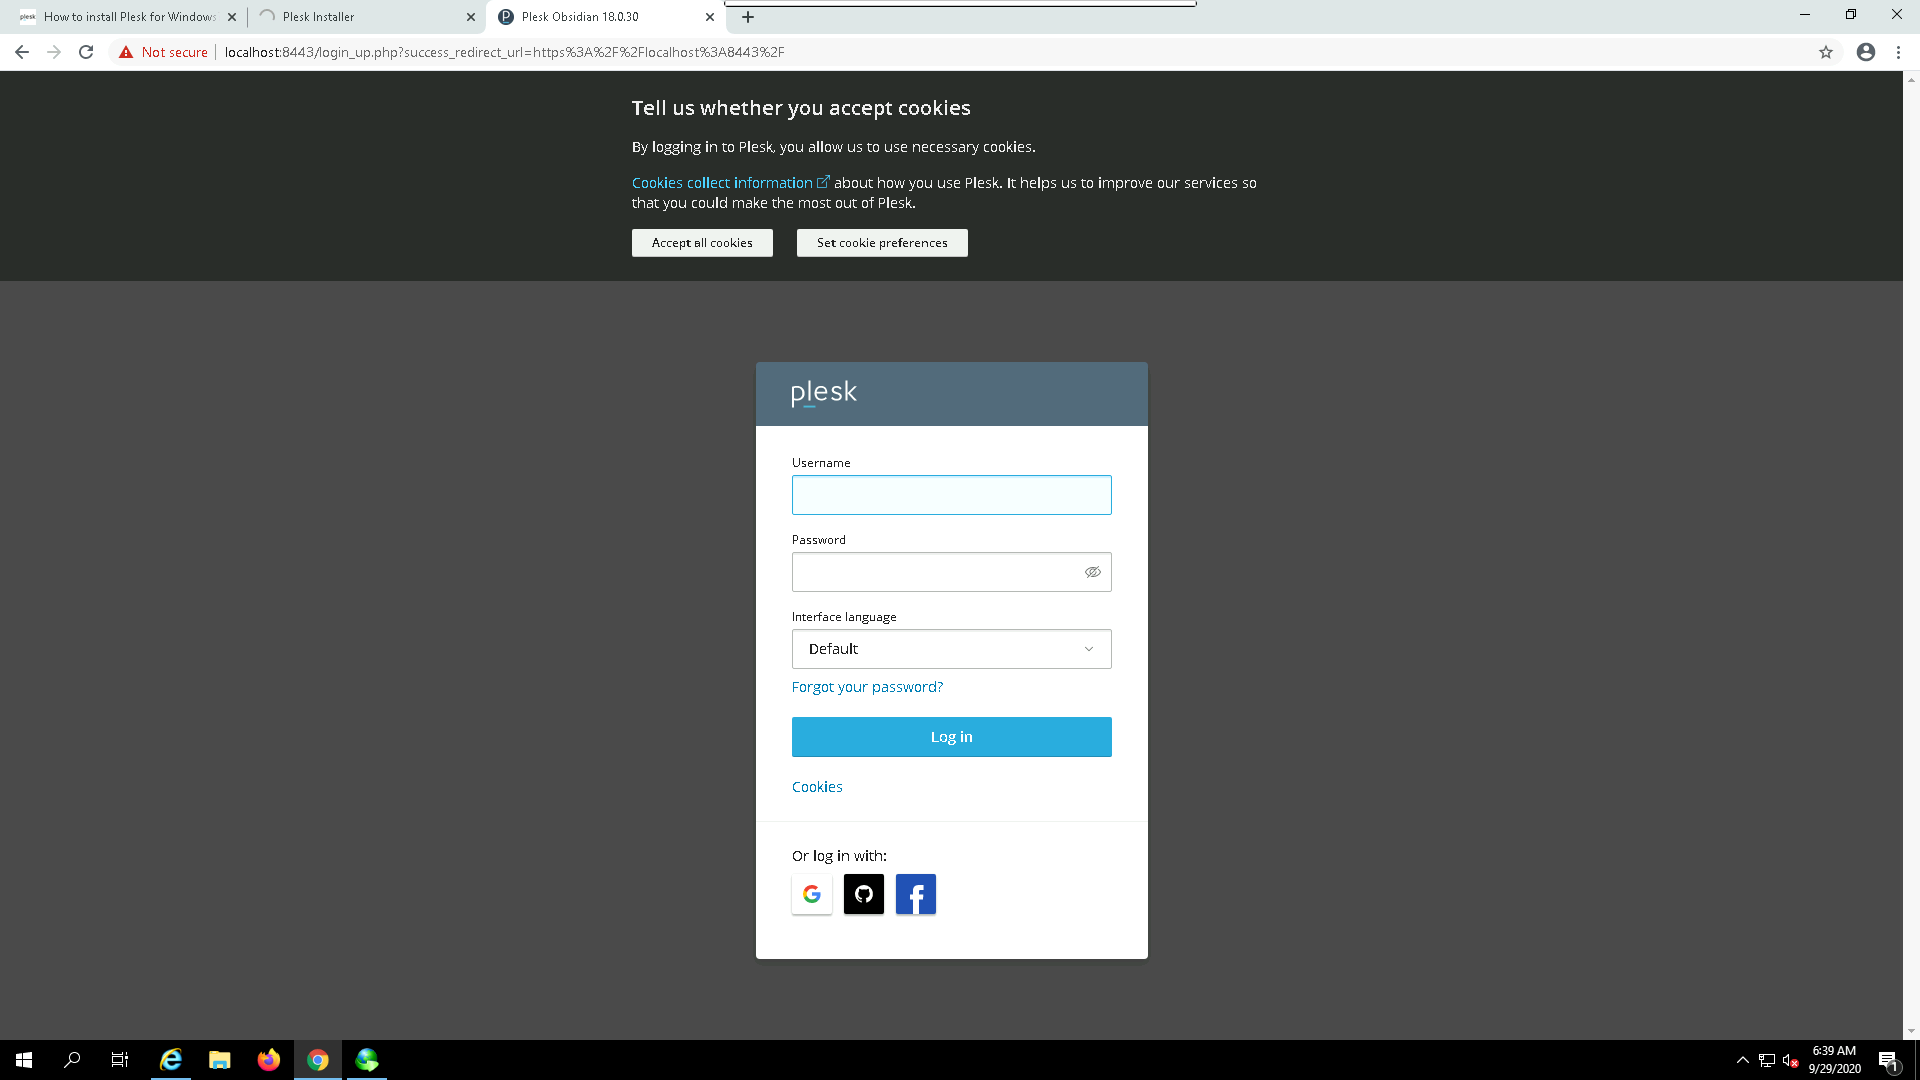
Now upon executing the installer you will shown a login page. Input the Administrator password and click login button.
Note: If you have logged in as a different user intead of “Administrator” then input that respective user’s password.

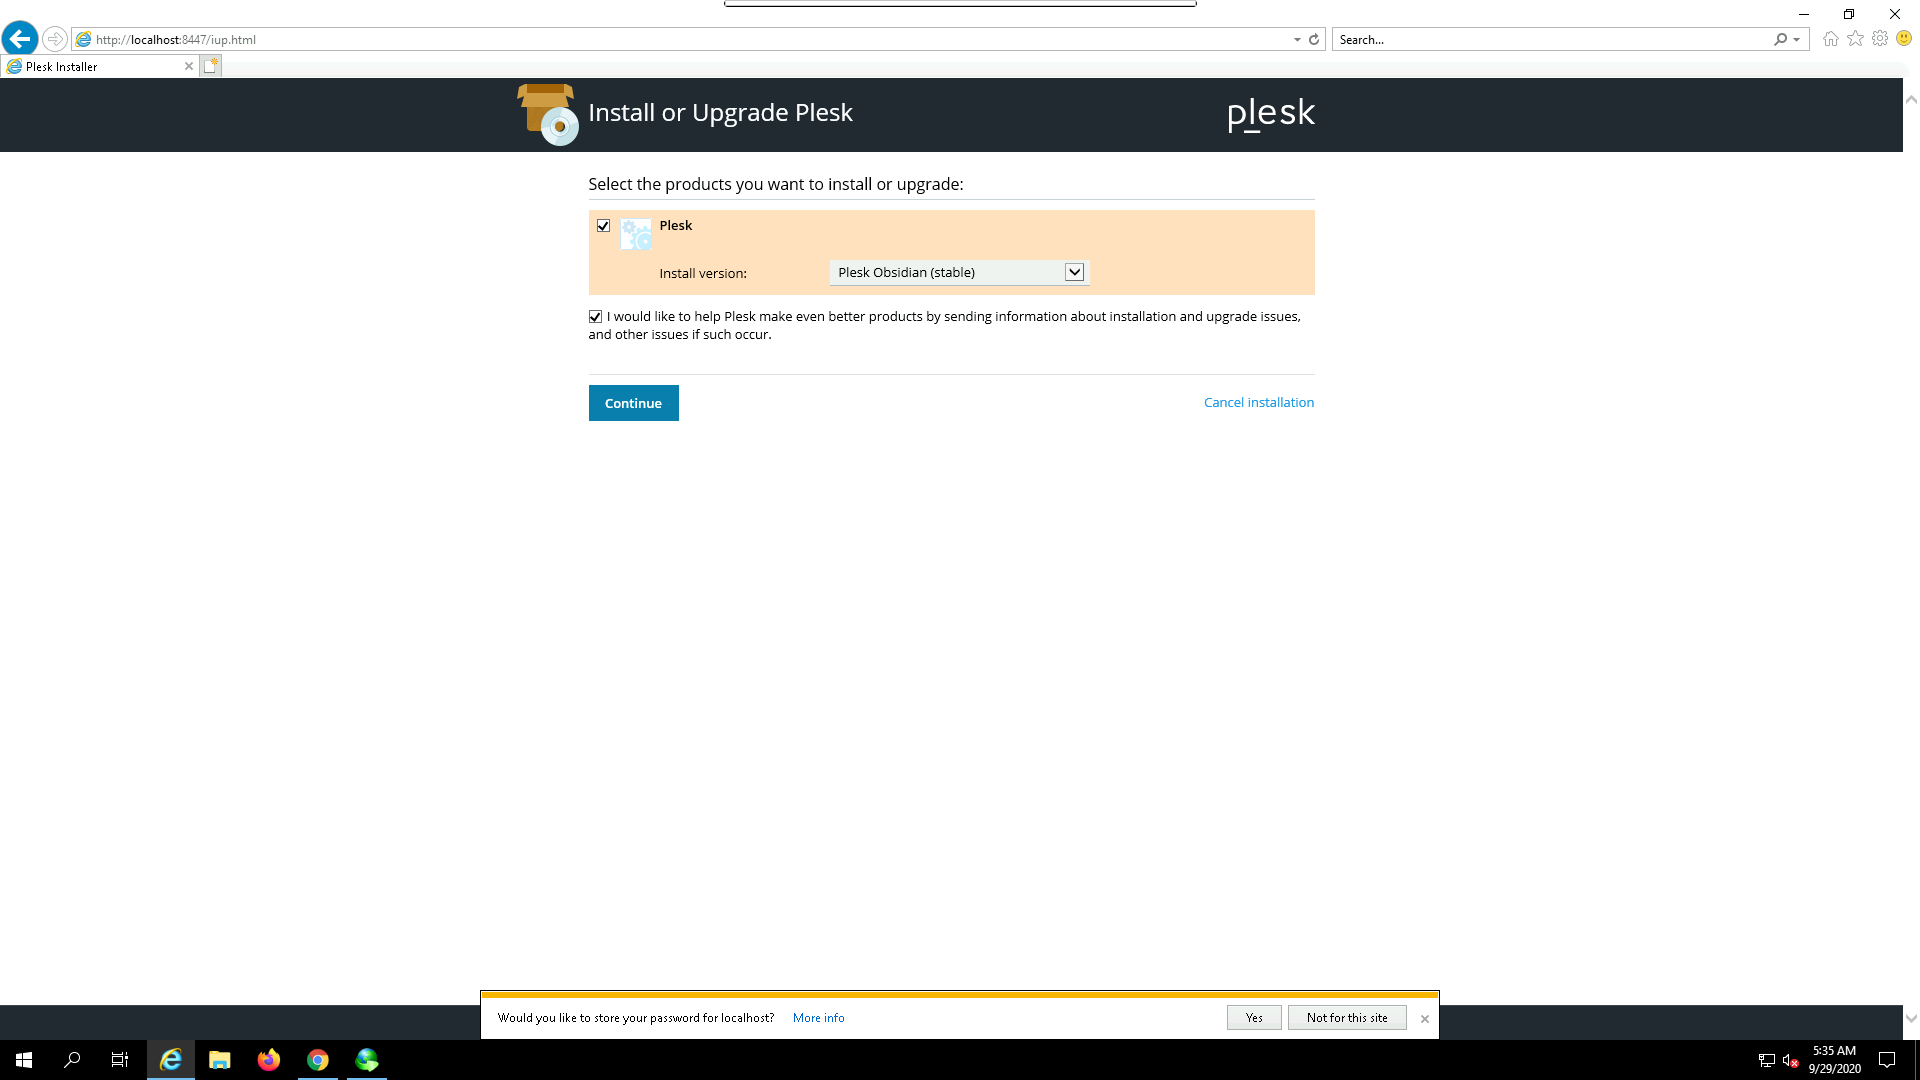
Select Install or Upgrade Product.
Enable the Checkbox for Plesk and click on continue
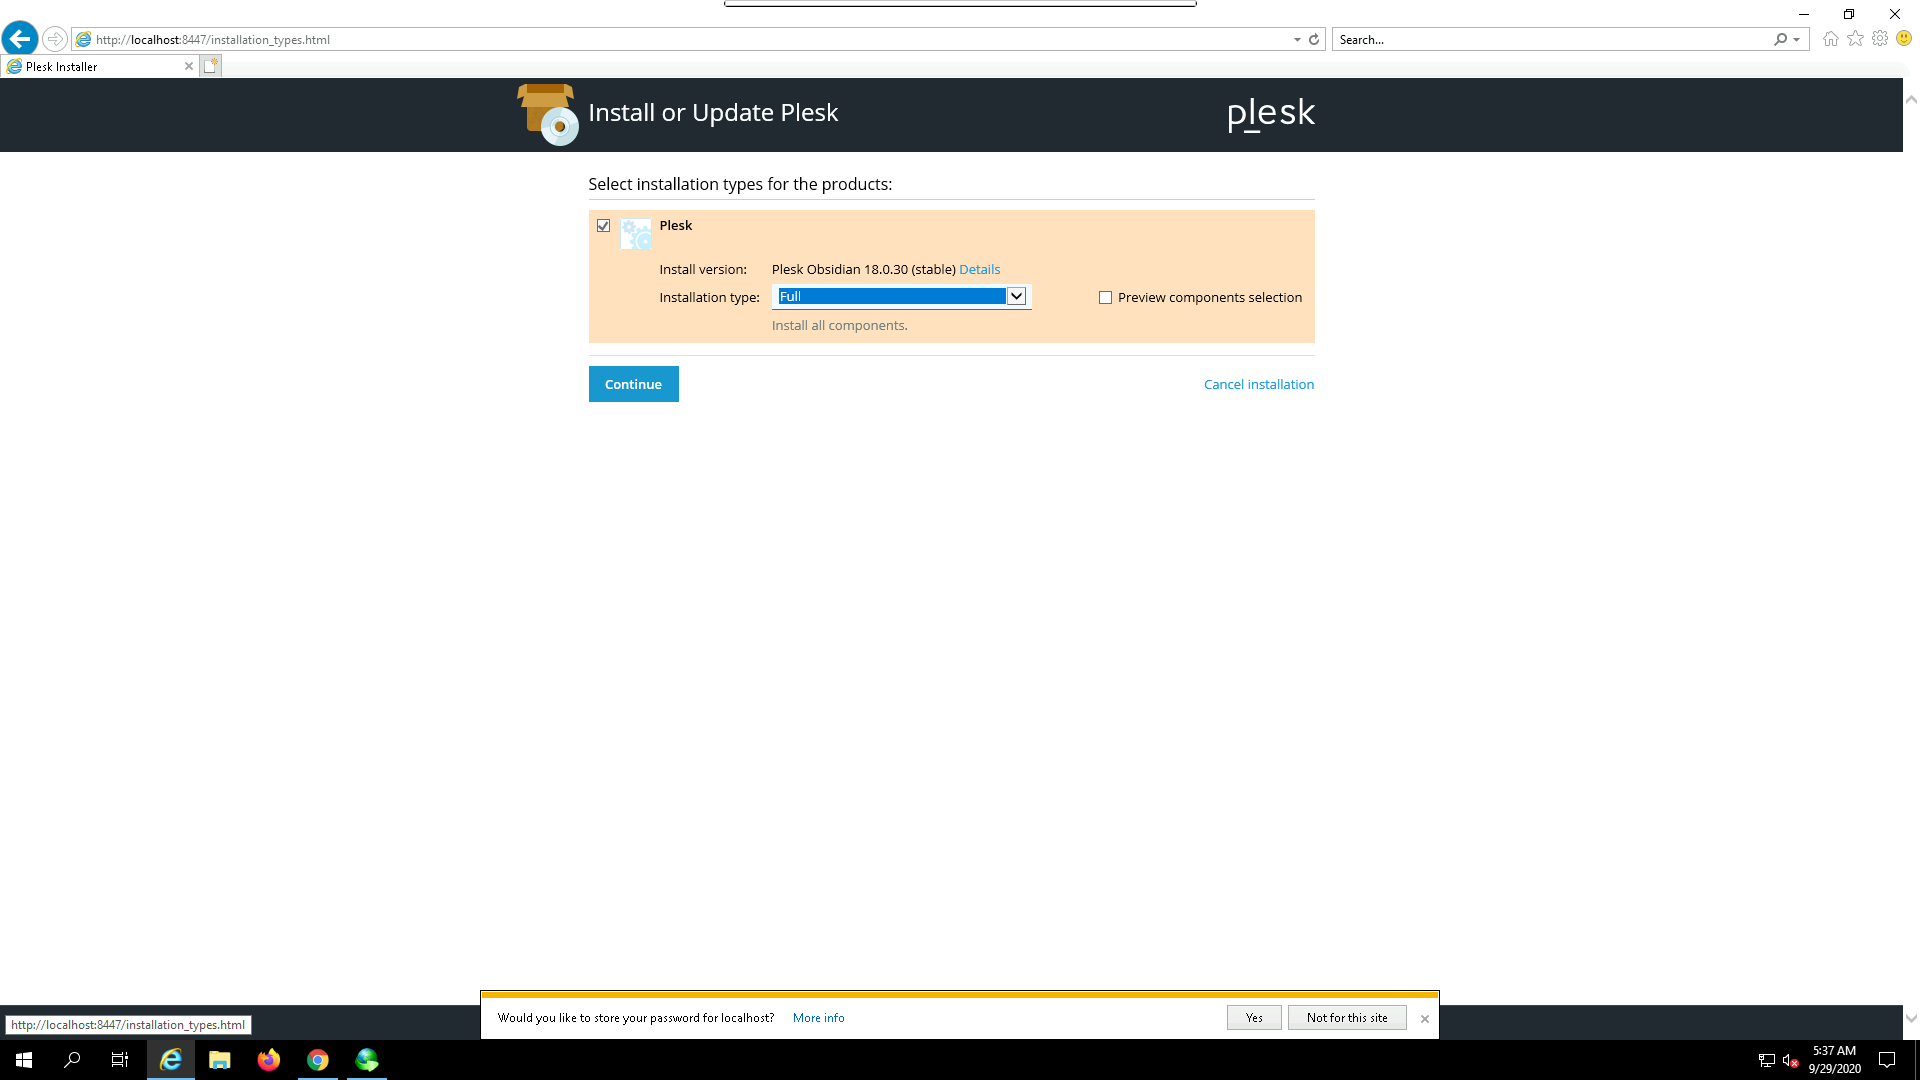
You will be prompted again asking for the Installation type select recommended or Full and click on continue.
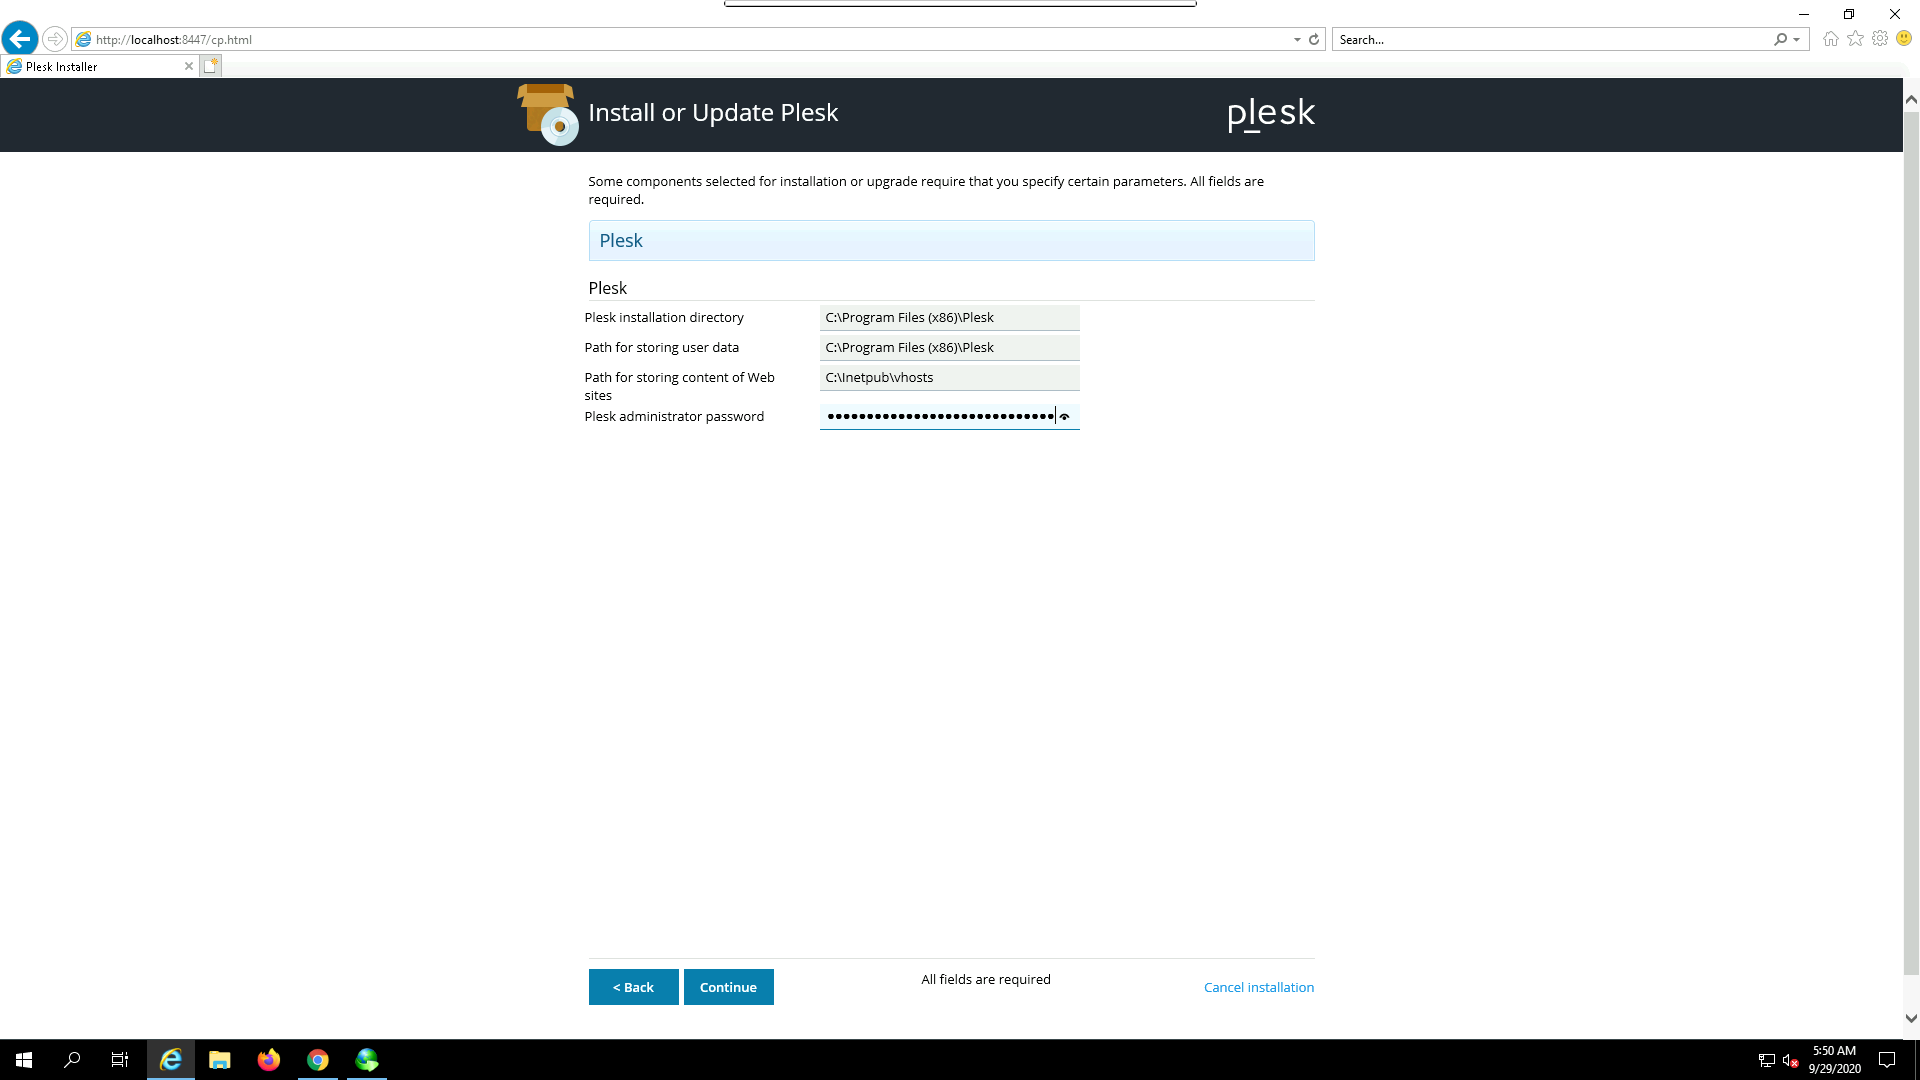
Now you can also set custom installation path for plesk and also set the default root directory of your choice or leave it with default values and proceed by inputing the administrator password.
It will take around 20 to 30 minutes to complete the installtion, do not interupt or close anywhere in middle until completes.
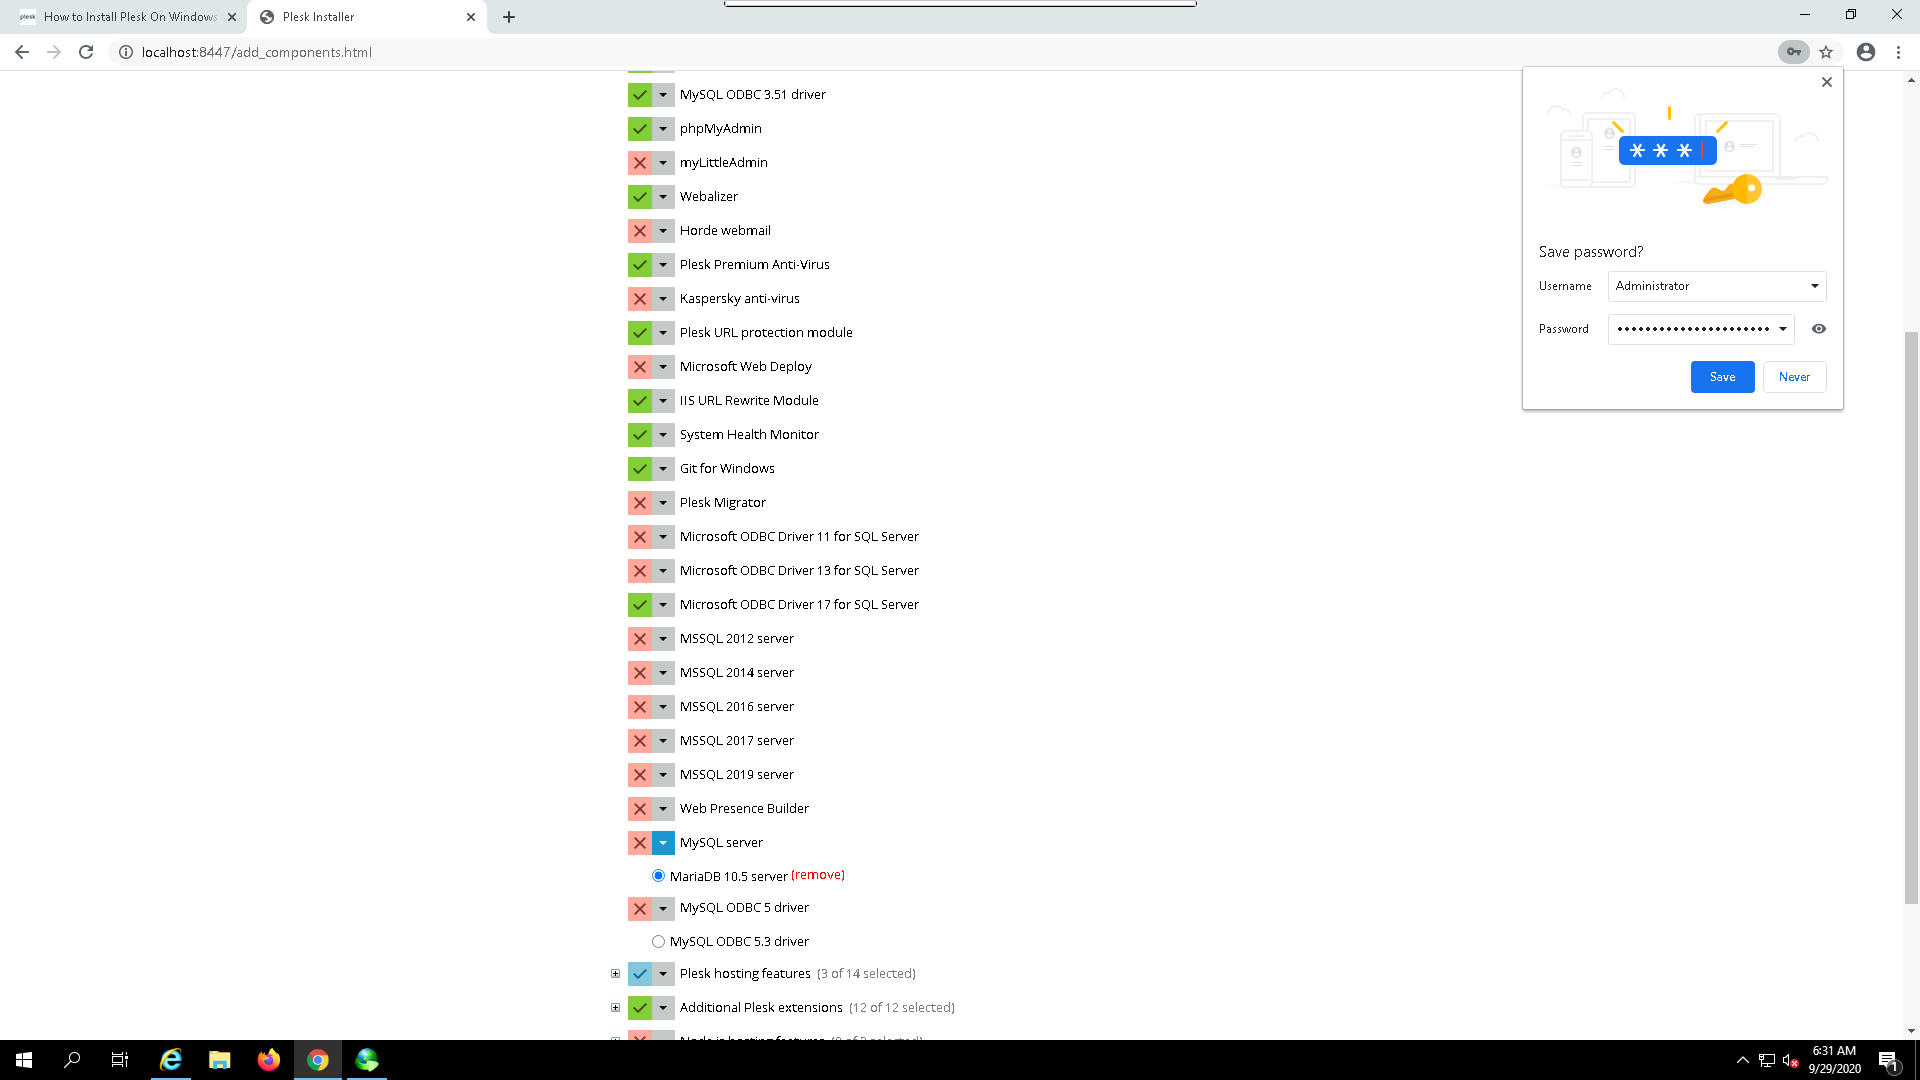
After the successfull installation click on OK. Now select add/remove components and make sure to add IIS rewrite module , MariaDB 10.5 and expand plesk hosting feature make sure php 7.3 is selected beacuse Faveo solely depends on these packages finally click on continue
2. Creating and Configuring Domain Account
Once the Plesk installation is finished, the access to Plesk is possible via URL https://
Note: Suppose in future if you want to visit the add/remove components page you can use 8447 port.
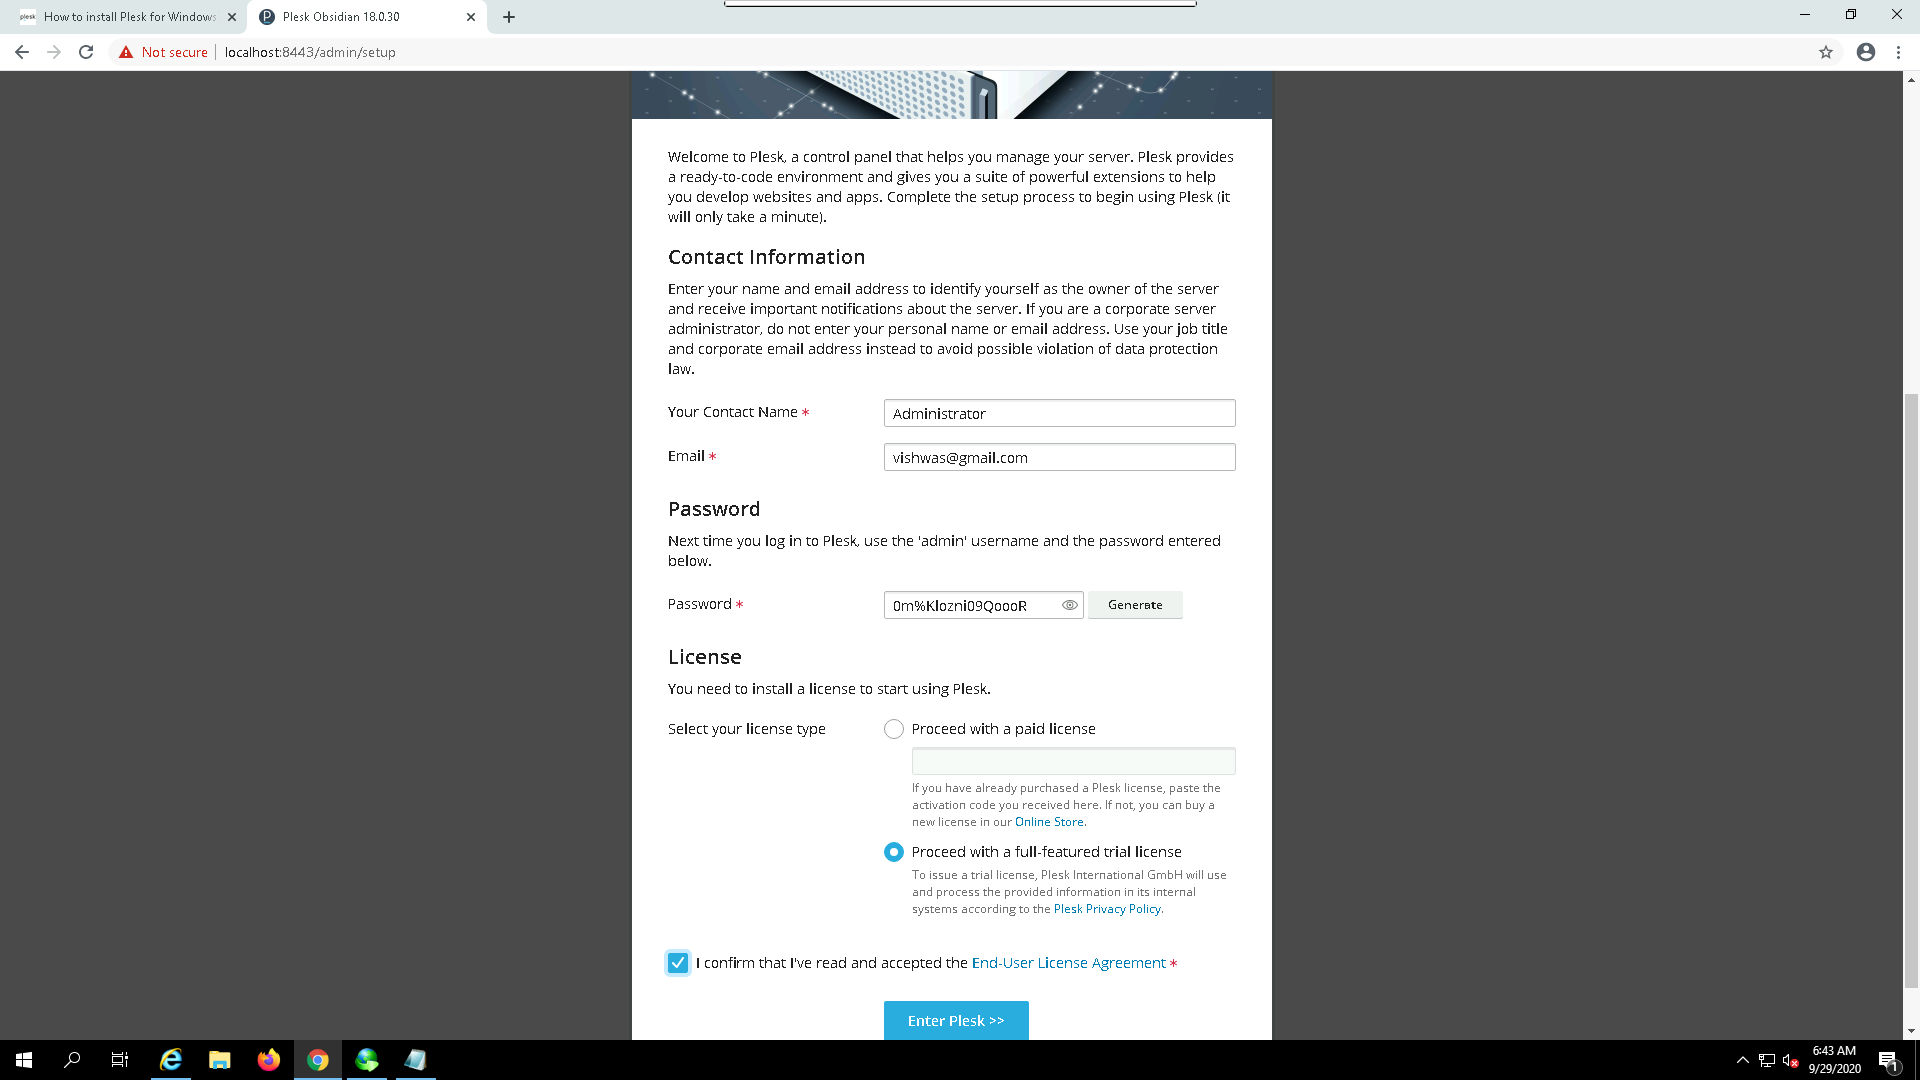
Now enter your email address, generate new password for “admin” user and accept to the license of your choice and click on Enter Plesk.
Note: Next time when you login to plesk you should use the username “admin” and newly generated password.
You will be landed into plesk dashboard and by now you should have properly propagated FQDN pointing to your server IP.
If you are running your server behind NAT or your server is on either AWS, GCP or any similar cloud providers usually comes with NAT enabled. So you need to perform the below steps otherwise you can skip this step.
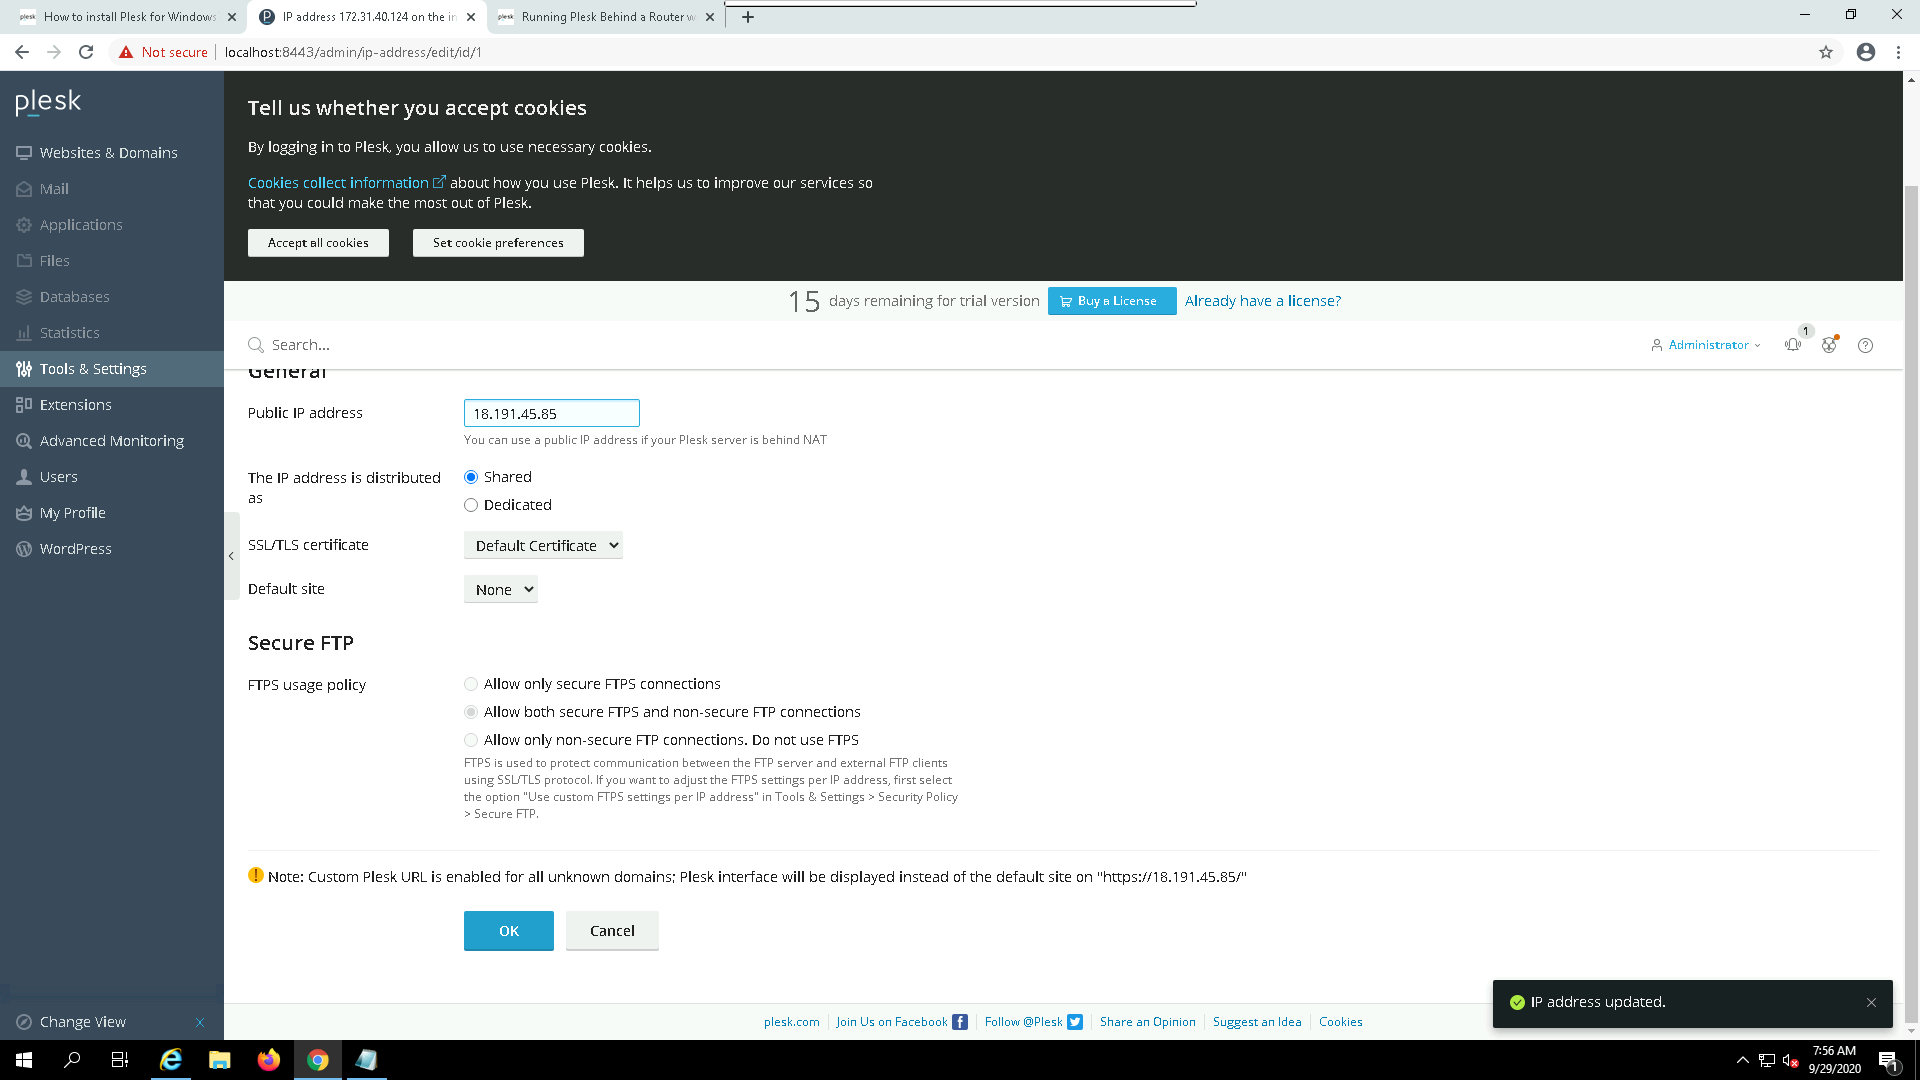
(Only for NAT-ed network)If your Plesk server is behind NAT, you can match private IP addresses on the server to the corresponding public IP addresses via the Plesk interface. This way, instead of private IP addresses, the corresponding public IP addresses are displayed in the Plesk interface, making the existence of NAT transparent to customers and resellers.
To match a public IP address to a private one, go to Tools & Settings > IP Addresses, click the IP address which you want to match to a public one, and type in the corresponding public IP address in the Public IP address field.
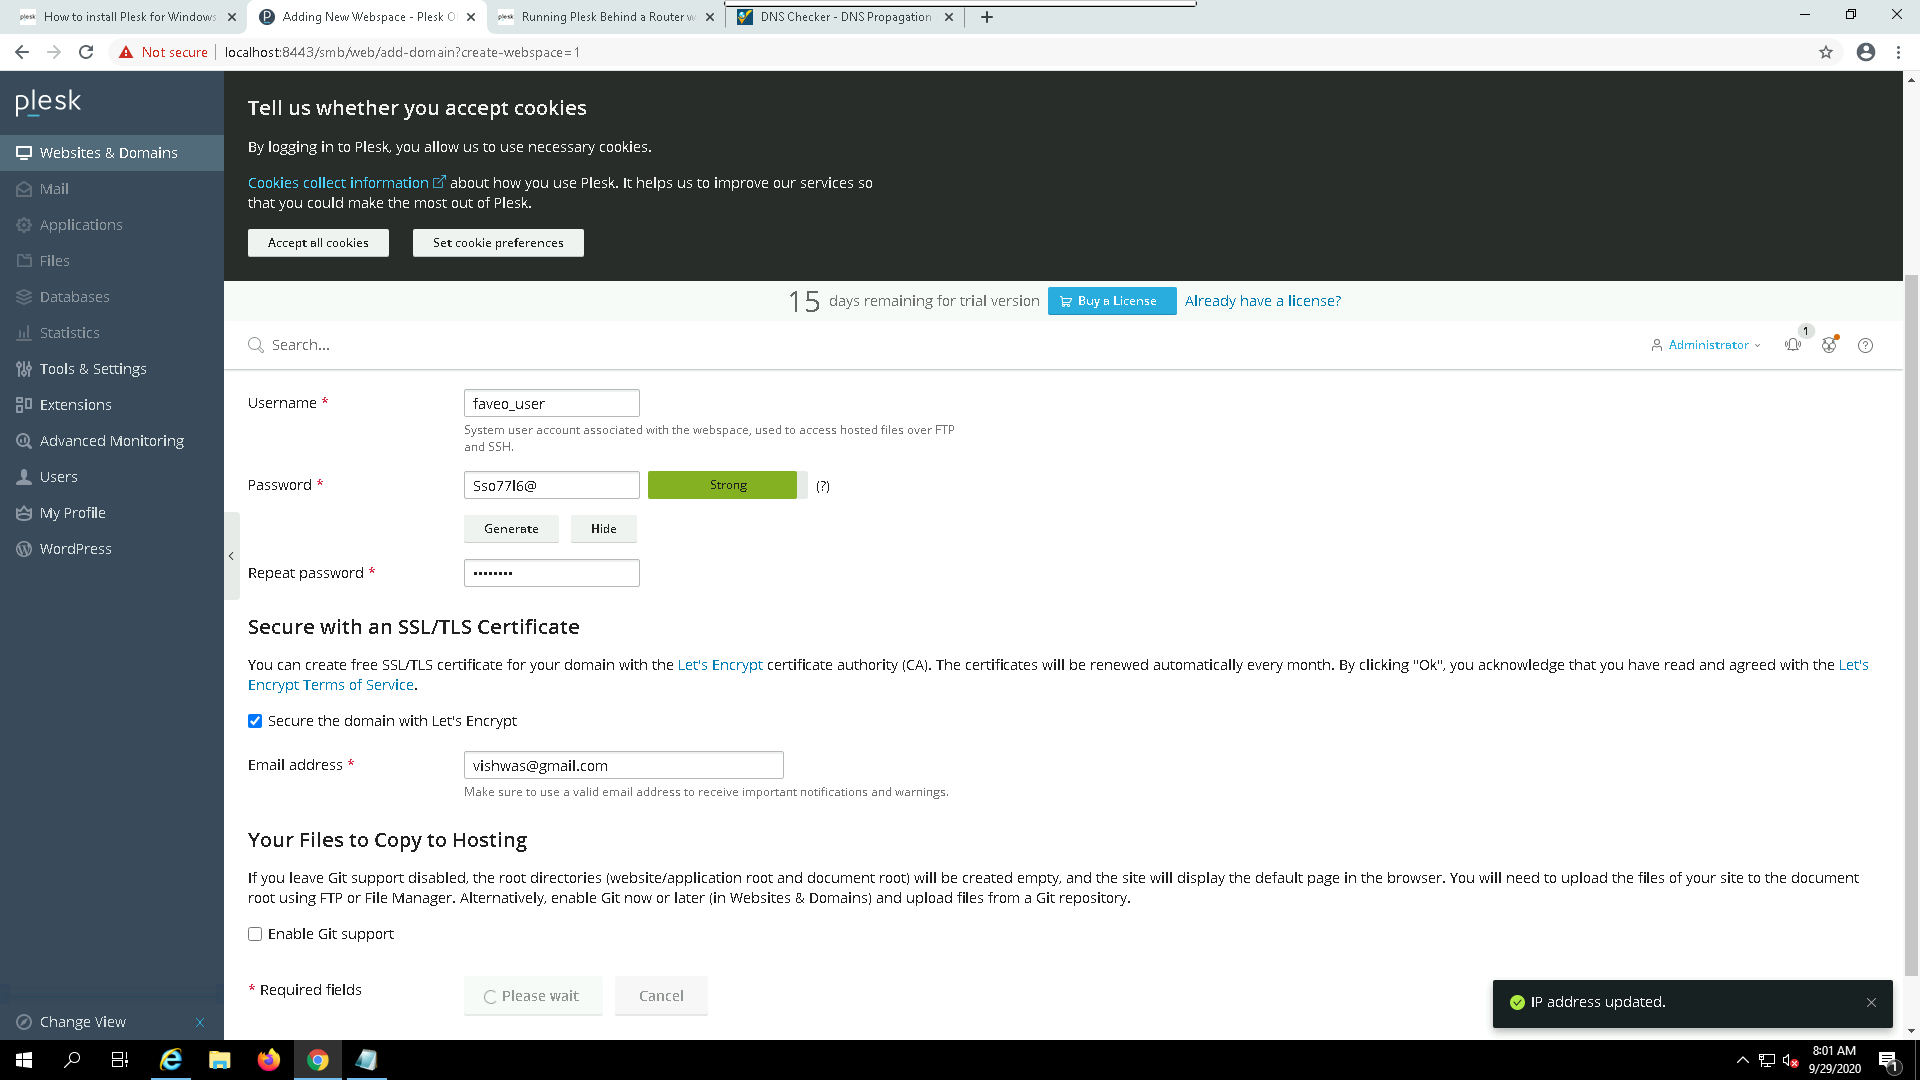
Now get back to home dashboard and click on Add Domain and enter the FQDN and fill the rest of the account details. You can also use the Free SSL provided by LetsEncrypt and which will be renewed by Plesk panel itself every month by enabling the SSL Checkbox.
Now that we have created a domain account in plesk its time to move our faveo files. Download the Faveo Variant of your choice from billing.faveohelpdesk.com .
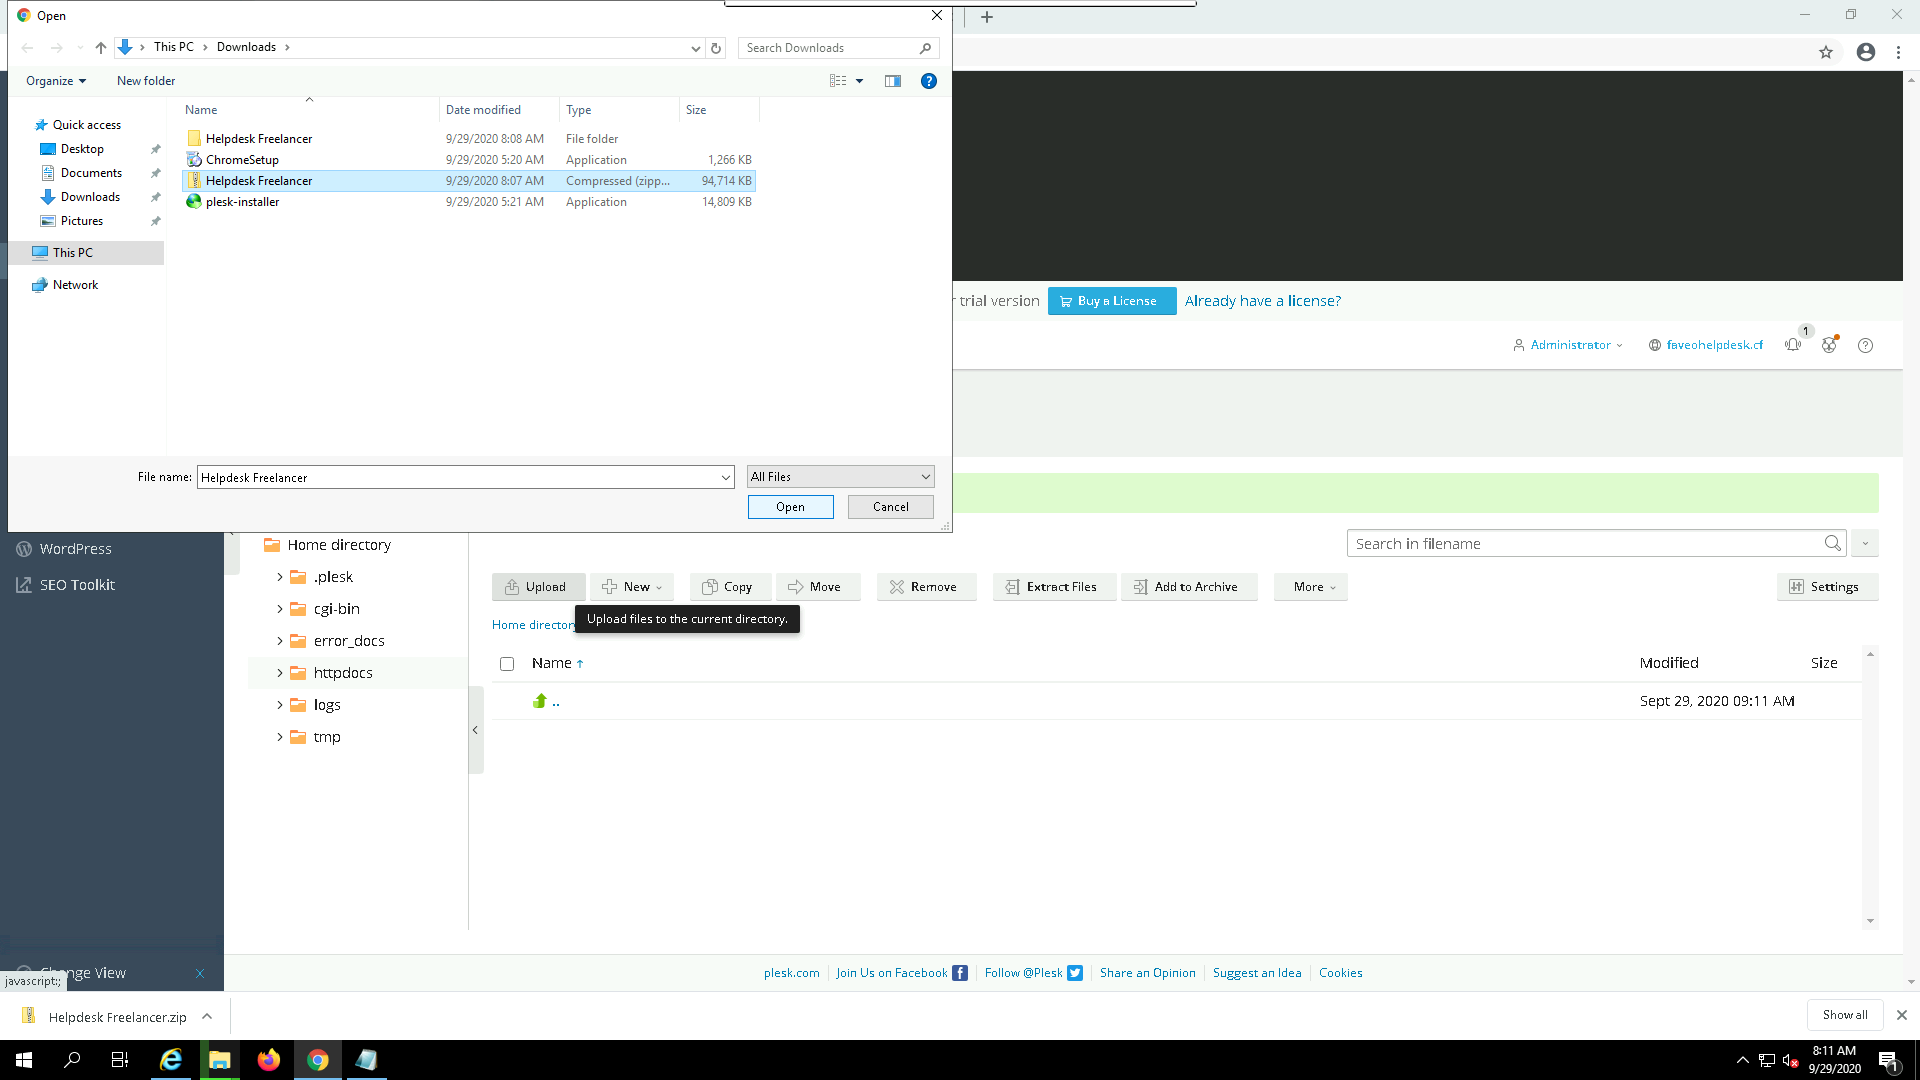
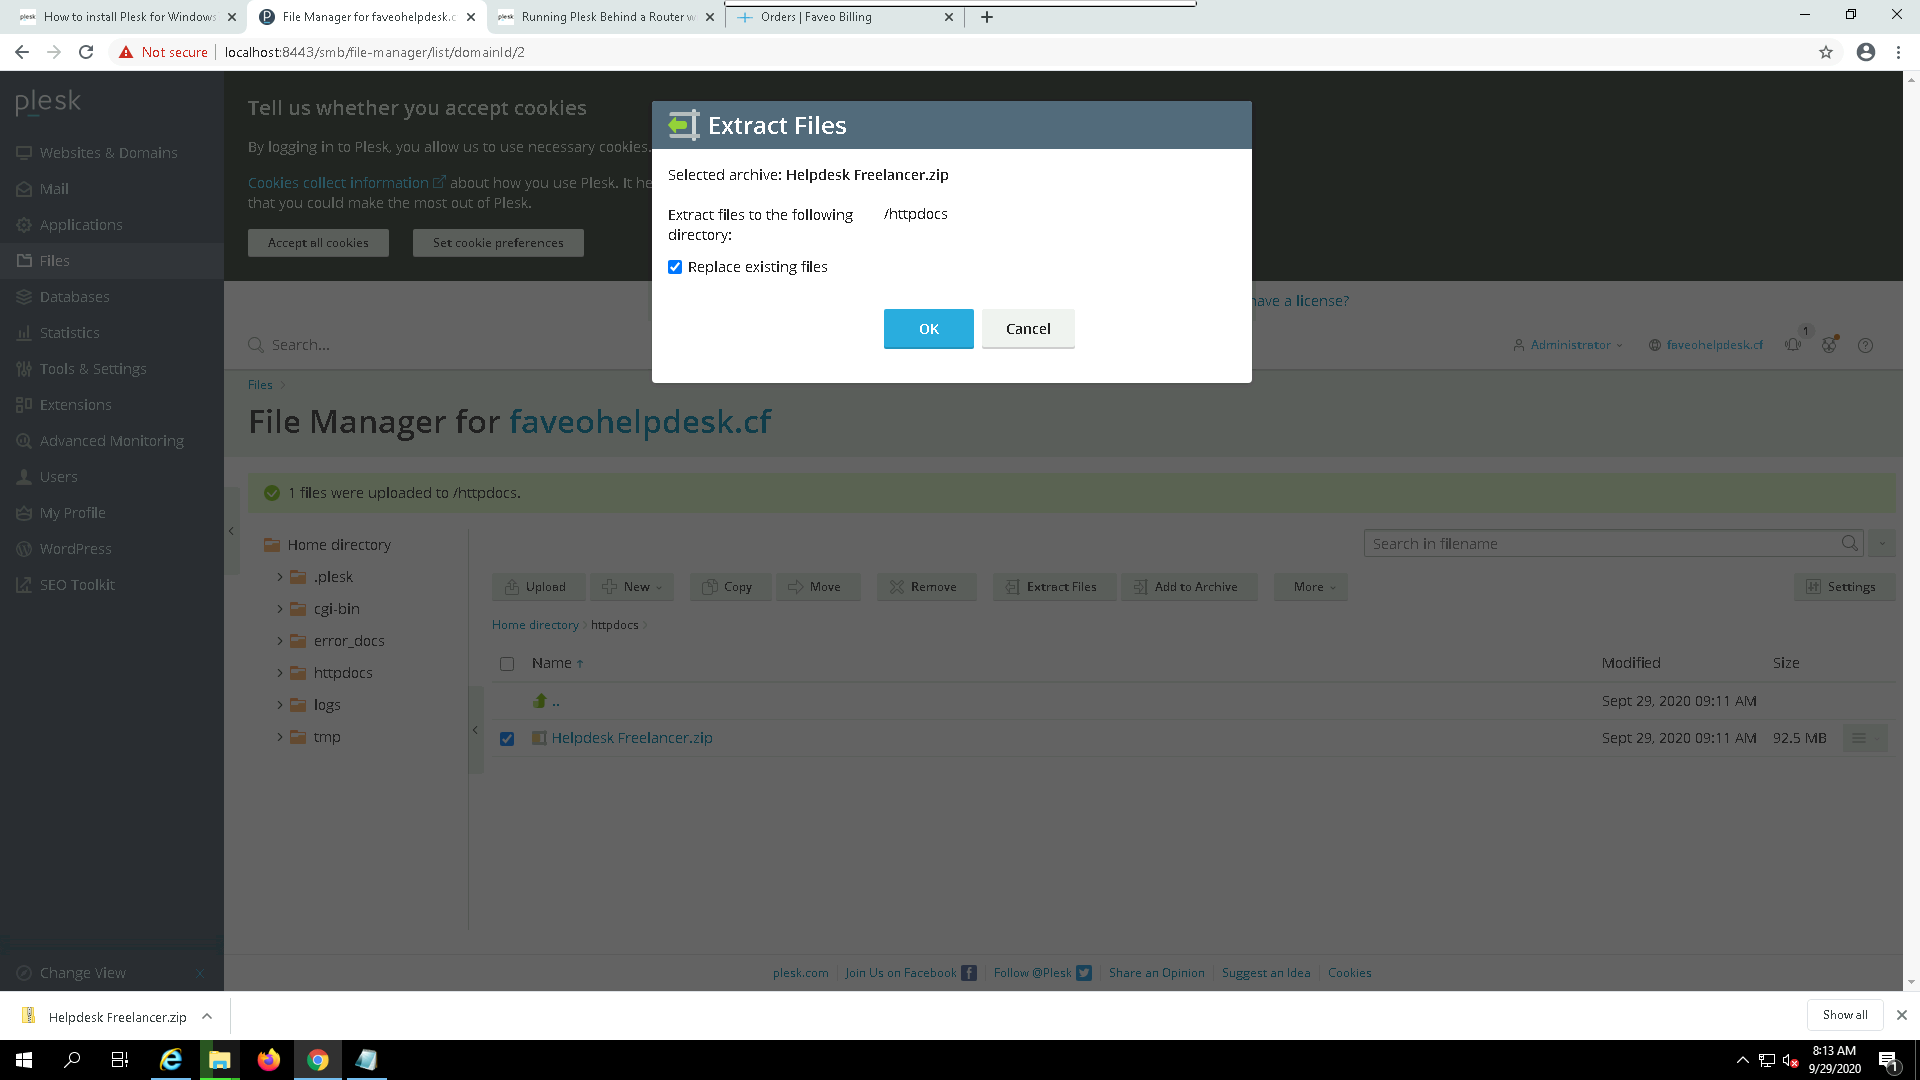
Open file manager of your domain account and delete the default files under httpdocs, upload the downloaded faveo zip file and extract it all this operations can be performed in the file manager itself. Later you can delete the zip file or leave it as backup.
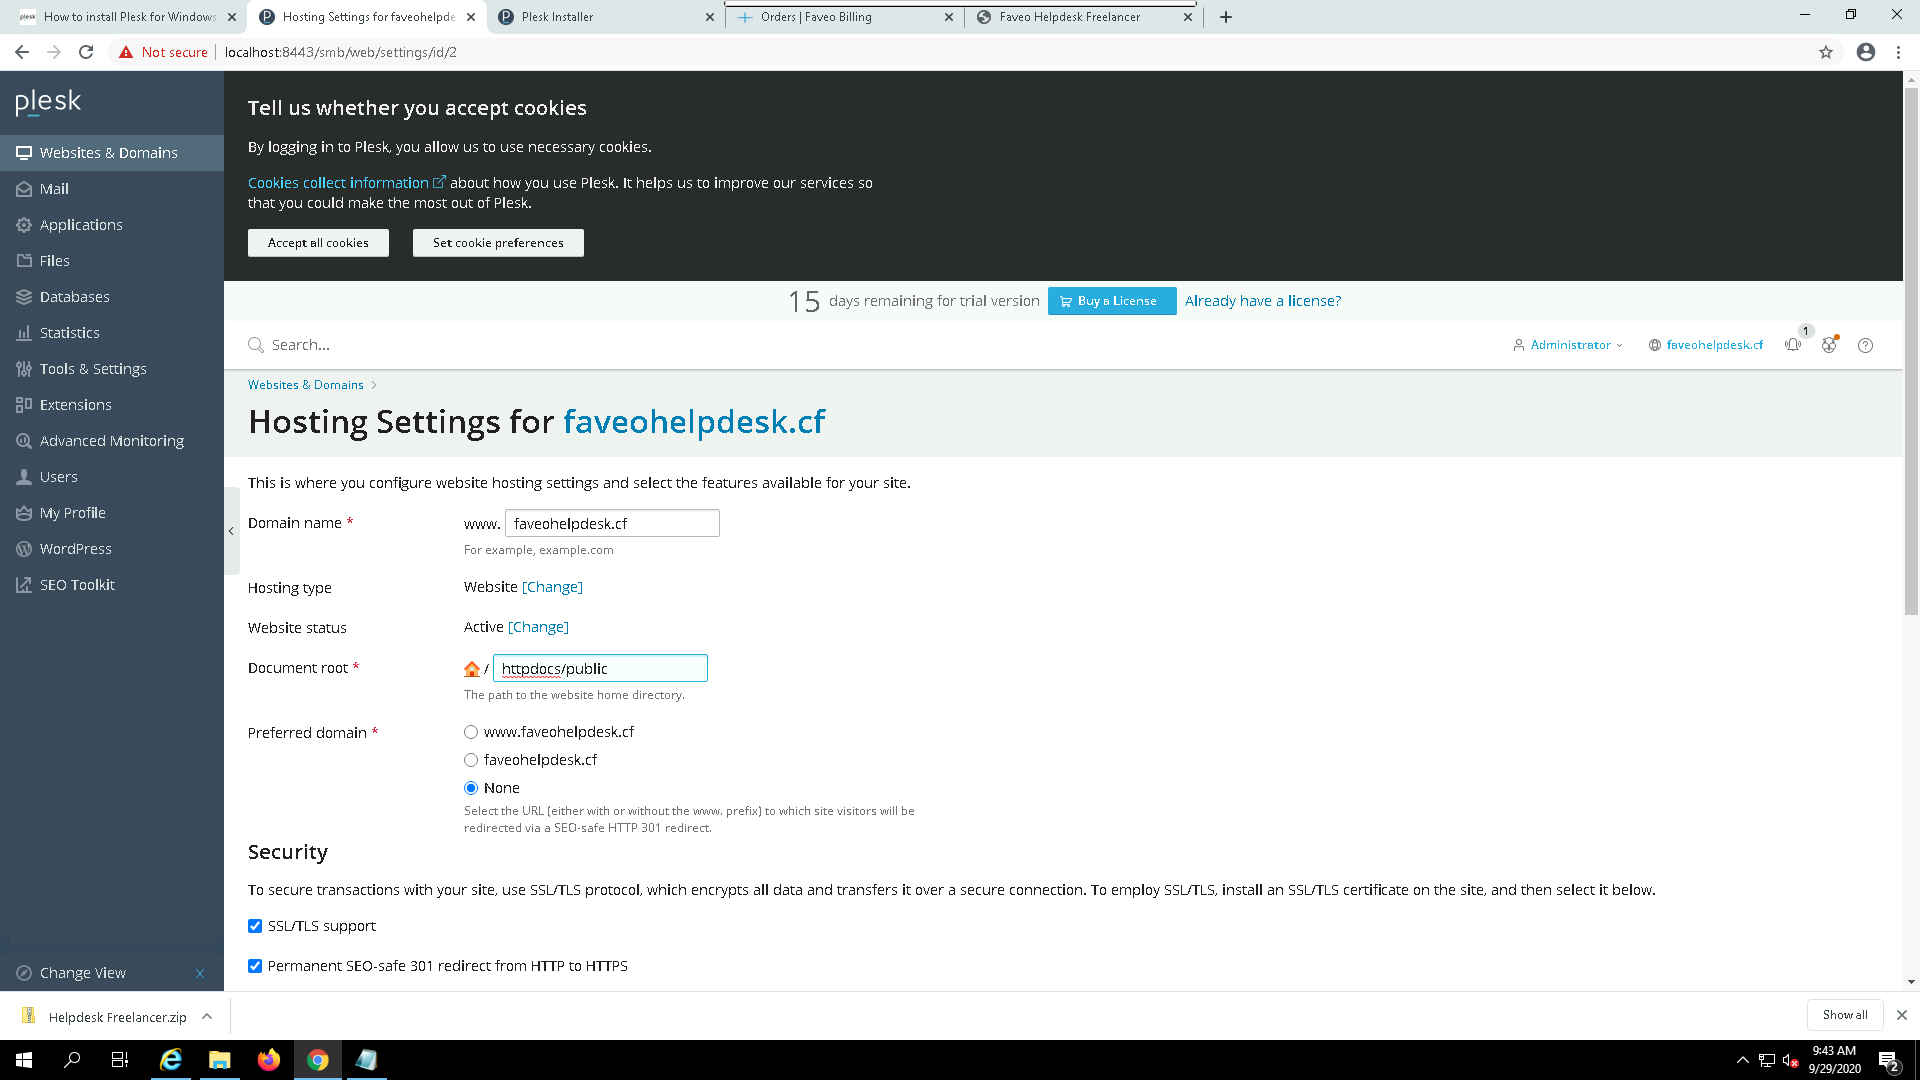
Open Hosting settings of your domain account and set the Document root to httpdocs/public to avoid /public appearing in URL. This should be done before proceeding with further steps.
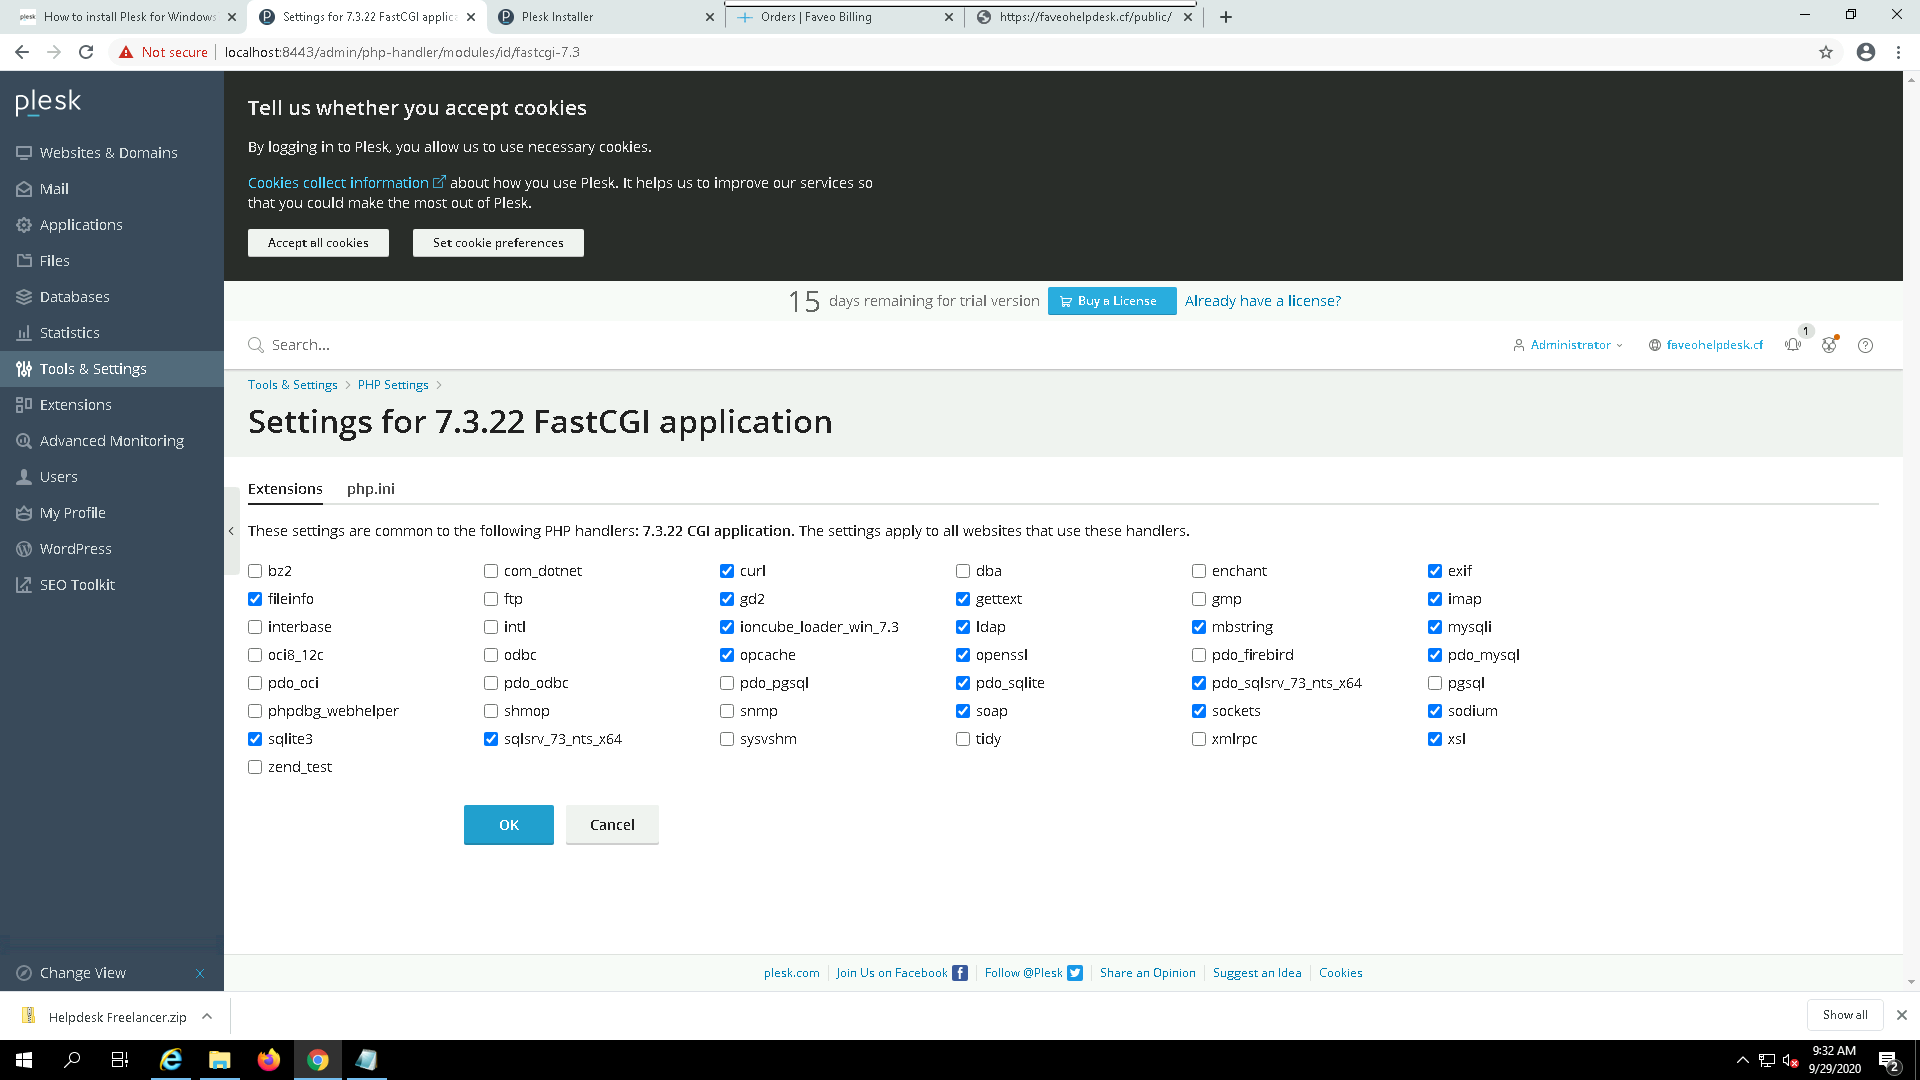
Enable some PHP plugins by navigating to Tools & Settings > General Settings > PHP settings > Click on PHP 7.3 and enable checkbox for soap, ldap, imap, Ioncube.
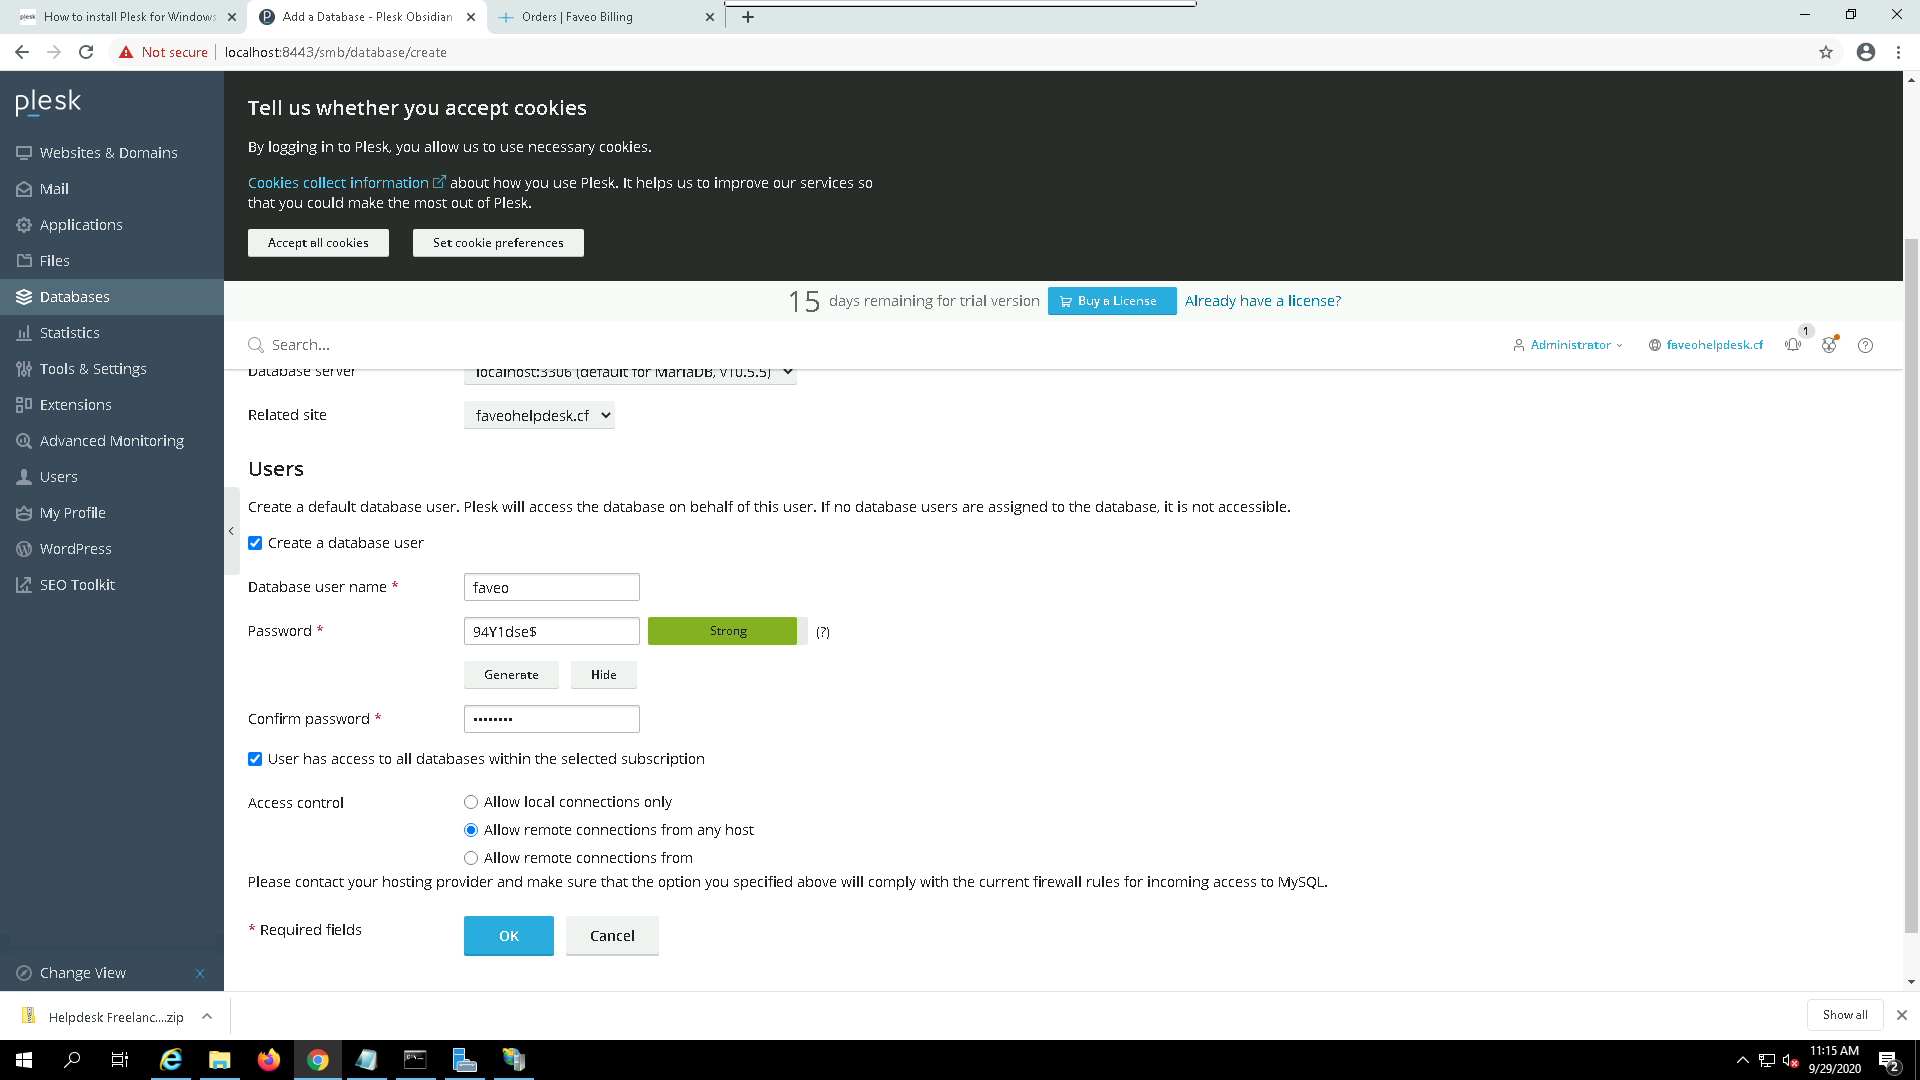
Create a Database for Faveo by navigating to left pane Databases > Add Database and input the database user and name of your choice.
At this point you shoud be able to open Faveo with your Domainname. If not check your firewall settings.
Note: You should have Domain pointing to this server.
3. Faveo Installation.
Fire up a browser of your choice and enter your FQDN. You will be landed on Faveo Probe page make sure you don’t see any dependencies highlighted in Red.
If you see the error “OFF (If you are using apache, make sure AllowOverride is set to All in apache configuration)” under “User Friendly” URL then you need to include a special file that overrides the Gloobal Configuration in Plesk under the public directory.
- Search for file named web.config under httpdocs/public/web.config and replace the content of the file with below code. If you do not find the file then create it and refresh the probe page and click on next.
<?xml version="1.0" encoding="UTF-8"?>

<configuration>

    <system.webServer>

        <rewrite>

            <rules>

                <rule name="Imported Rule 1" stopProcessing="true">

                    <match url="^" ignoreCase="false" />

                    <conditions logicalGrouping="MatchAll">

                        <add input="{REQUEST_FILENAME}" matchType="IsDirectory" ignoreCase="false" negate="true" />

                        <add input="{REQUEST_FILENAME}" matchType="IsFile" ignoreCase="false" negate="true" />

                    </conditions>

                    <action type="Rewrite" url="index.php" />

                </rule>

            </rules>

        </rewrite>

    </system.webServer>

</configuration>
Now you can install Faveo via GUI Wizard or CLI
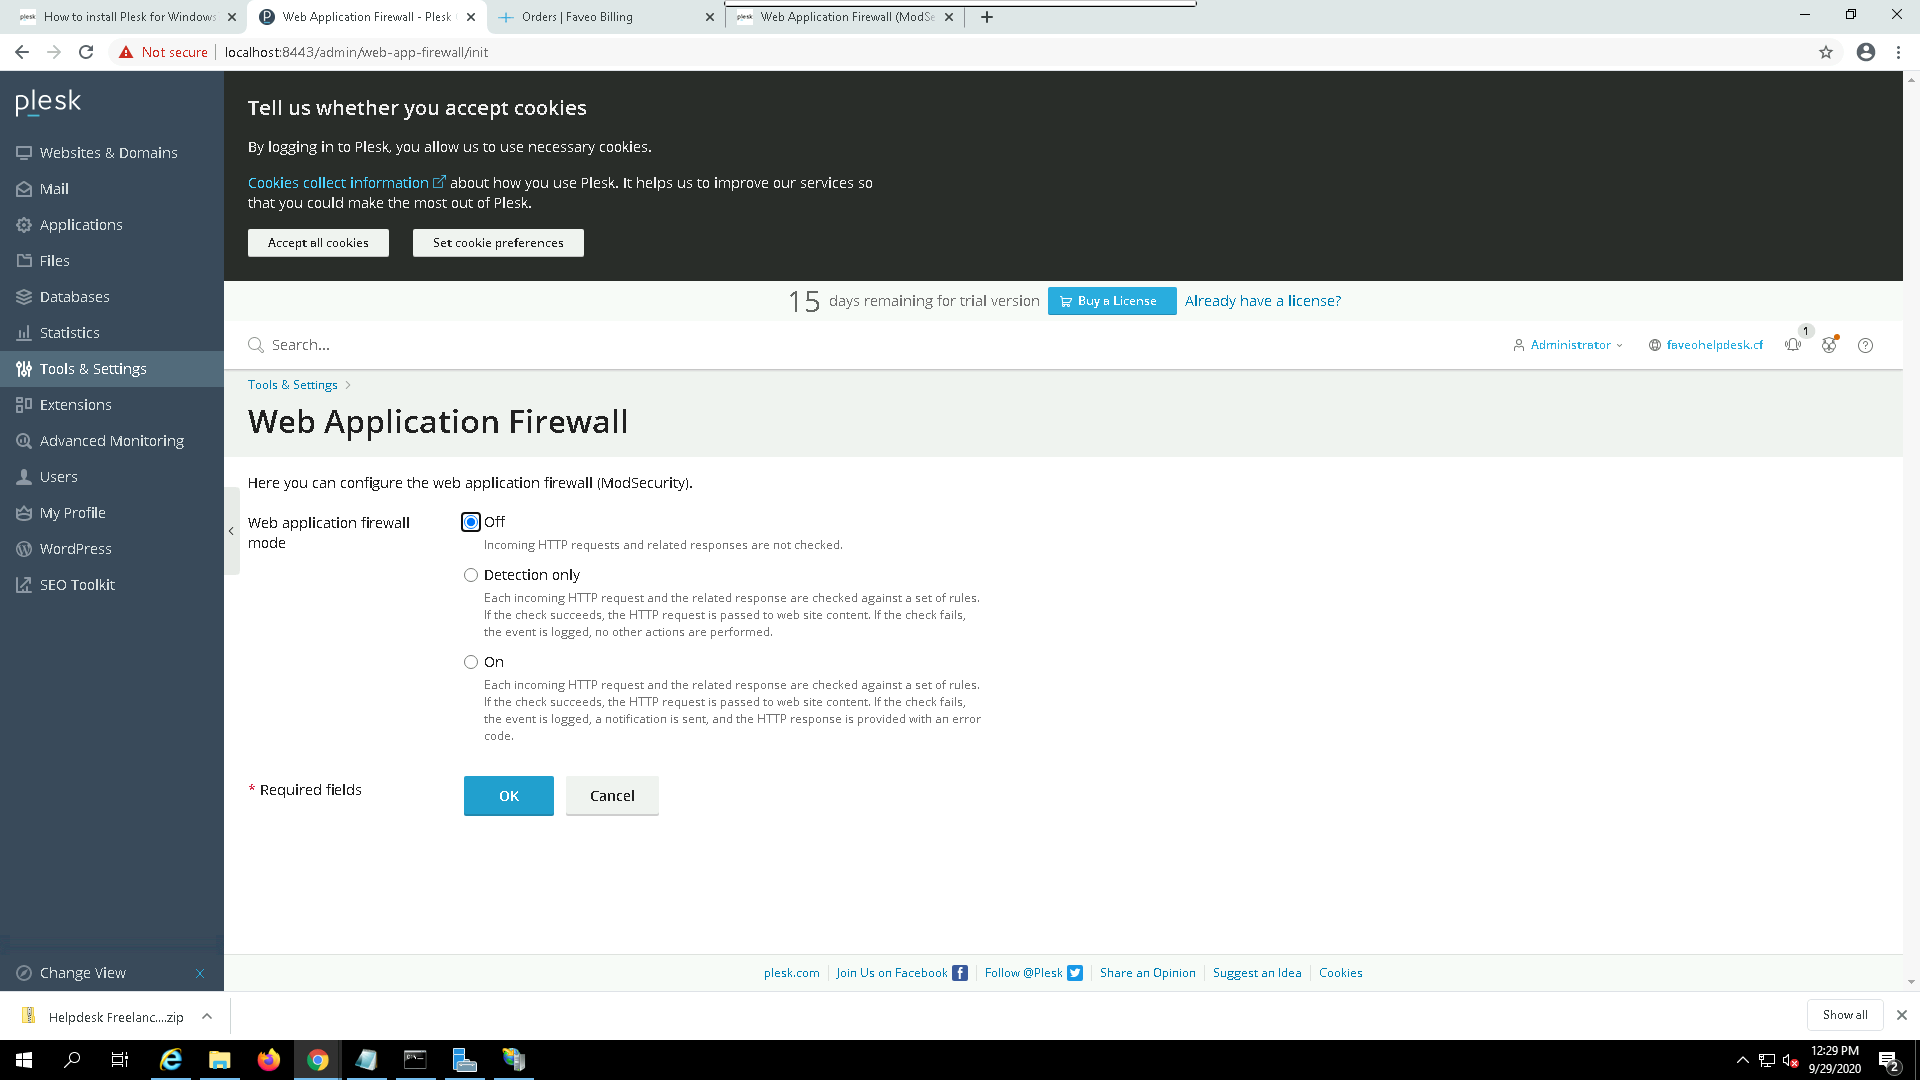
4. Disable Mod Security.
If you face trouble logging in faveo or if the pages does not load fully and you find mod_security error in your logs you should disabled it by going to Tools & Settings > Web Application Firewall (ModSecurity) and turn it off.
5. Configure IIS WebServer
By default, IIS configures PHP only to accept GET, POST and HEAD request types. Since Faveo makes use of other requests types (such as DELETE and PUT), you must manually change the PHP handler to allow them.
Step 1: Open IIS Manager
Open the Start menu and type “IIS” in to the find box. You should see an application called “Internet Information Services (IIS) Manager”.
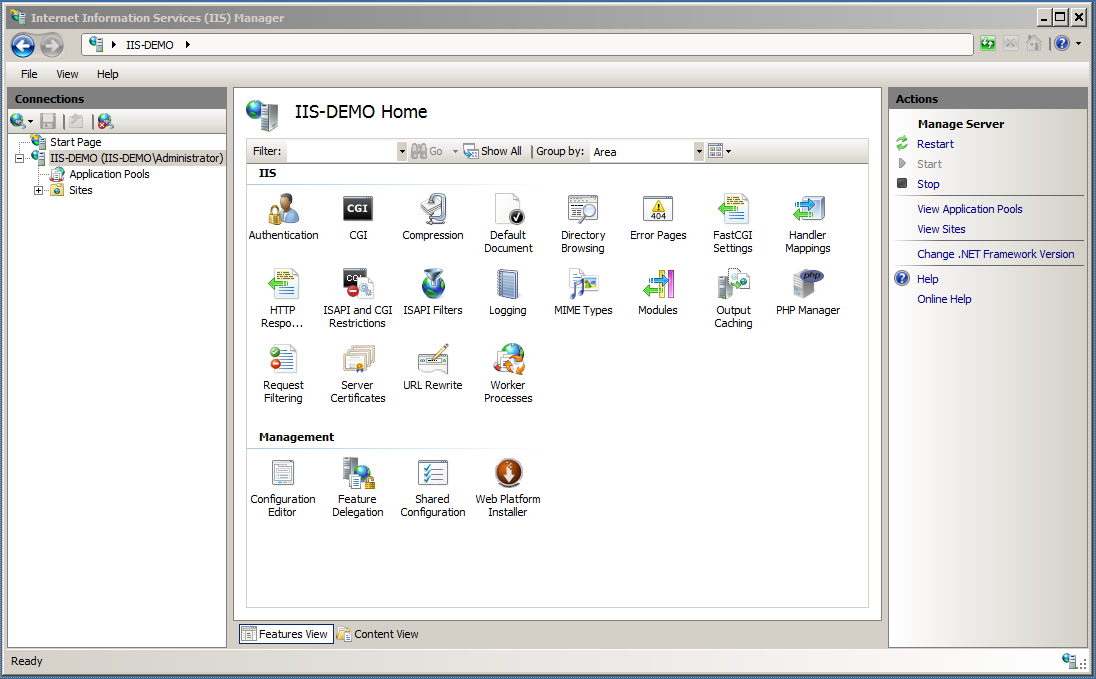
Step 2: Select your computer in the “Connections” pane
On the left, there is a “Connections” pane. You should see your computer listed here. Click on your computer name which should load the a dashboard with a handful of icons.
Step 3: Open PHP Handler Mapping
Double-click on the Handler Mappings icon to bring up the Handler Mappings screen.
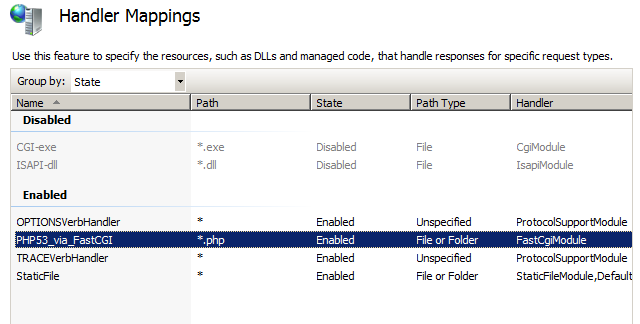
Then double-click on the handler for PHP files to bring up the “Edit Module Mapping” window:
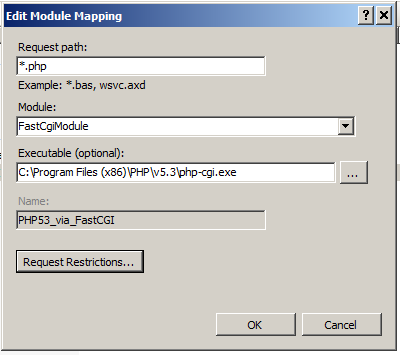
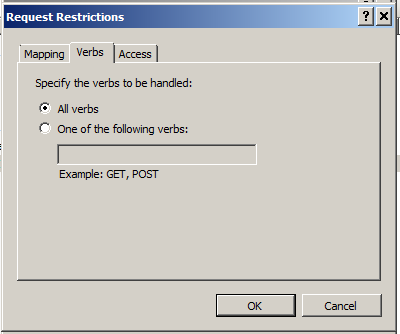
Step 4: Edit Verbs
Click on the “Request Restrictions” button, then switch to the [Verbs] tab. Switch the radio button to “All Verbs”, then click “OK” to close the window, then “OK” again to close the other window.
Note: You may be prompted with an alert to “fix” the path to the PHP executable. If so, just put double-quotation marks around the path that already exists in the “Executable” box and it will save successfully.
To Open the Faveo on your domain , you must set the binding. Go to Bindings option on right pane and select “HTTP” and edit the hostname to your concern.
Now you can open the browser and enter the IP or Domain Name to open Faveo. To test the successfull configuration perform some create delete operations in Faveo if the Delete operation fails then the above steps is not sufficient at this point you may need to perform the below steps too.
Disable WebDav (Optional)
Perform this step only if you have problem with delete option in Faveo ec=pven after following the previous steps.
To remove WebDav, go to Control Panel -> Uninstall Program -> Turn Windows features on or off -> IIS -> World Wide Web Services -> Common HTTP feature -> WebDAV Publishing.
6. Cron Job configuration
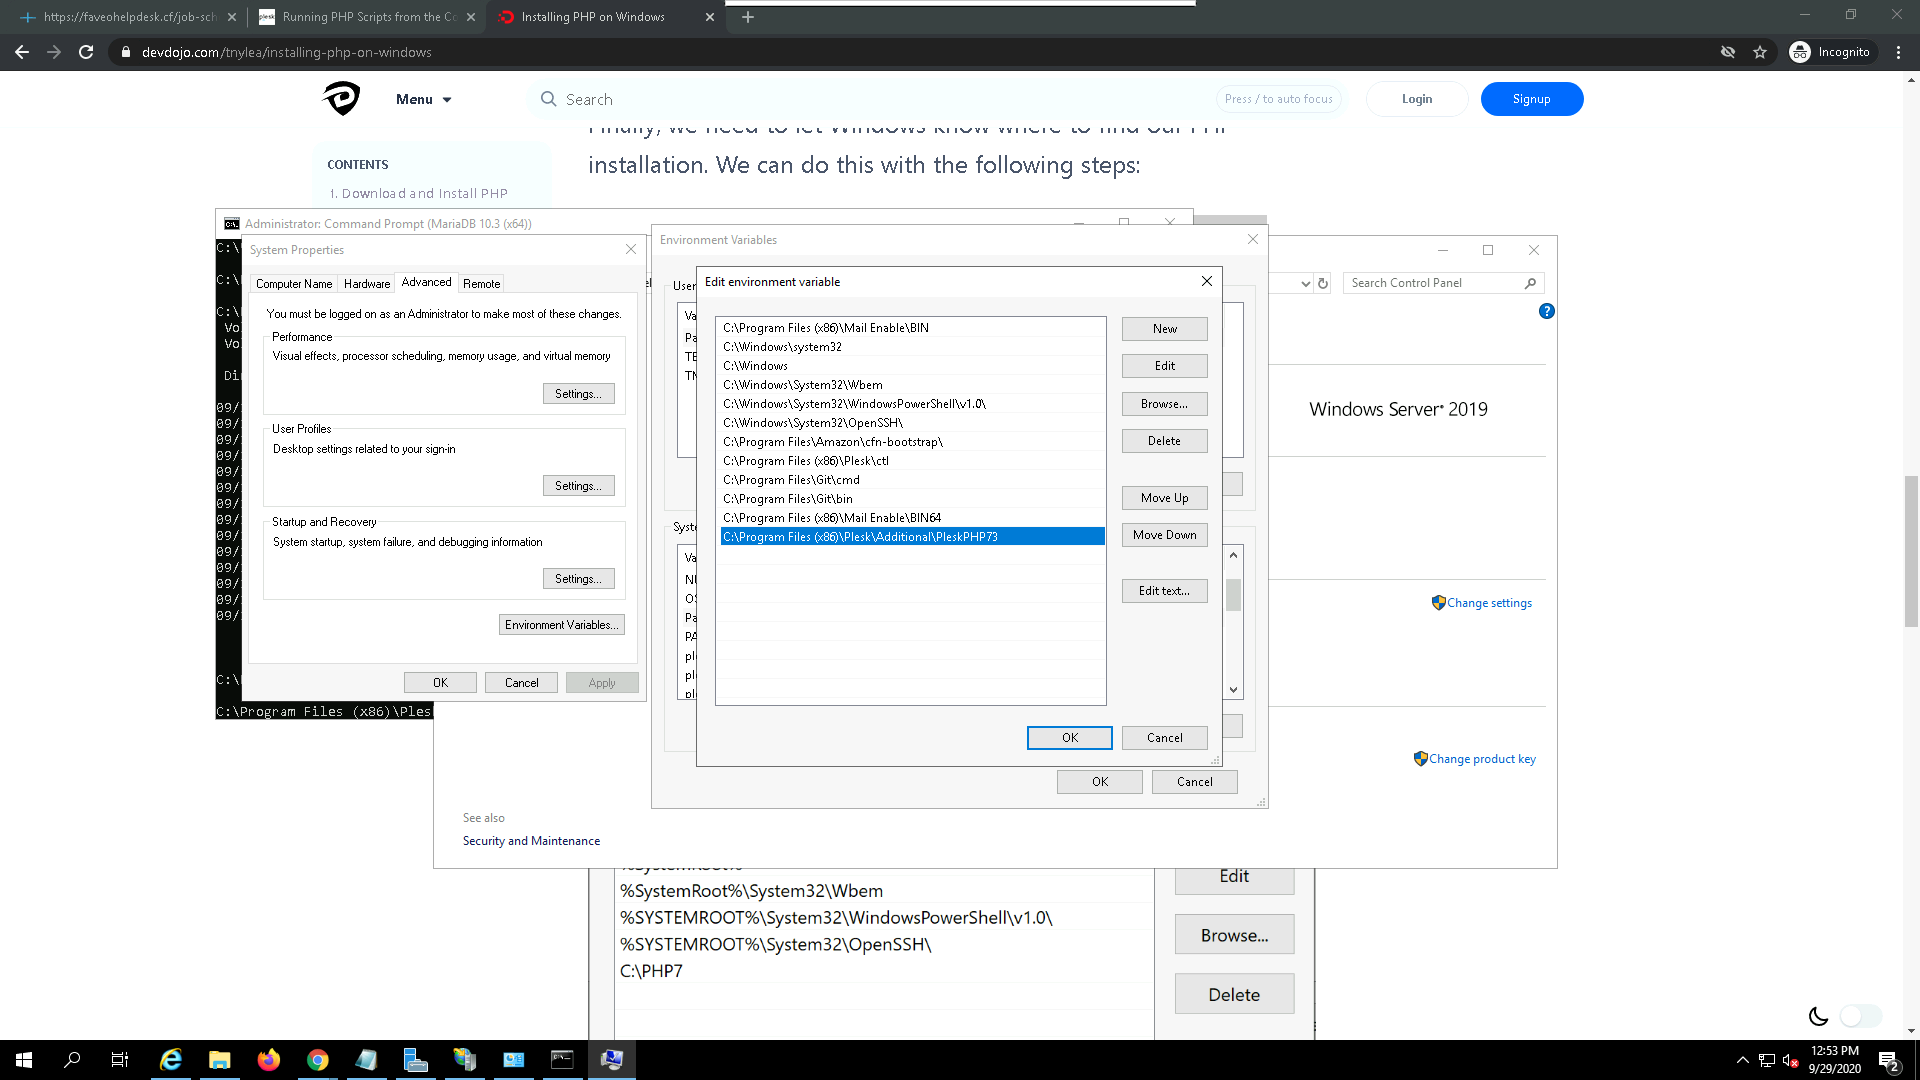
Faveo needs a Job to run every 5 minutes in Background so we need to setup a Job in Task Scheduler and by default Faveo won’t recognise the PHP executable Path when it comes to Plesk Panel. You need to first update the PHP executable path to environment variables by going to
- Control Panel -> System and Security Settings -> System
- Click on Advanced system settings
- Click on the Environment Variables button
- Under System Variables select the Path variable and click the
Editbutton - In the new Popup click the
Newbutton and add a new row with “C:\Program Files (x86)\Plesk\Additional\PleskPHP73” Click Ok, Ok, and Ok. You’ve now added the PHP Environment variable
To open Taskscheduler press ctrl + R and Type “taskschd.msc”.
To Setup Schedule task for Faveo. Open Task scheduler on server and follow this steps
On the Right pane of Task scheduler select “create basic task” and enter a name for the task and click next.
Under Trigger section select daily and click next and leave the default values in daily section and proceed next.
Now under Action section select start a program and click next and in Start a program copy the below value in to the program/script field.
C:\Windows\System32\cmd.exe
Add following value in Argument and make sure to replace the domainname with yours or you could navigate to the directory and copy the path leading to artisan of yours :
/c php "C:\inetpub\vhosts\<domain_name>\httpdocs\artisan" schedule:run
Finally under Finish section select the checkbox to open the properties window after finish and click finish button.
In the properties window select the Triggers tab and click on Edit and select the checkbox for “Repeat task every” and set values to run every 5 minutes for indefinitely and click on OK. In Addition to that please Enable server Backup.
The final step is to have fun with your newly created instance, which should be up and running to https://domain_name or the domain you have configured Faveo with.