Faveo Installation on Ubuntu with Plesk Panel
![]()
Faveo Installation on Windows with Xampp Server
1. Plesk Installation
- Follow the instructions here
2. Adding Domains
- Go to
Websites & Domains, clickAdd Domainand follow on-screen instructions.
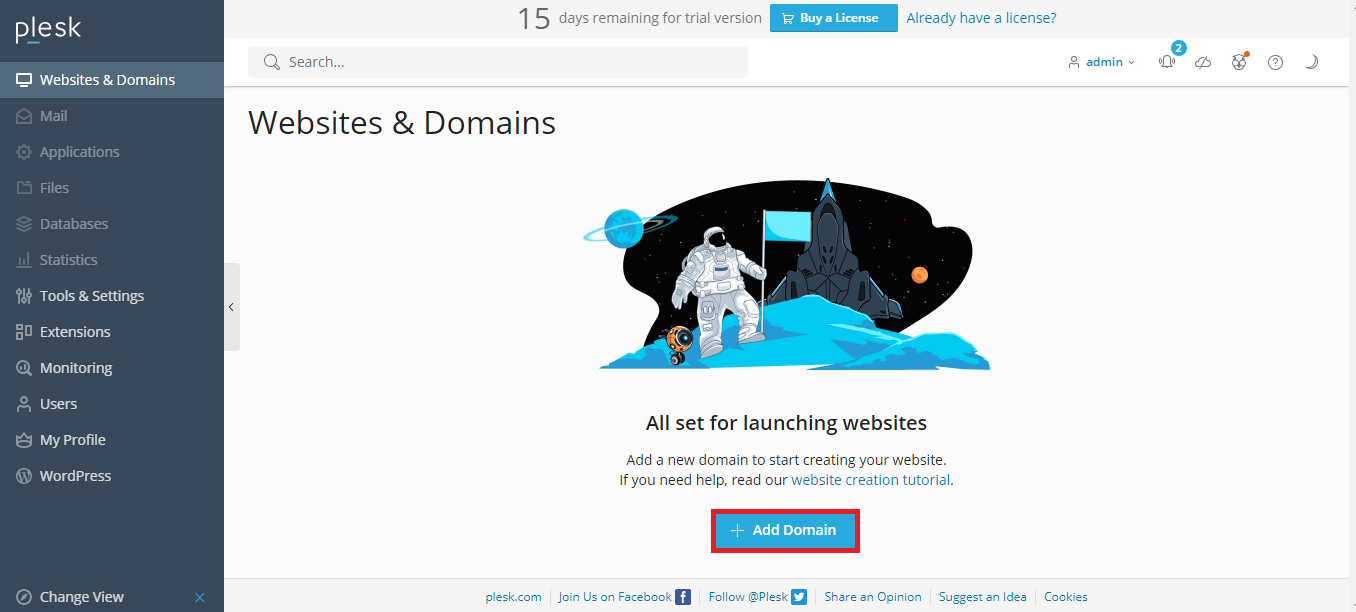
- Click
Add Domain.
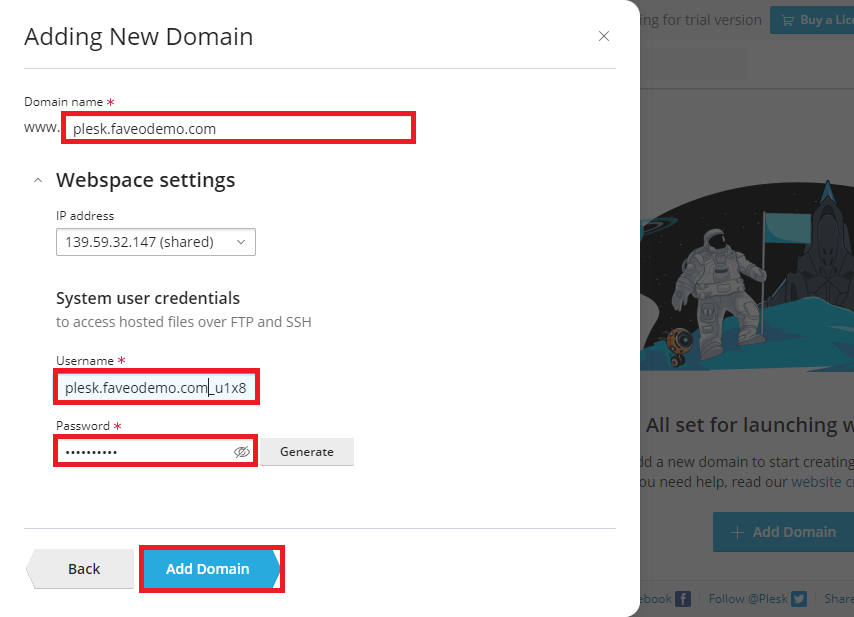
The new domain name is now shown in the list at the bottom of the screen.
To upload a website using File Manager:
- Download the Faveo Helpdesk from https://billing.faveohelpdesk.com
Go to Websites & Domains > domain name > Files.

- Click the
httpdocsfolder to open it, clickUpload File, select the archive file, and clickOpen.
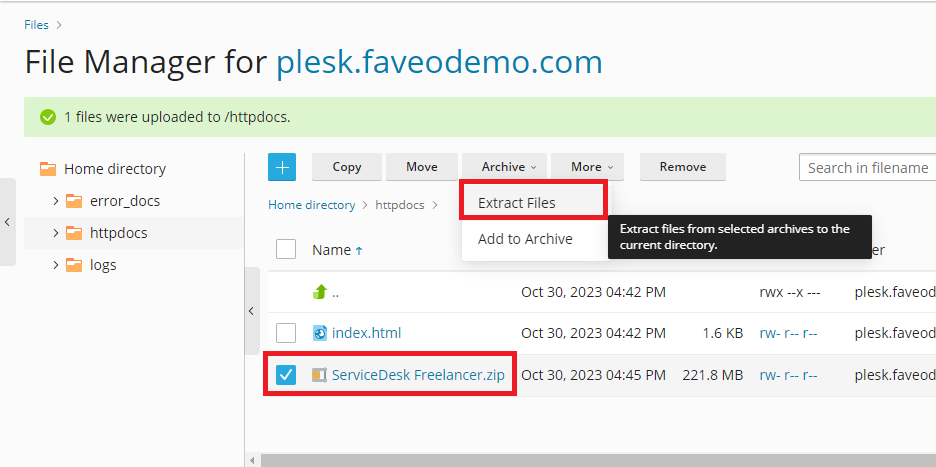
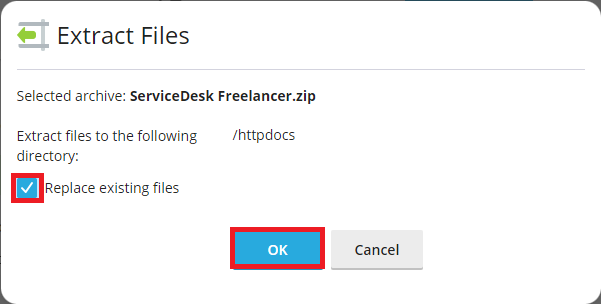
- Once the file has been uploaded, click the
checkboxnext to it and select theExtract Filesoption.
3. Configure the PHP 8.1
3.a. Switch PHP Versions
Step 1: In Plesk, go to Tools & Settings and click Updates (under Plesk).

Step 2: On the Updates and Upgrades page, click Add/Remove Components.
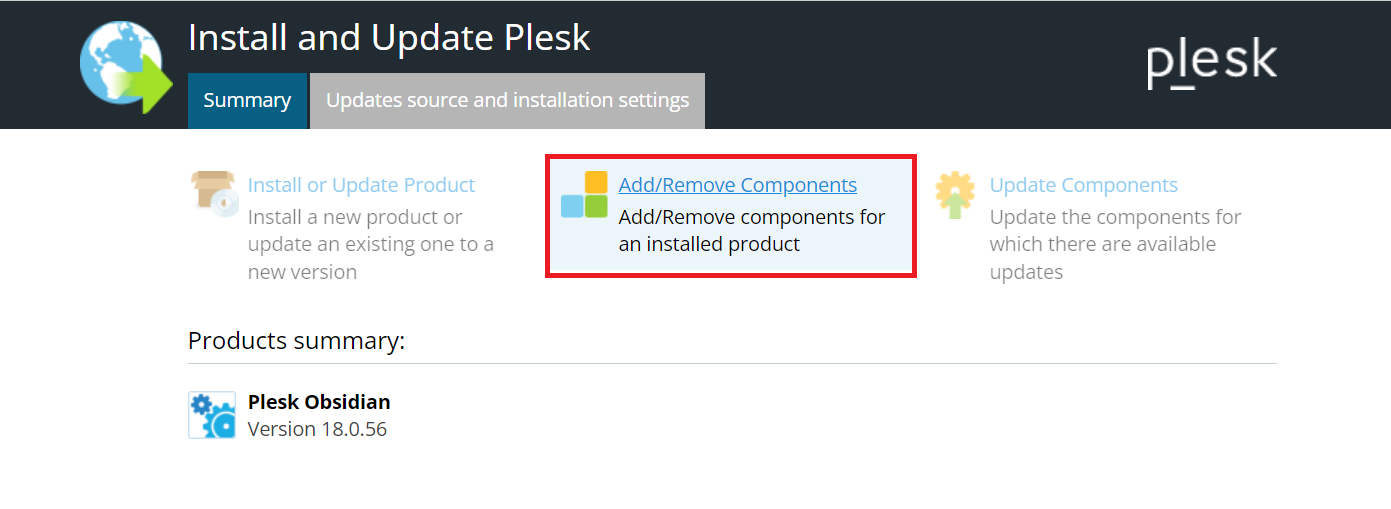
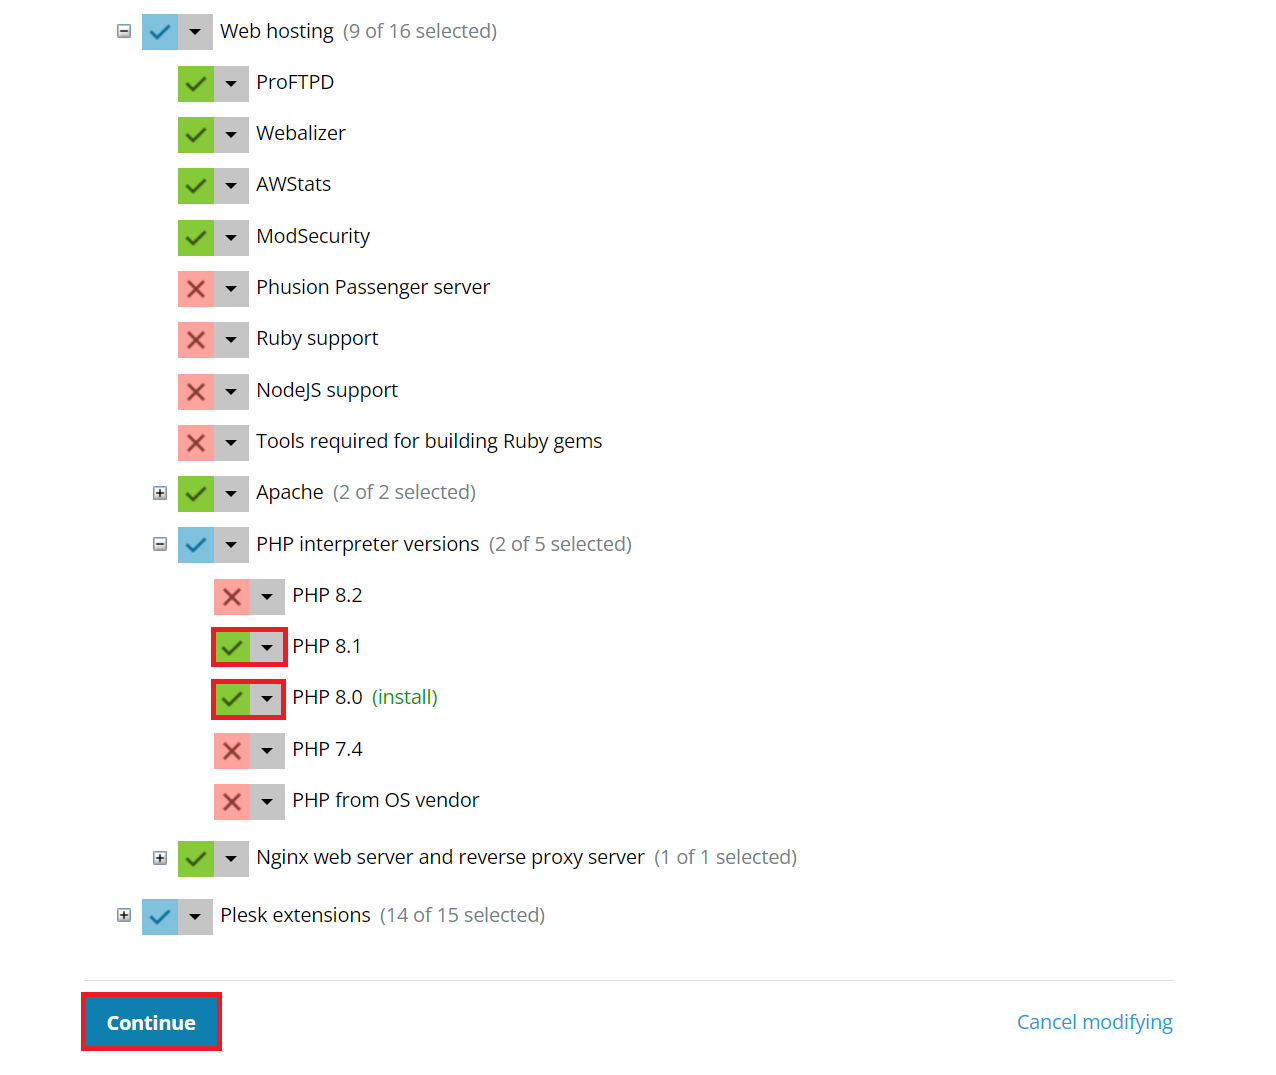
Step 3: On the Add/Remove Components page, expand:
-
Web hosting > PHP interpreter versions section, if this is a Linux server.
-
Select required PHP versions for installation/uninstallation and click
Continue.
Step 4: Go to Websites & Domains > Hosting Settings > PHP version.
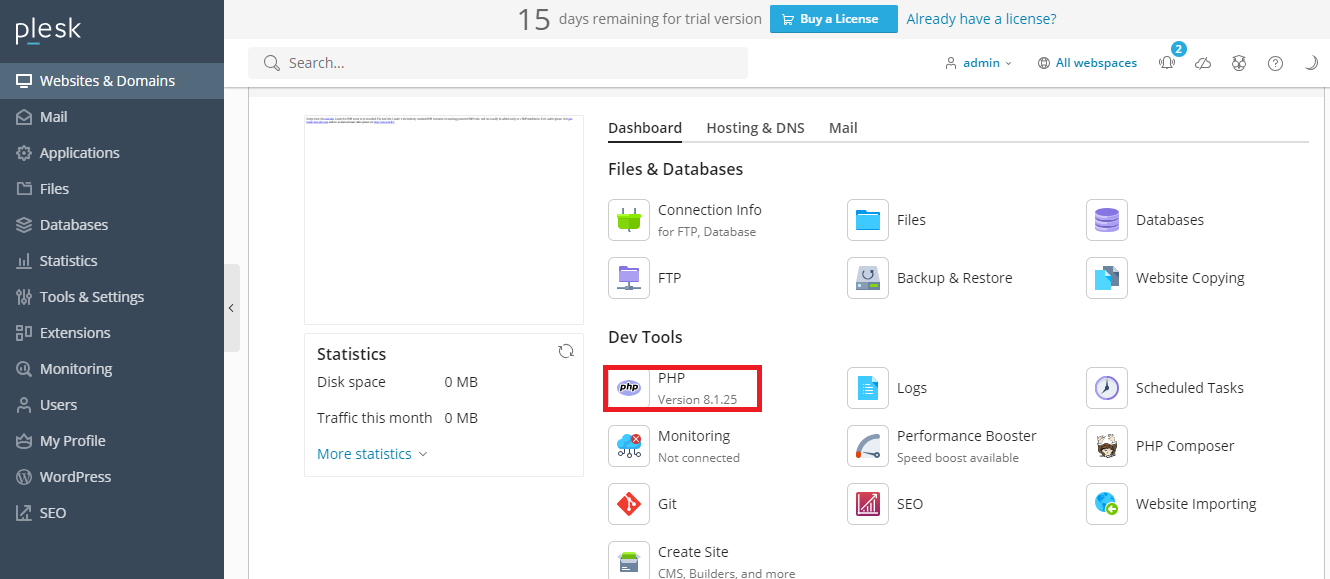
Step 5: Now select the PHP Version 8.1.X, then scroll down and press OK:
3.b. Setting Up ionCube
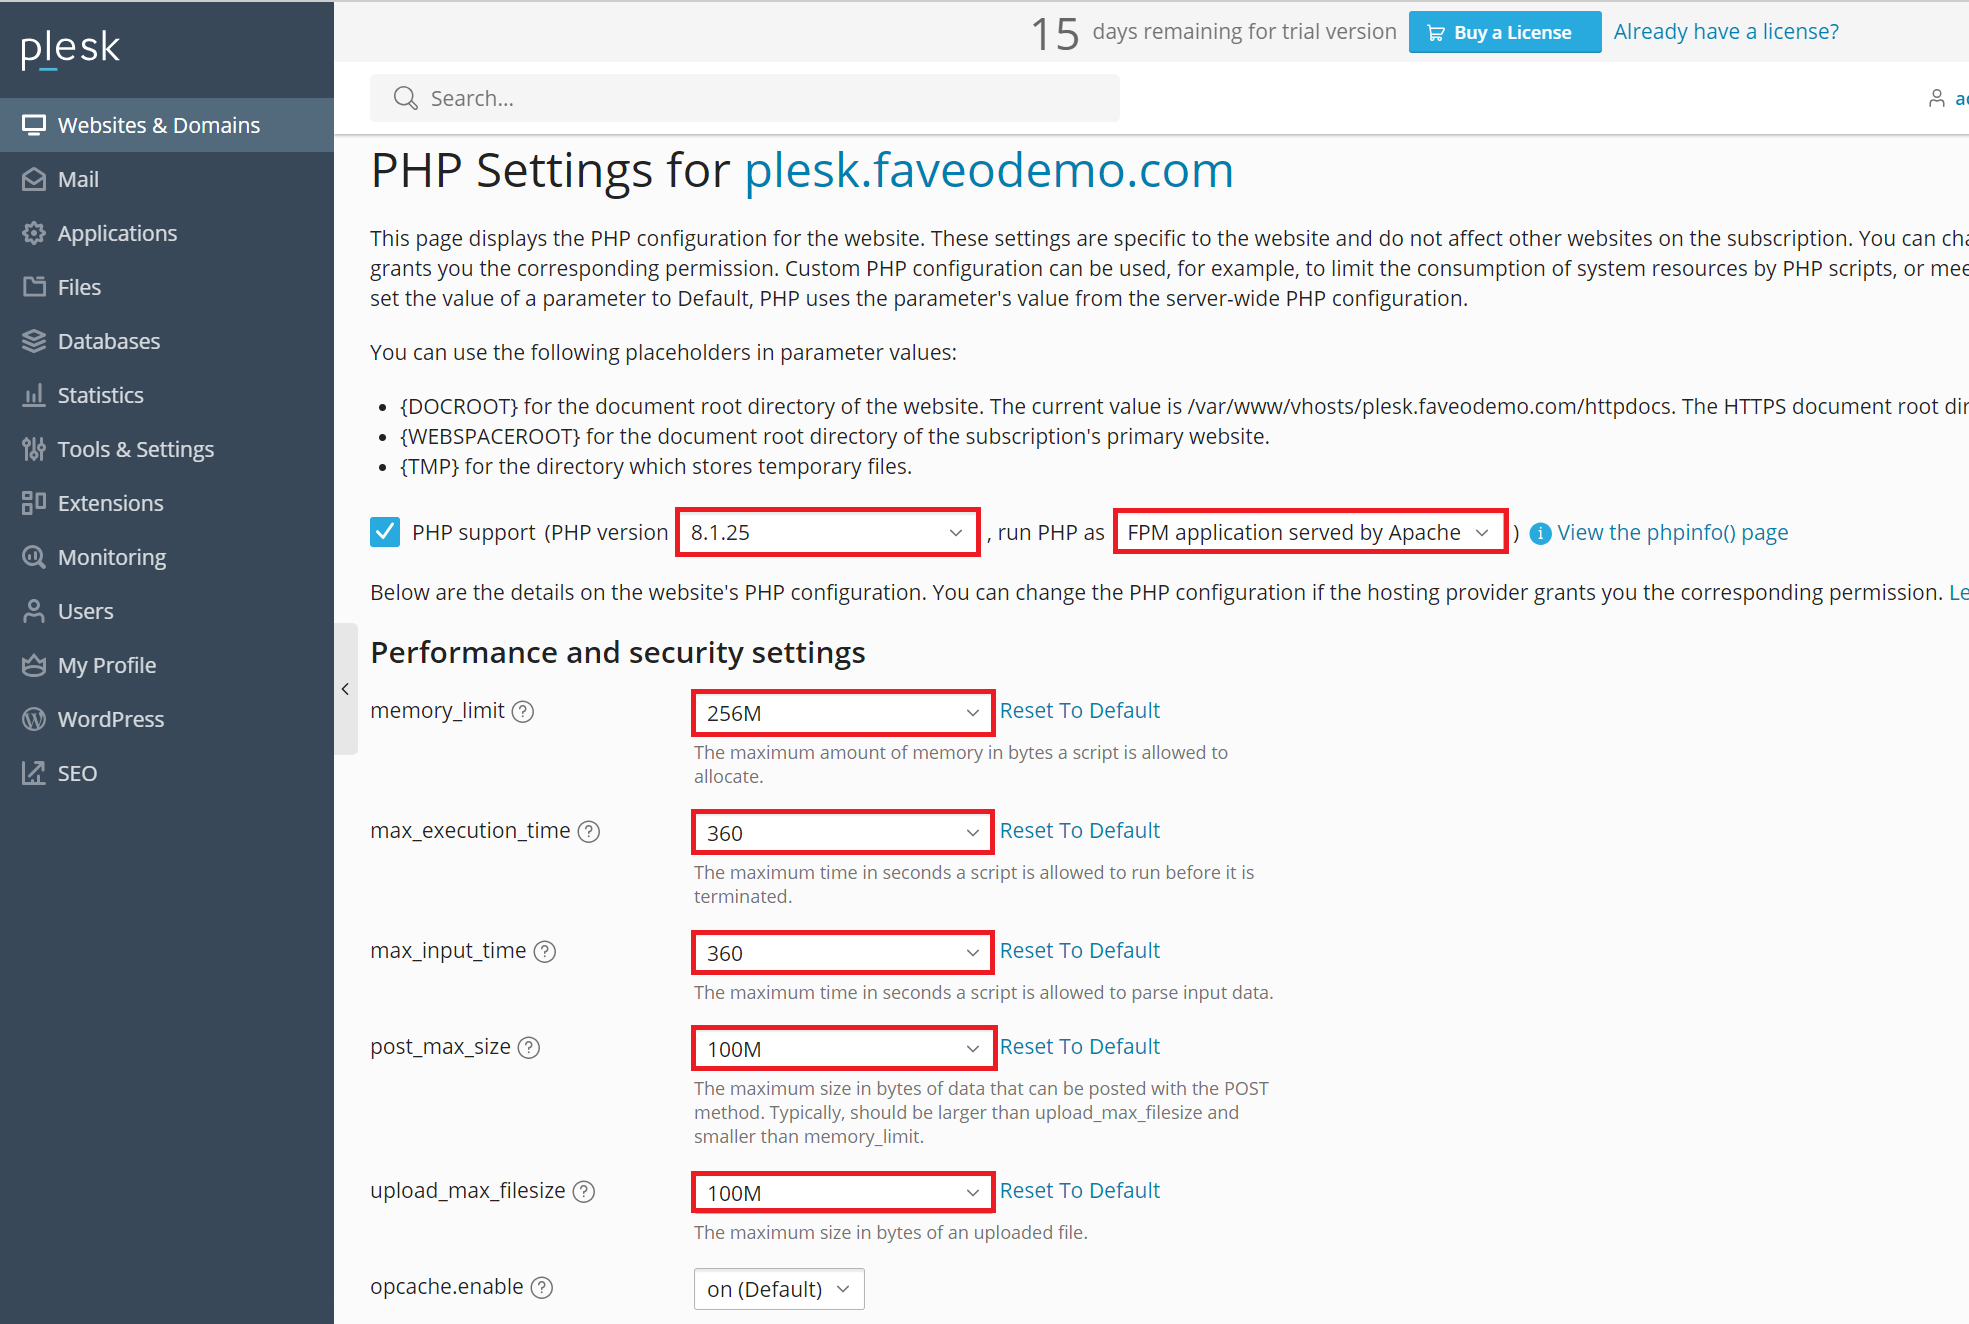
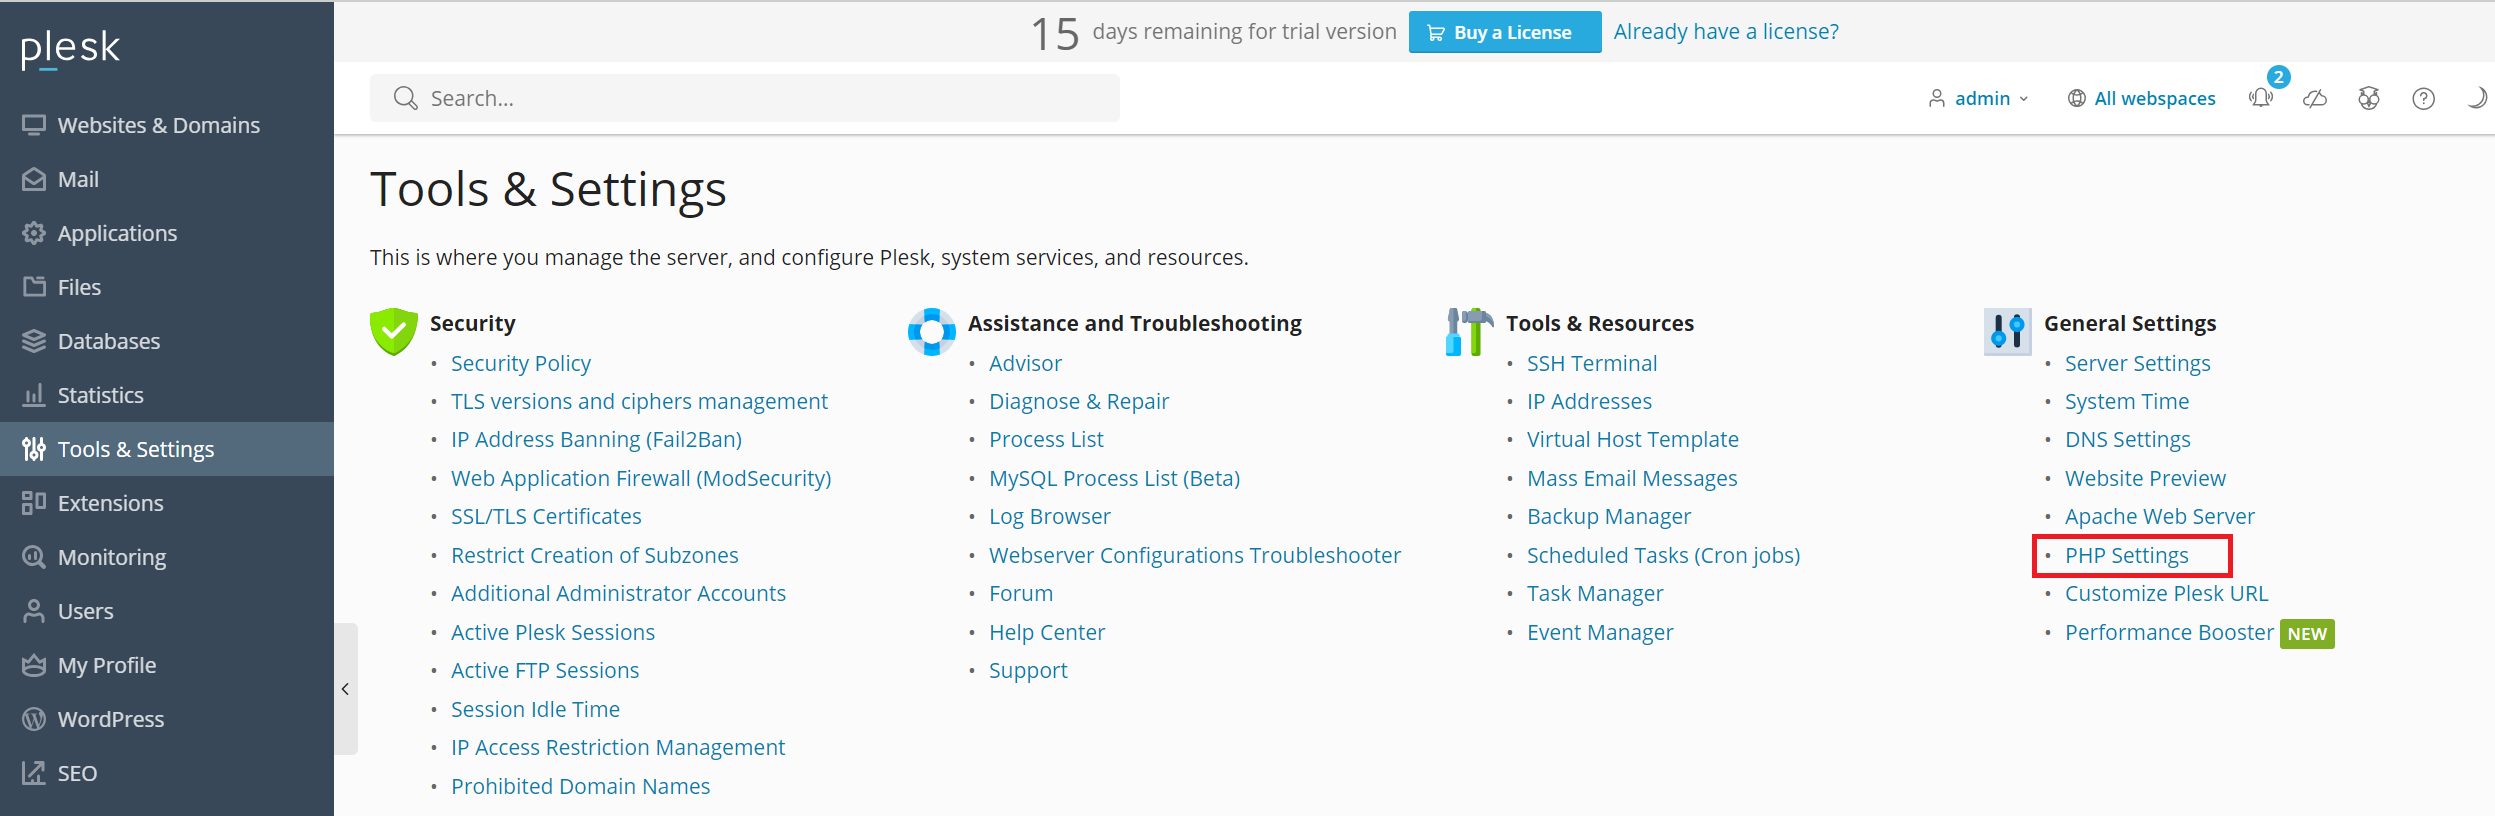
Go to Tools & Settings > PHP Settings
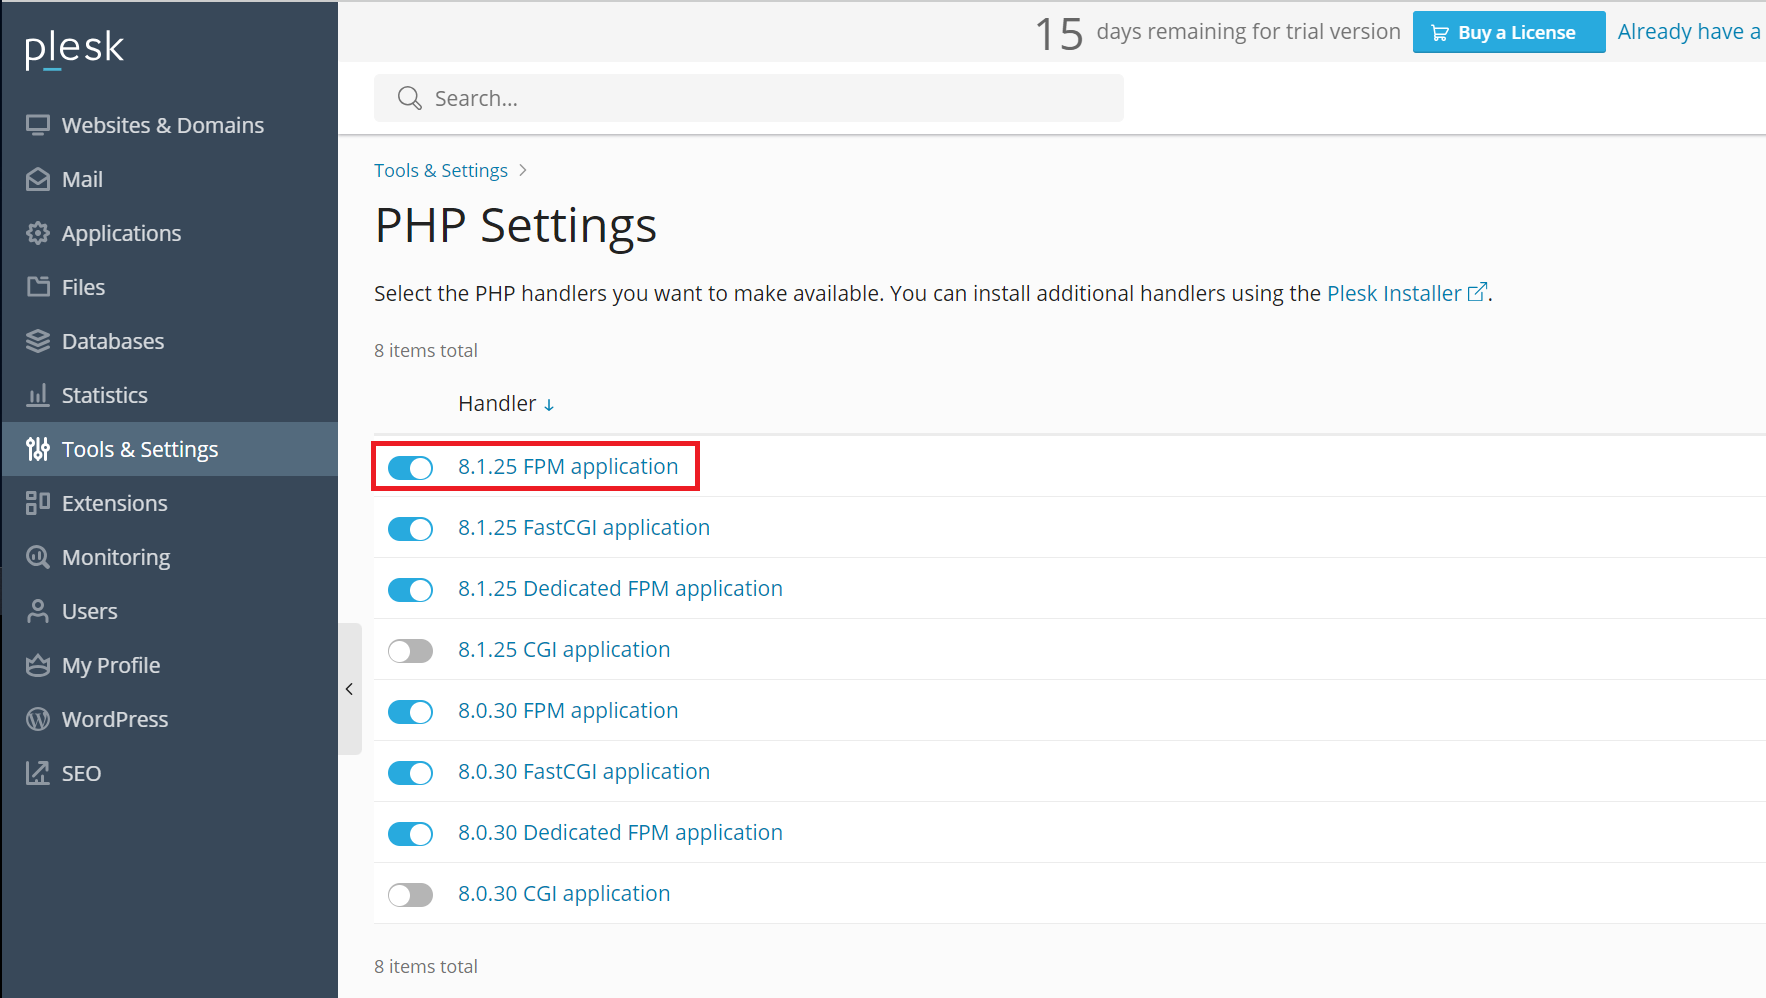
Click on the required PHP handler, for example, 8.1.X FPM application
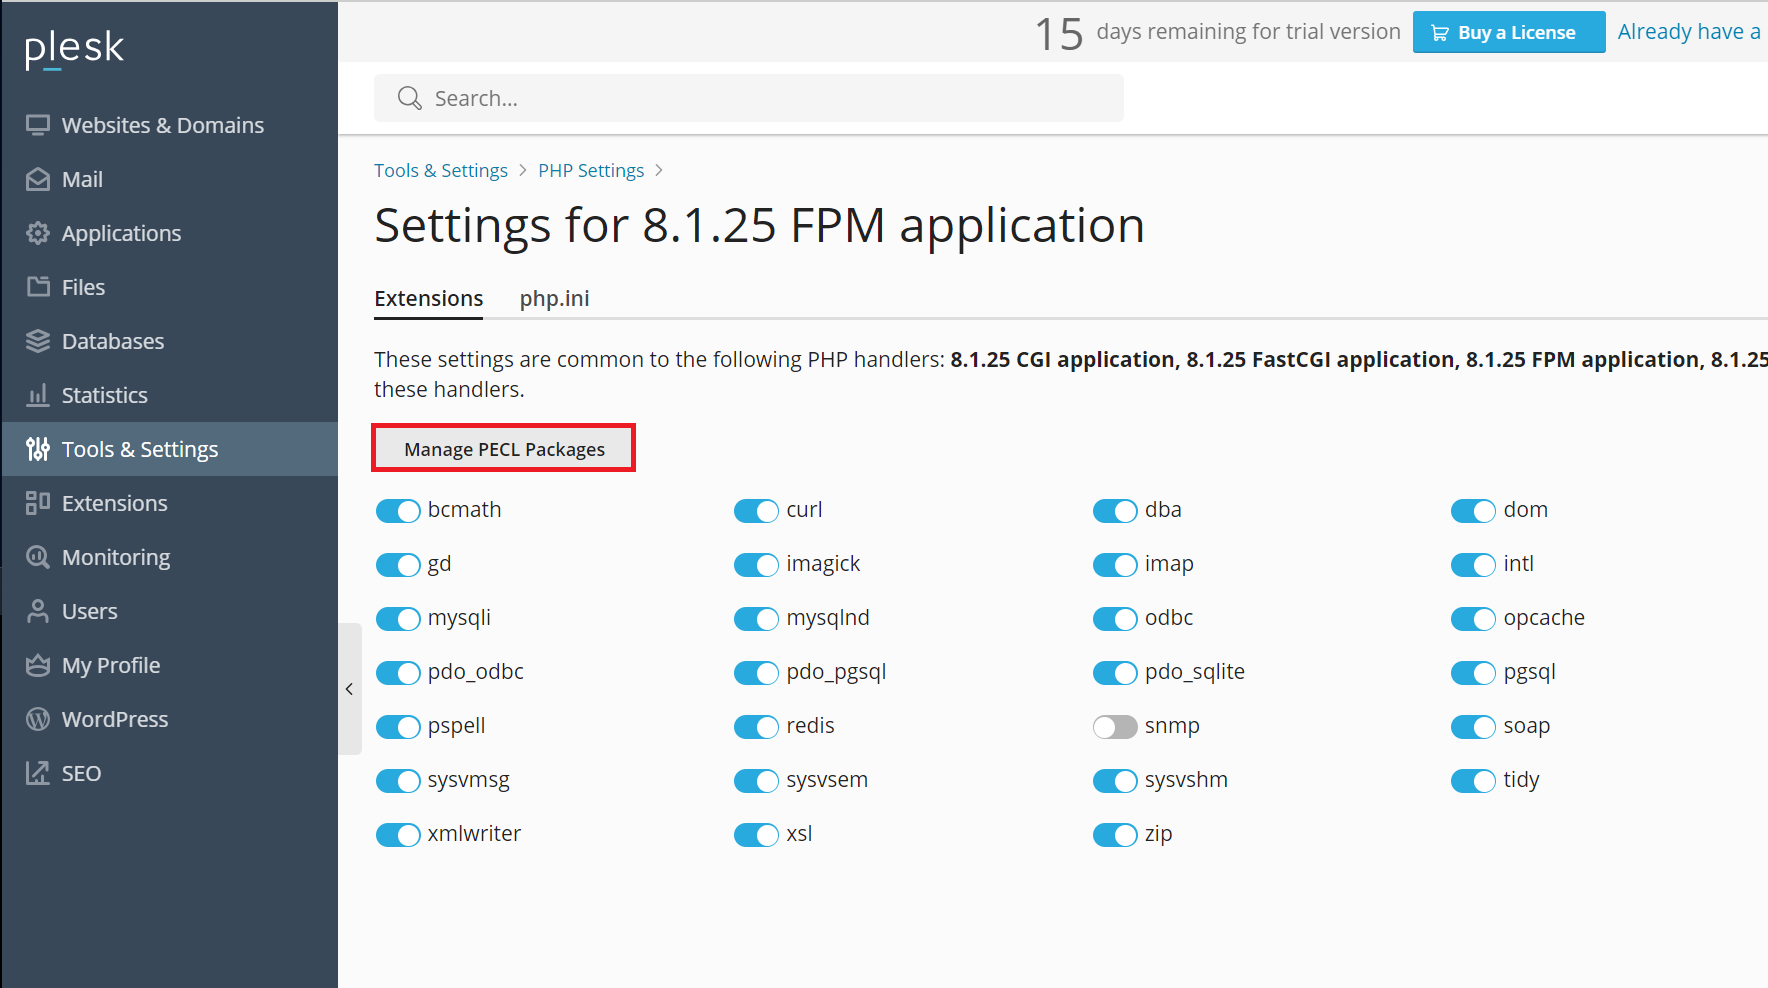
Go to Manage PECL Packages
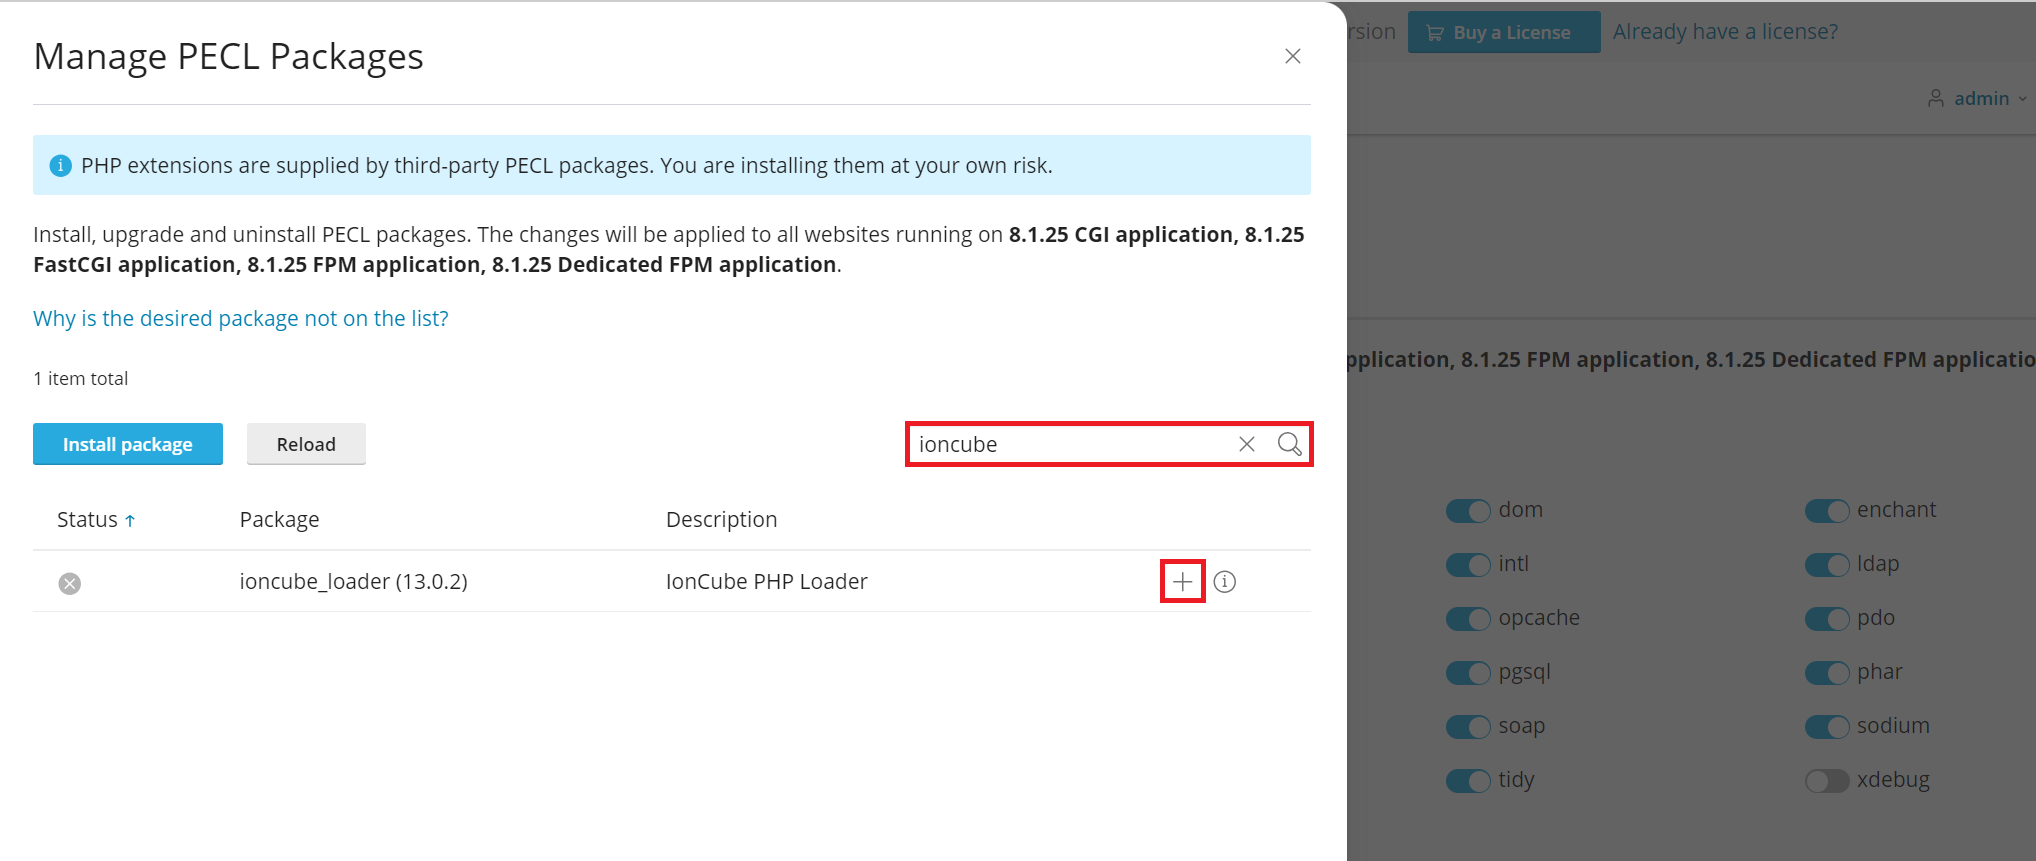
Search "ioncube" and click install the ioncube loader
3.c. Install wkhtmltopdf
Wkhtmltopdf is an open source simple and much effective command-line shell utility that enables user to convert any given HTML (Web Page) to PDF document or an image (jpg, png, etc).
It uses WebKit rendering layout engine to convert HTML pages to PDF document without losing the quality of the pages. Its is really very useful and trustworthy solution for creating and storing snapshots of web pages in real-time.
apt-get -y install wkhtmltopdf
4. Setup the database
Click Databases from the left-side menu to create a new database
Click the Add Database button.

Fill out the details for the new database
-
Provide the name of the new database.
-
Select the correct server type (MySQL or MariaDB) from the Database server dropdown.
-
You may keep the Related site’s default value.
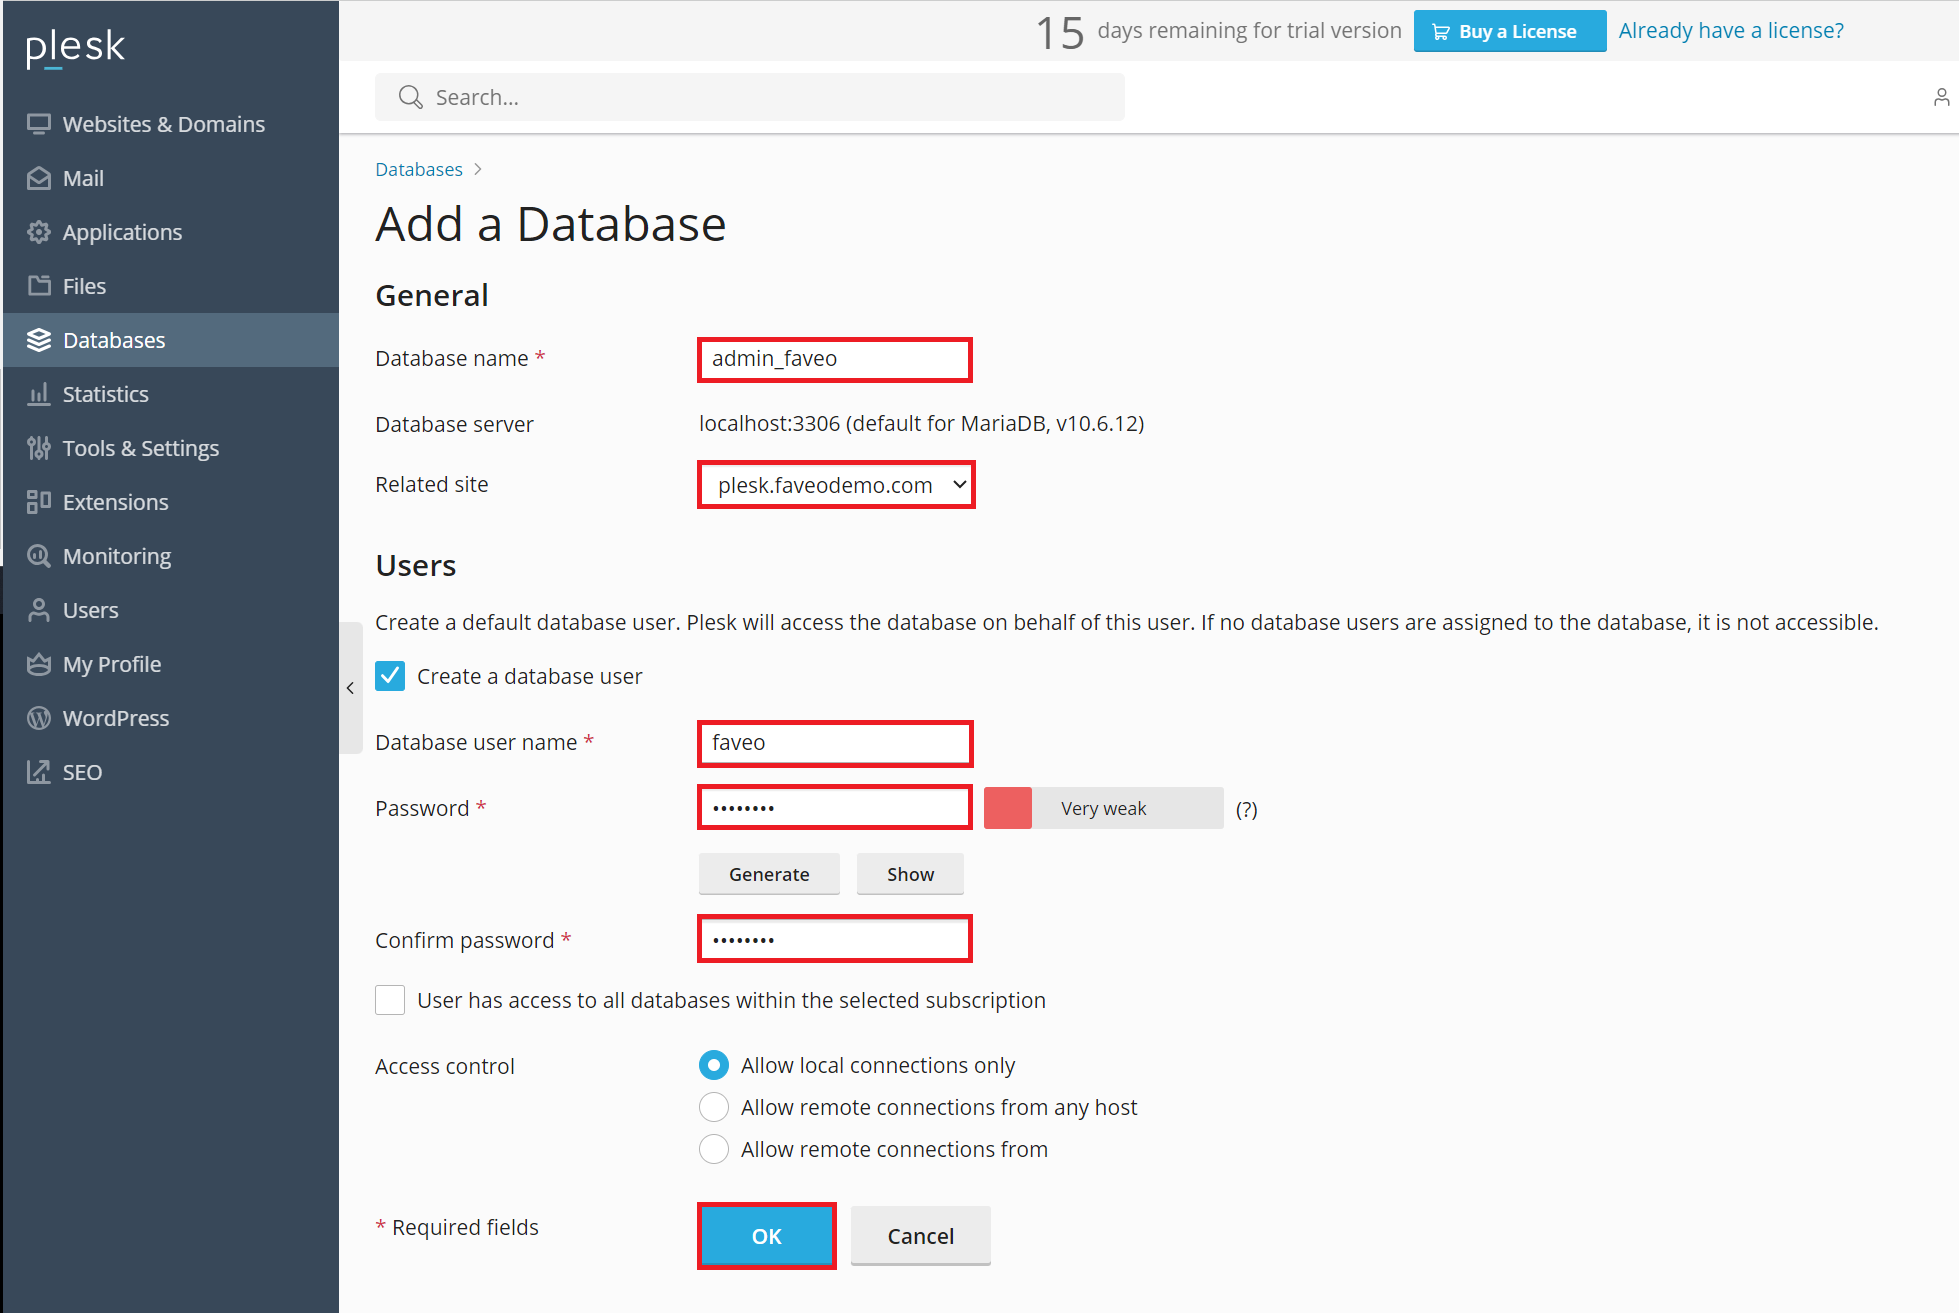
Once done with the database name, you will need to create the database user. Fill out the details for the Users.
If you want this new user to have access to all databases within your domain, you may want to put a checkmark on User has access to all databases within the selected subscription.
Click OK.
A confirmation will be displayed, and your new database is now added under your domain name.
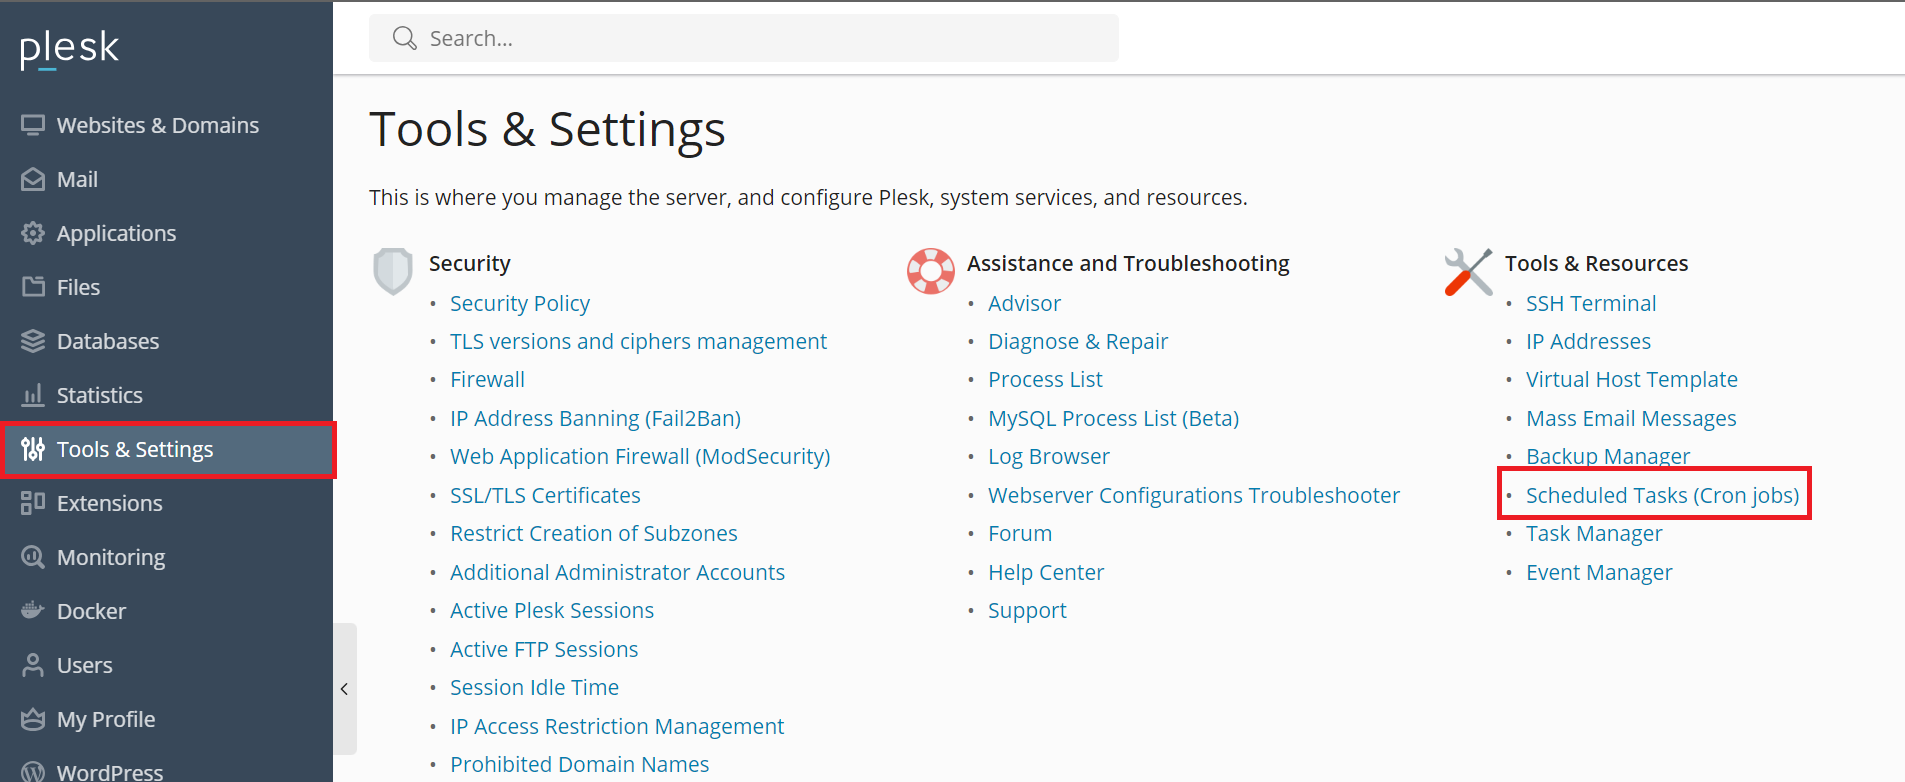
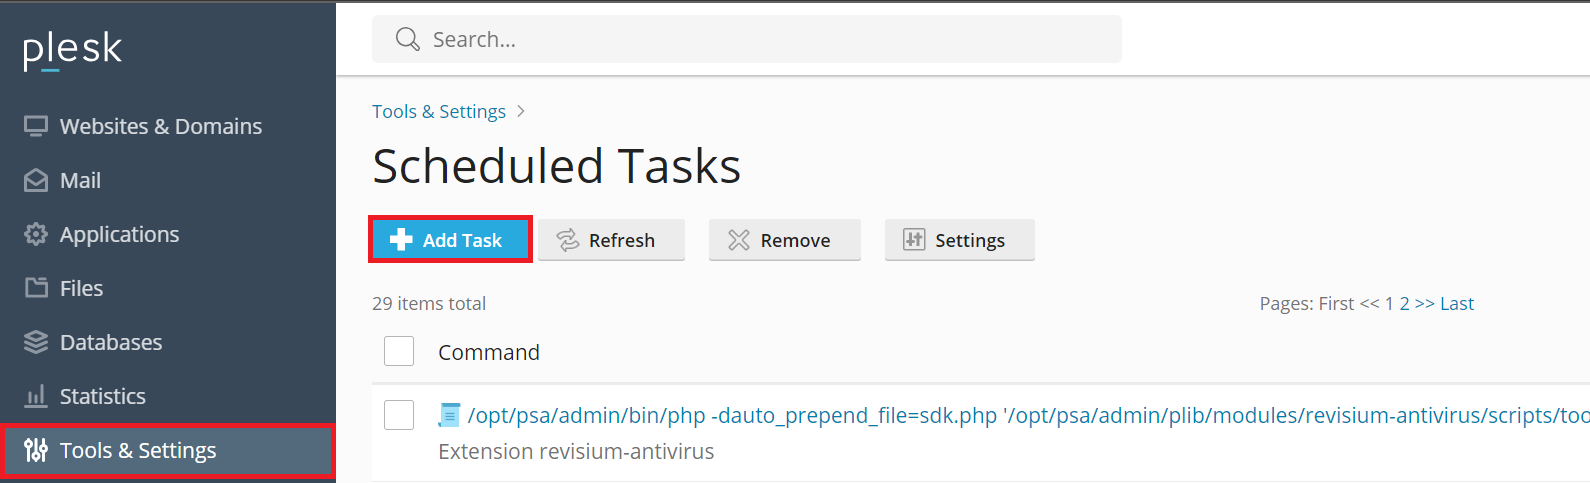
5. Scheduling Tasks
go to Tools & Settings > Scheduled Tasks (Cron jobs) > Add Task.
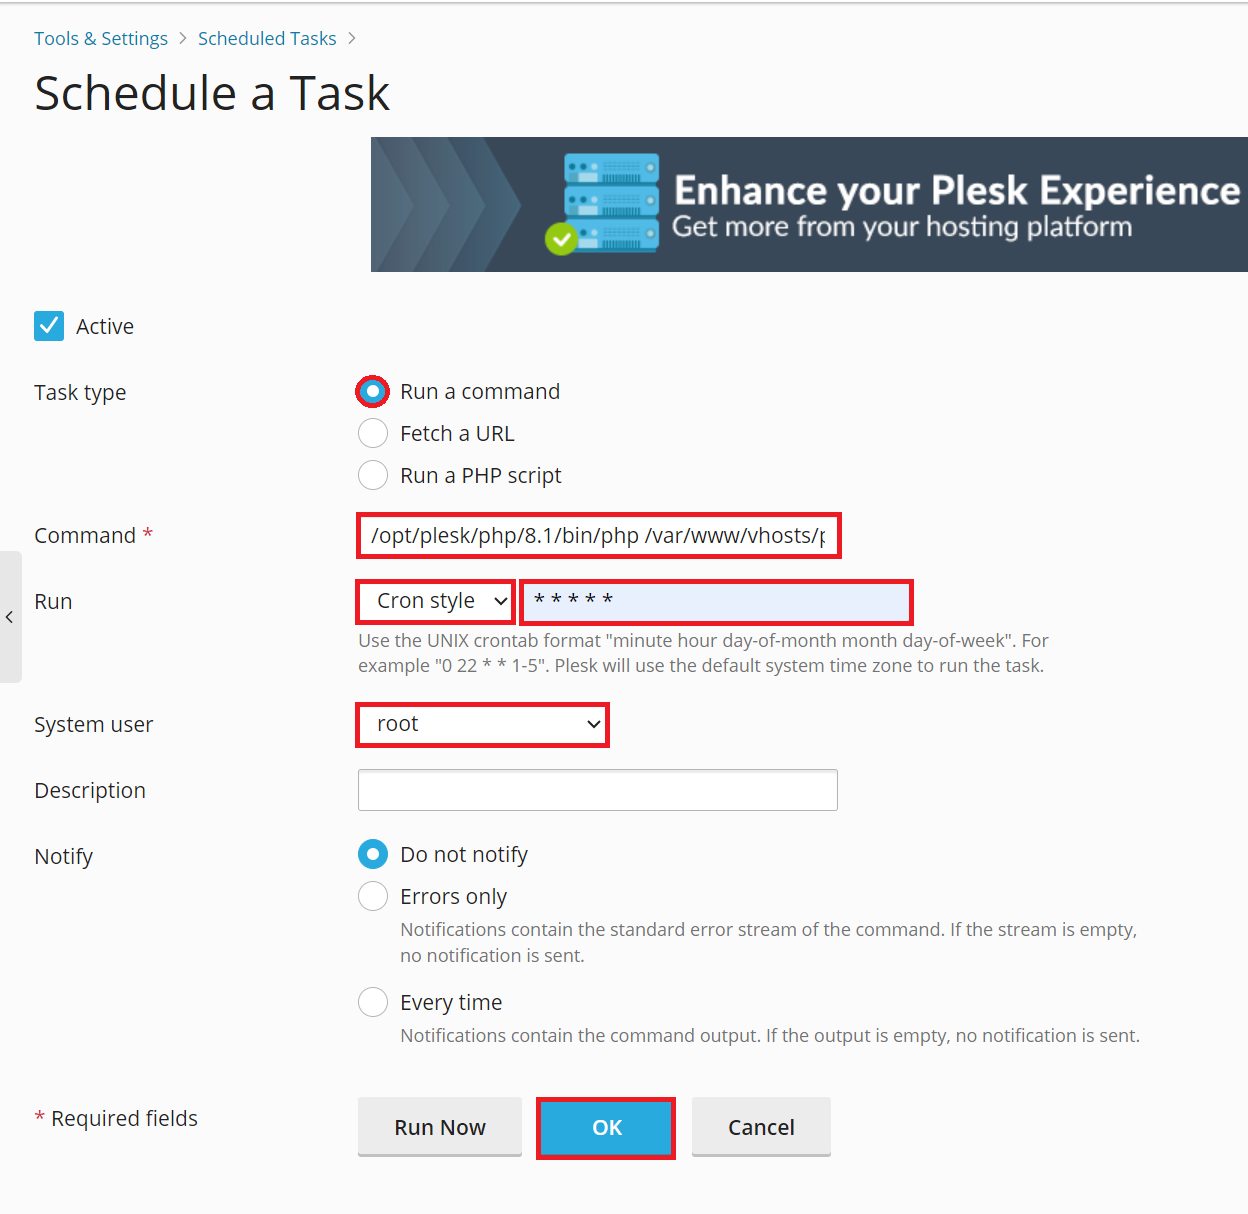
Fill in the Command text field with the cron command
Pick a editor of your choice copy the following and replace "–DOMAINNAME–"
/opt/plesk/php/8.1/bin/php /var/www/vhosts/"–DOMAINNAME"–/httpdocs/artisan schedule:run 2>&1
Click Add task and set specify Run parameter to Cron style.
Fill in the Run text field with cron-style time syntax
*****
6. Redis Installation
Redis is an open-source (BSD licensed), in-memory data structure store, used as a database, cache and message broker.
This is an optional step and will improve system performance and is highly recommended.
Redis installation documentation
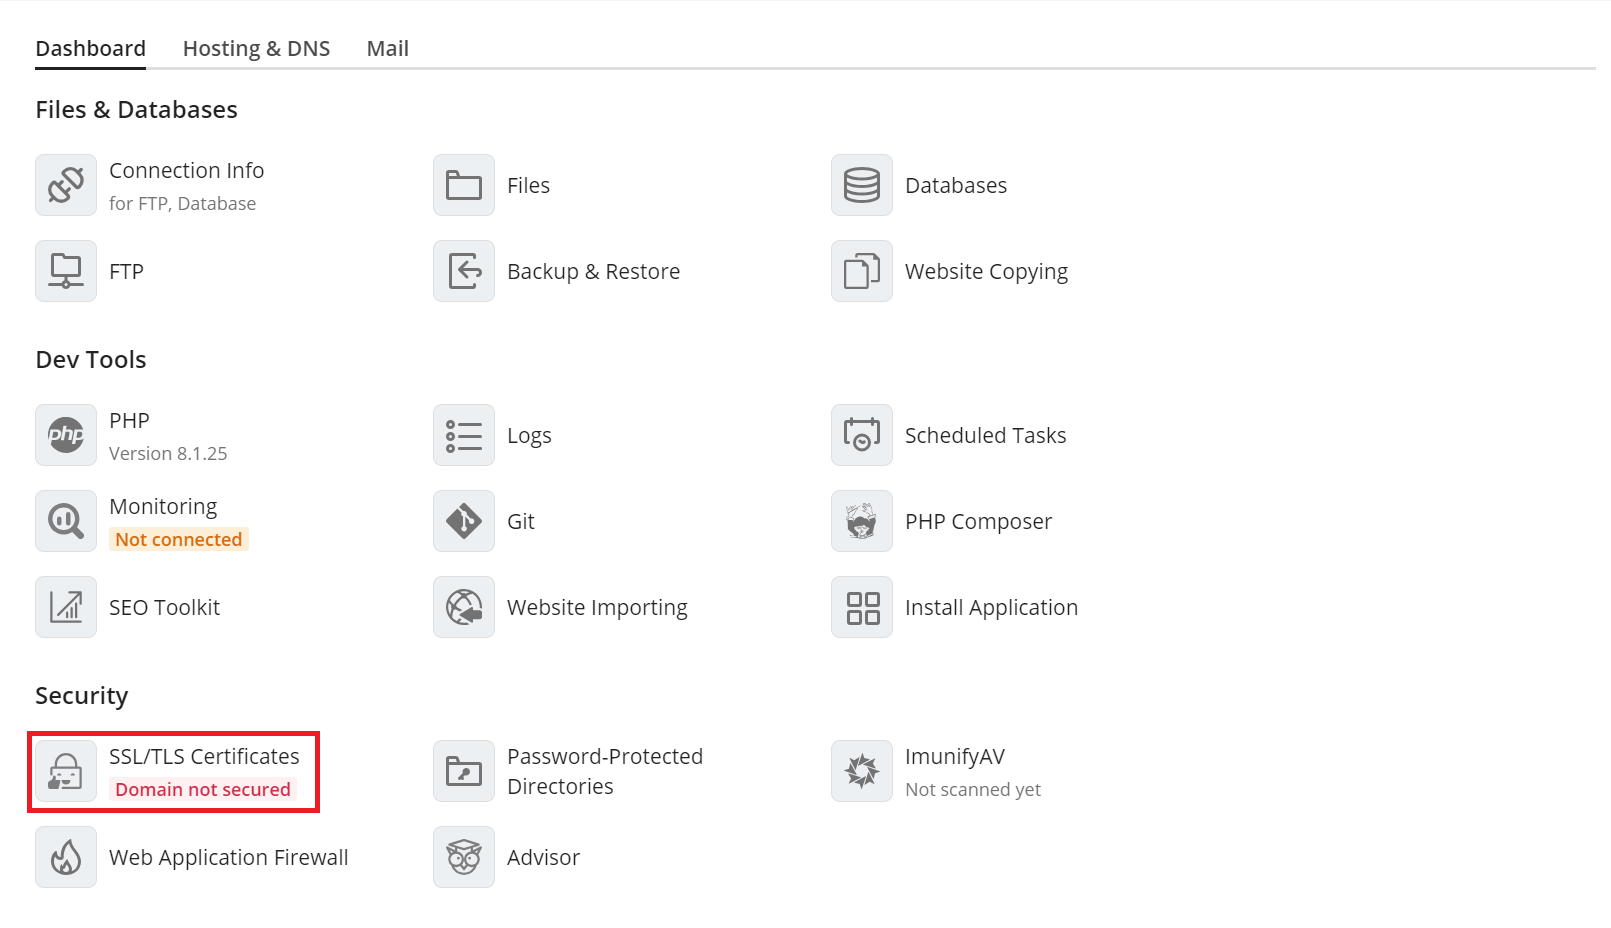
7. SSL Installation
Let’s Encrypt
- Go to Websites & Domains > domain name and click
SSL/TLS Certificates:
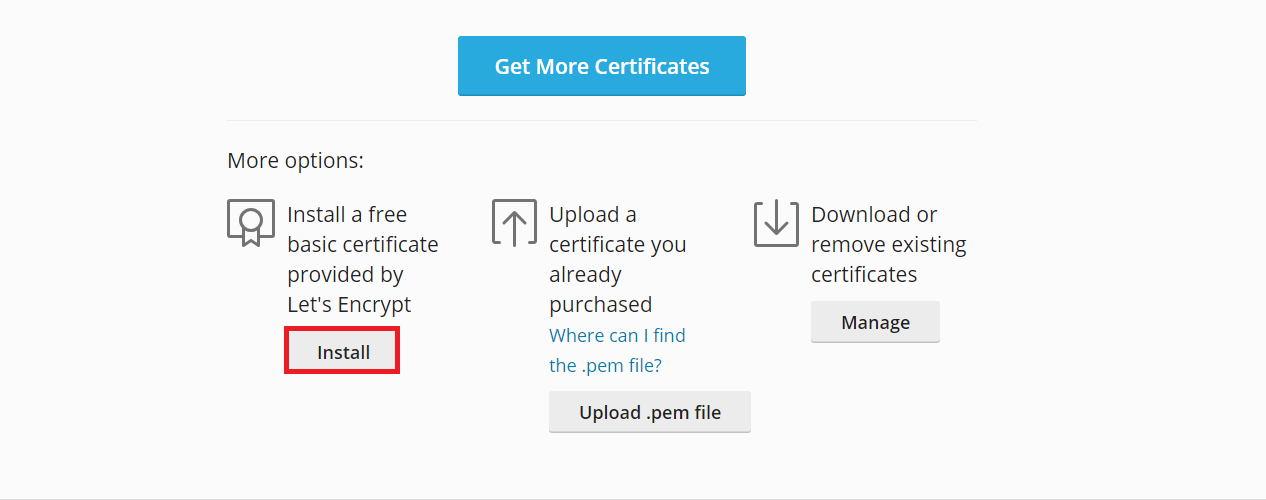
- At the bottom of the page, click
Installin the section More options > Install a free basic certificate provided by Let’s Encrypt:
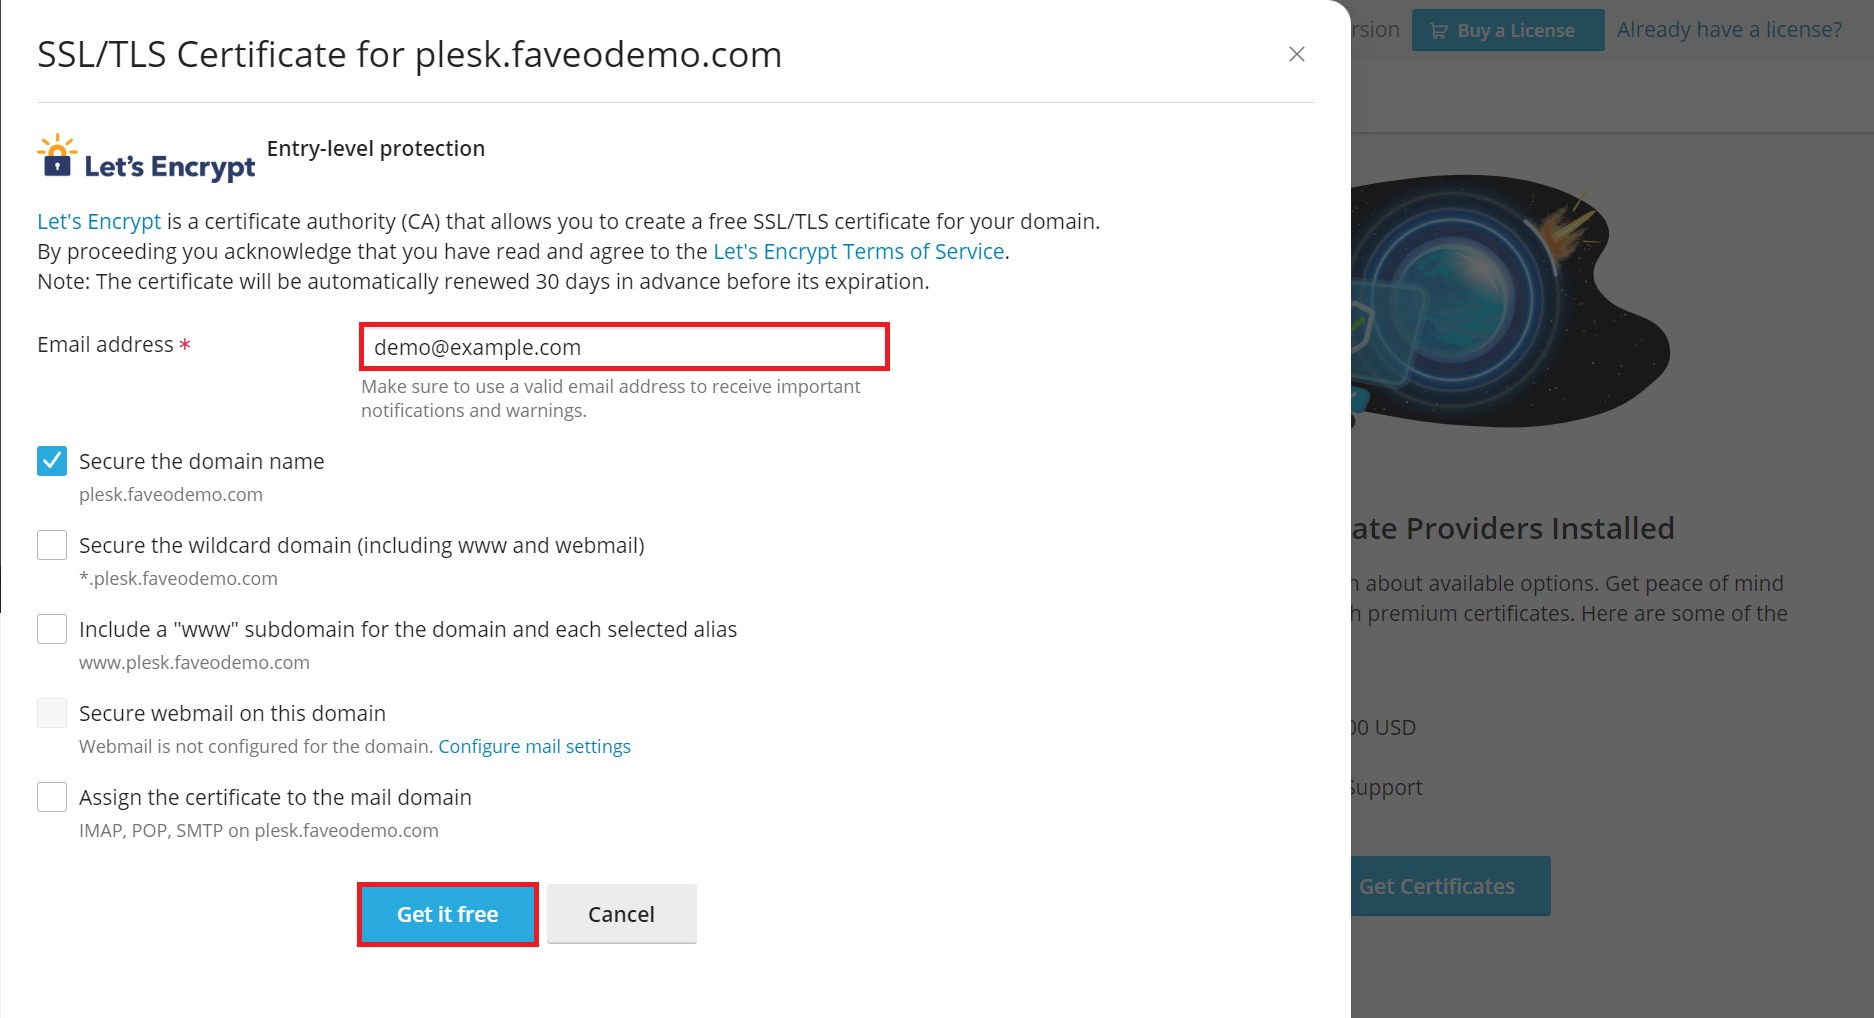
Select the desired options for the certificate to be issued. We recommend enabling the checkboxes:
- Secure the domain name
- Include a “www” subdomain for the domain and each selected alias
- Secure webmail on this domain
- Assign the certificate to mail domain
Note: The specified Email address will be used to receive important notifications and warnings about the certificate sent by Let’s Encrypt. Plesk by default takes the email from the owner of the domain to secure.
- Click
Get it free
8. Install Faveo
Now you can install Faveo via GUI Wizard