Faveo Installation on Windows with Apache Web Server
![]()
![]()
Faveo Installation on Windows with Apache Web Server
-
- 1.Install & Configure Apache for Windows
- 2. PHP 8.4 for Apache Web Server
- 3. Install Ioncube Loader
- 4. Install wkhtmltopdf
- 5. Upload Faveo
- 6. Install MariaDB 10.6/MySQL 8.0
- 7. Setting up the Database
- 8. Set Cron & Configure Queue Driver
- 9. Install Meilisearch
- 10. SSL Installation
- 11. Install Faveo
- 12. Faveo Backup
Before we follow the installation steps Notepad++ , Winrar & 7-Zip must be installed.
1. Install & Configure Apache for Windows
a. Download Apache for Windows
- Click Here to download 64-bit version Apache.
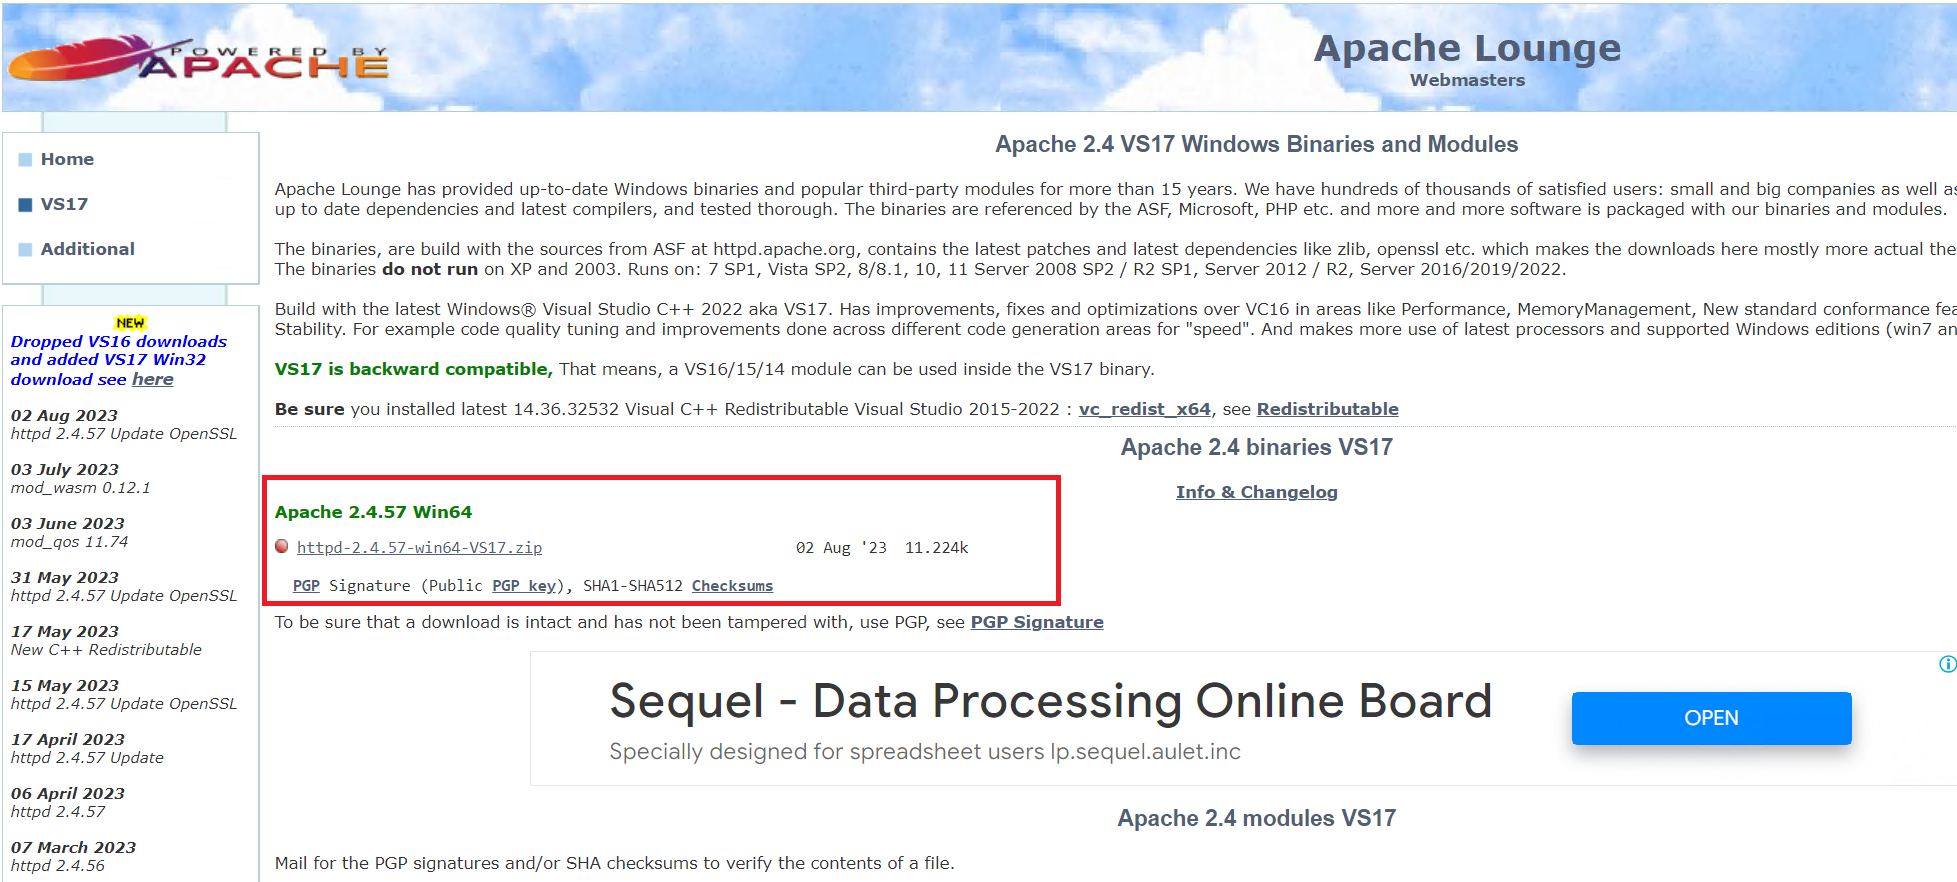
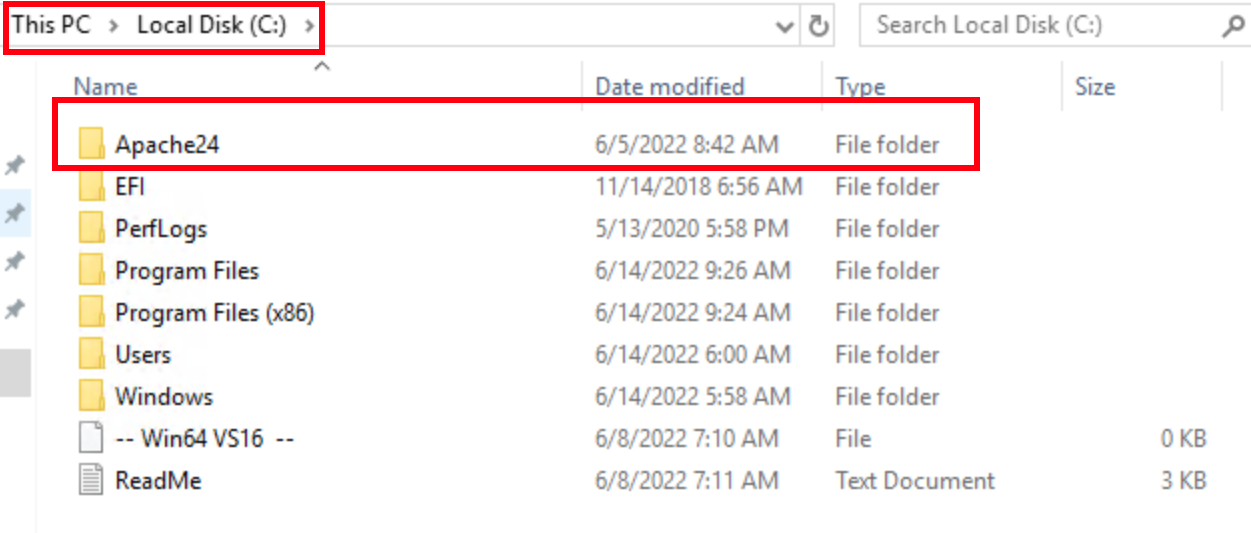
- Extract its contents of the zip file to a suitable location on your Windows server to be configured. It is recommended to extract the contents in the
C driveof the server.
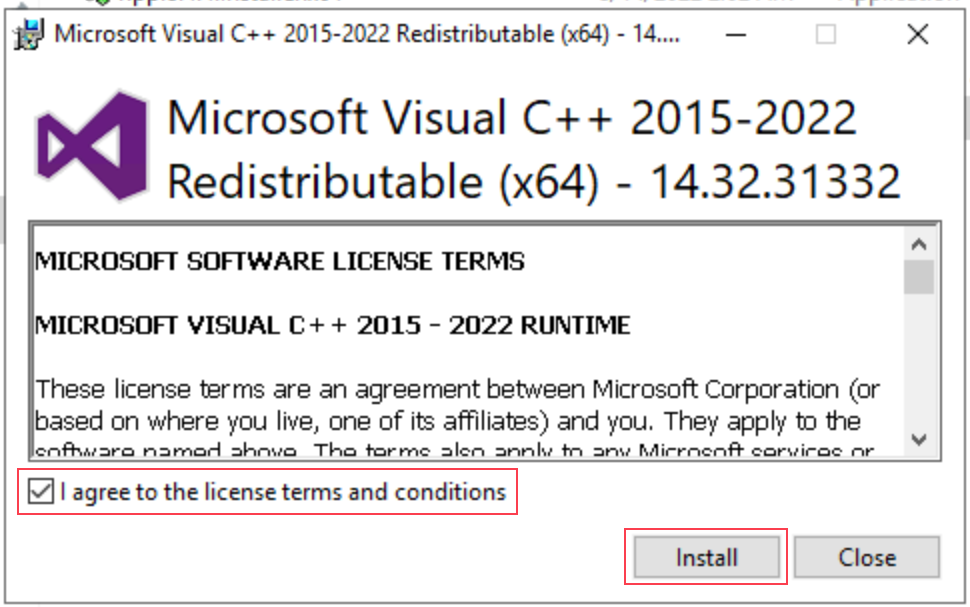
In addition, you need to have the relevant C++ Redistributable for Visual Studio installed on your server too.
- Click Here to download the Visual Studio.

- Execute the installer to perform the required installation.
- Accept the License Agreement terms and click
Install.
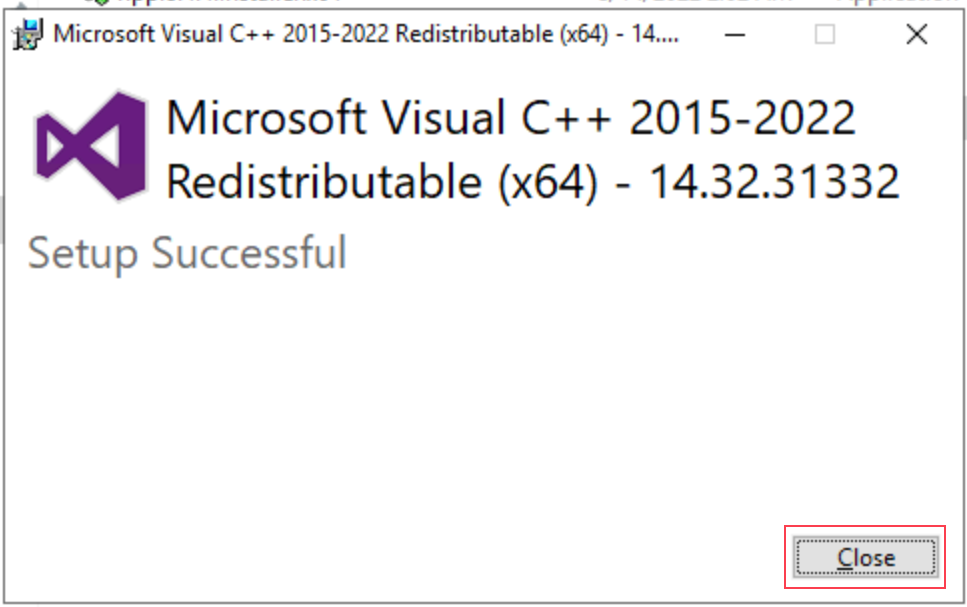
- Click
Closeto finish the installation.
b. Run Apache
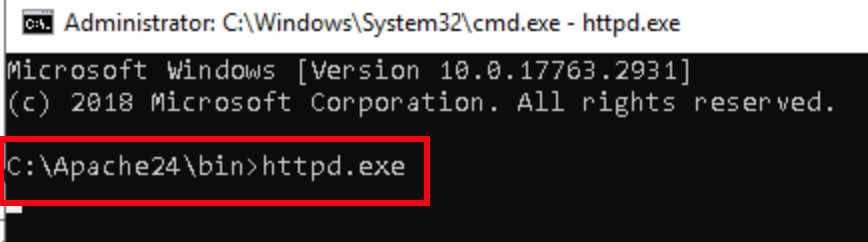
Open a Command Prompt in the C:\Apache24\bin folder. (i.e., the location where you extracted Apache).
- For command prompt, enter the following command to start Apache:
Httpd.exe
You might see a Windows Firewall prompt. Allow the access to be appropriate.
Failing to allow Apache access through your server’s firewall will result in other computers/devices being unable to connect to your web server.

You will come across a could not bind to address error if another service is already running on Apache’s default port (80).
Therefore, check that you don’t currently have an IIS (Internet Information Services) server already running.
If so, you either need to stop/disable IIS in order to run Apache or change the port on either IIS or Apache to allow both services to run simultaneously.
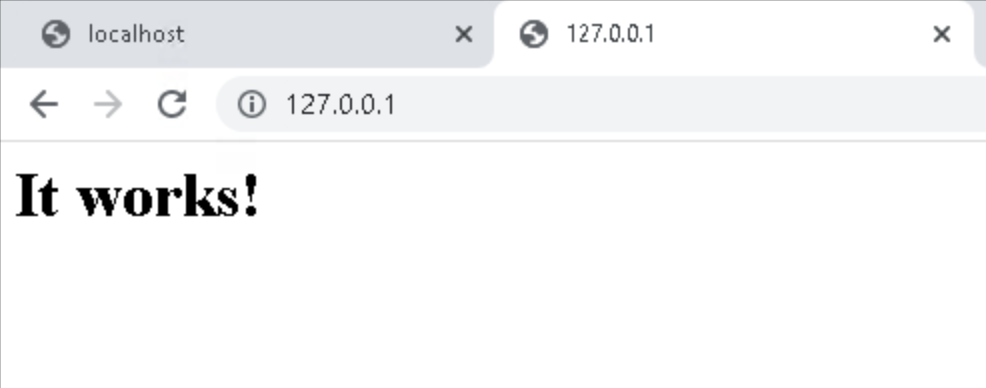
c. Test Whether Apache is Running Successfully
- Keep the previous command window open, and navigate to the below address with your web browser.
http://127.0.0.1
- If Apache is running on your Windows Server 2022 you will see the message It works! in your browser.
d. Install Apache as a Windows Service Default
After the previous step, Apache will exit after you close the command window.
To ensure that your Apache web server runs all the time, you need to install it as a Windows service.
Here is how you can install Apache as a Windows Service in an easy and quick way:
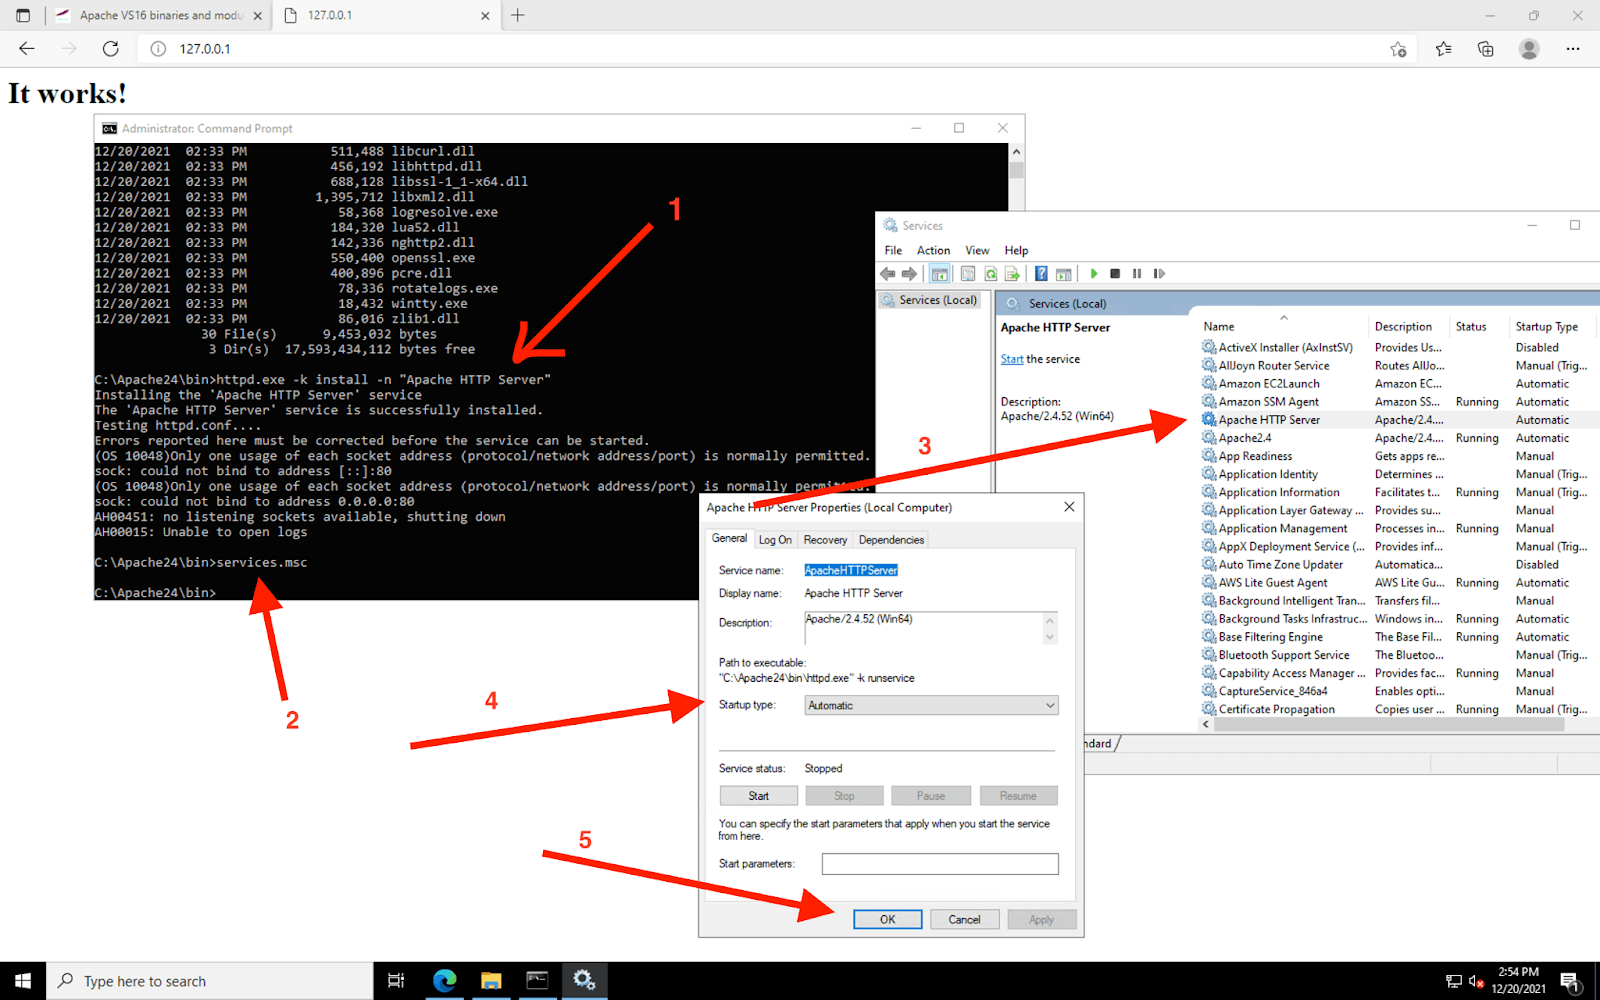
Step 1: Open an administrative command prompt window, navigate to the C:\Apache24\bin location and enter the following command:
httpd.exe -k install -n "Apache HTTP Server"
- You will see the following output,
Installing the 'Apache HTTP Server' service
The 'Apache HTTP Server' service is successfully installed.
Testing httpd.conf....
Errors reported here must be corrected before the service can be started.
Step 2: Then, write the following command and press Enter In the Command Prompt window.
services.msc
Look for the service Apache HTTP Server. You should see Automatic towards the left of that line. If you don’t, change the Startup Type to Automatic by double-clicking the line.
Step 3: Finally, restart your server and open a web browser once you are logged back in. Navigate to the following address in the web browser:
http://127.0.0.1
e. Configure Windows Firewall – Open to World
Configuring the Window’s Firewall is the final step to install Apache web server on Windows Server 2022. It allows connections from the Internet to your new web server. Here are the steps that you need to follow:
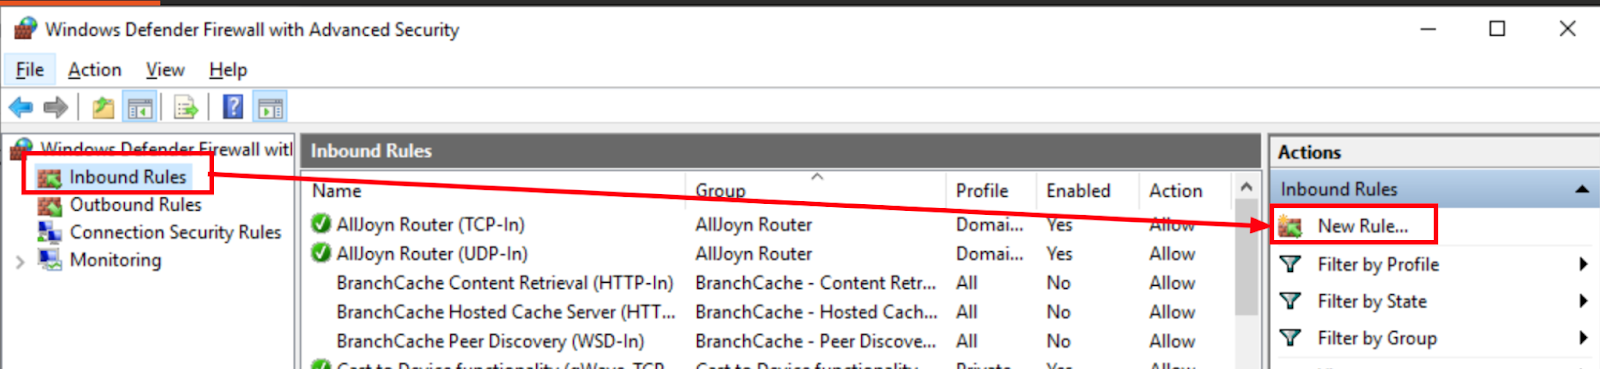
- Step 1: Go to Start Menu and enter a search query,
firewall. Select theWindows Firewall With Advanced Securityitem.

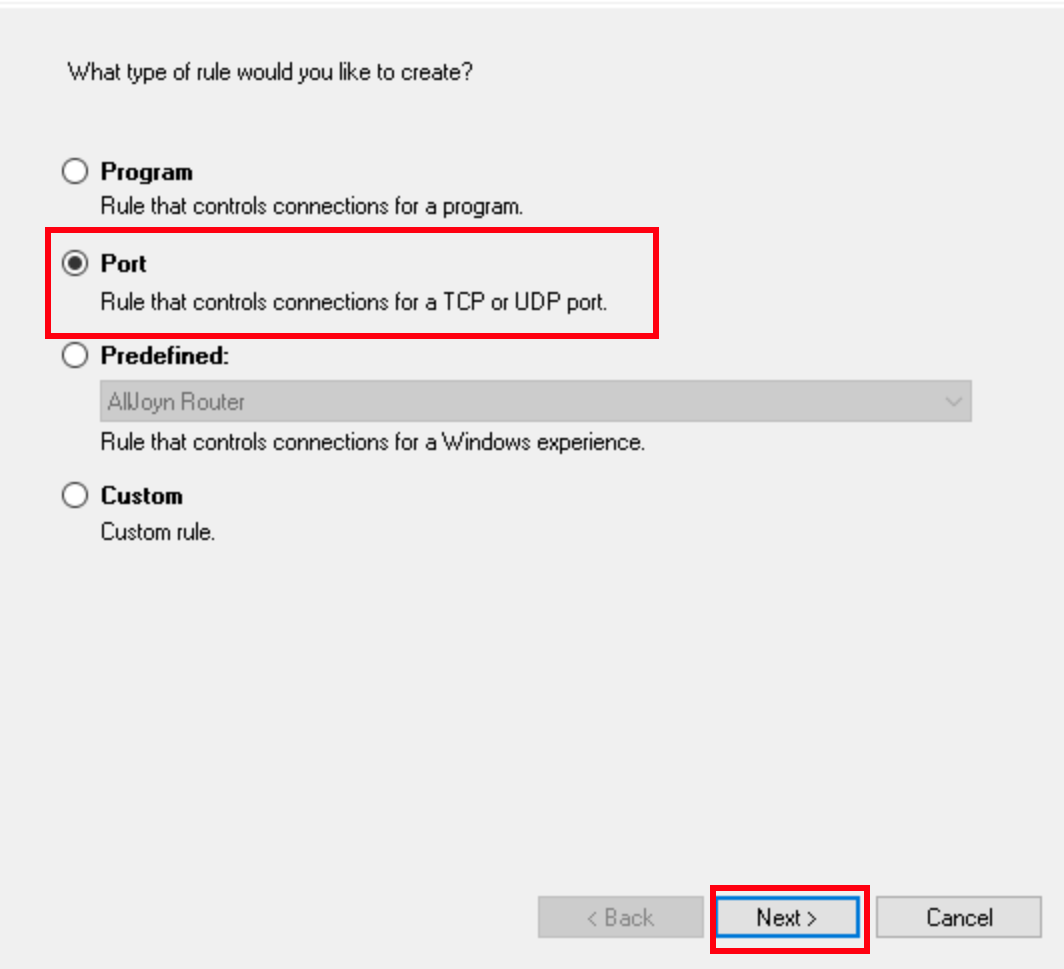
- Step 2: Select the
New Ruleon the right-hand sidebar.
- Step 3: Click on
Port,and then clickNext.
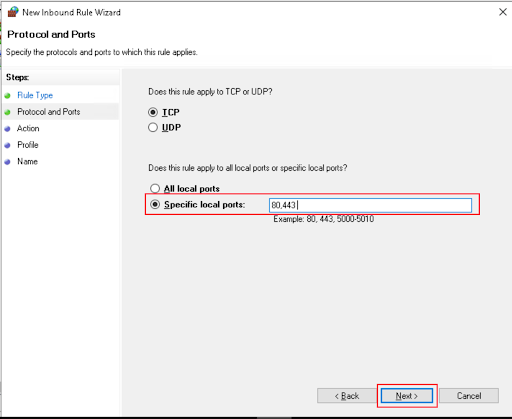
- Step 4: Then, select the radio button next to
Specific remote ports:and enter the following into the input box:80, 443.
-
Step 5: Click
Nextand select theAllow the connectionoption. -
Step 6: Click
Next. Make sure that all the boxes on the next page are selected and then clickNextagain. -
Step 7: In the
Namesection, enter a description which ensures that you will be able to remember the rule’s purpose later such as:Allow Incoming Apache Traffic.

- Step 8: Click
Finish. - Step 9: Test the server for other devices by connecting to your server’s IP address from a device other than the one you are using to connect to the server right now. Open a web browser on that device and enter the IP address of your server like:
http://SERVER-PUBLIC-IP
You will be able to see the test web page that shows the message It works!.
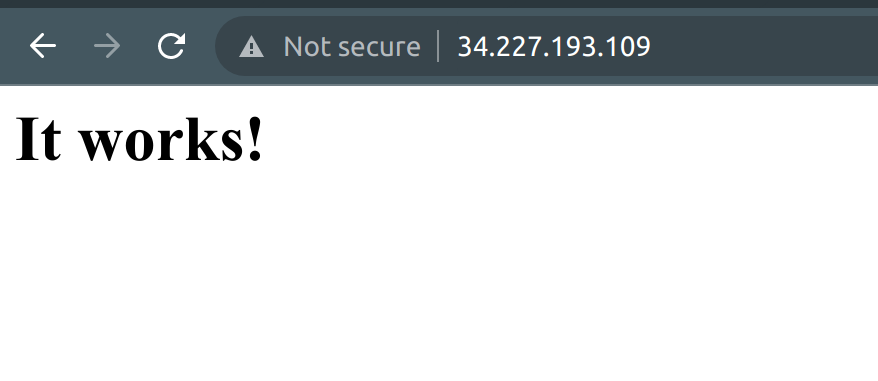
If the test page works successfully and shows the message, it means that you have successfully configured Windows Firewall and other devices can connect to your web server.
These were the simple steps by which you can install Apache Web Server on Windows Server 2022.
f. Mod_fcgi
- Click Here to download Mod_fcgi zip file.

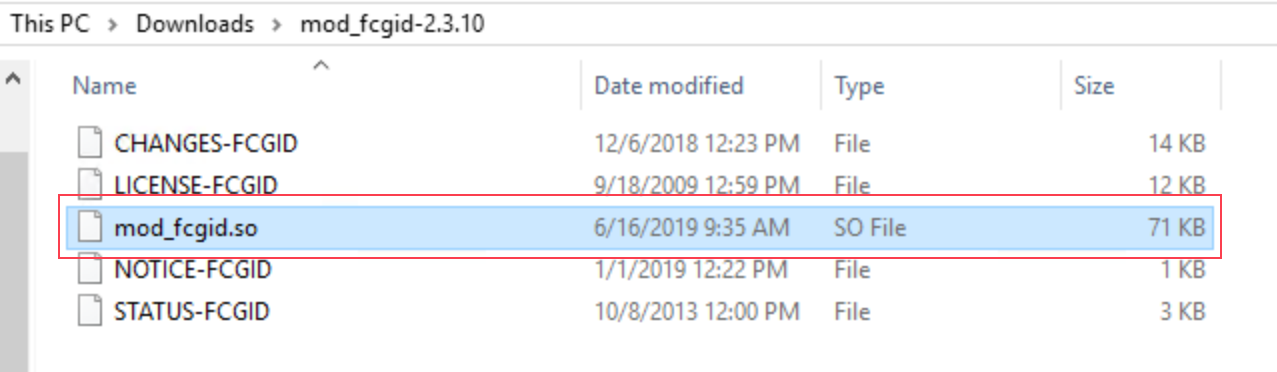
- Step 1: Unzip the
mod_Fcgi file, copy themod_fcgid.sofile to theC:\Apache24\modulesfolder.
-
Step 2:Edit the
C:\Apache24\conf\httpd.conffile using a text editor in Administrator mode, so that any changes you make are saved. -
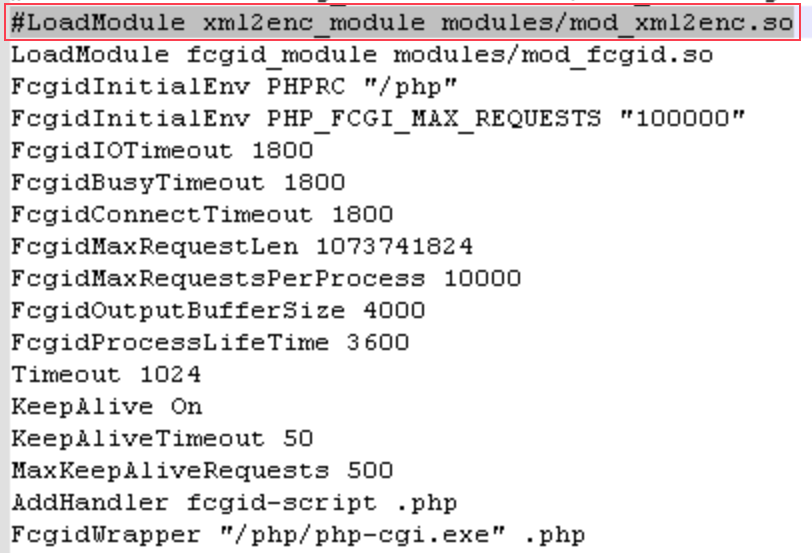
Add the content below after the
#LoadModule xml2enc_module modules/mod_xml2enc.soline:
LoadModule fcgid_module modules/mod_fcgid.so
FcgidInitialEnv PHPRC "/php"
FcgidInitialEnv PHP_FCGI_MAX_REQUESTS "100000"
FcgidIOTimeout 1800
FcgidBusyTimeout 1800
FcgidConnectTimeout 1800
FcgidMaxRequestLen 1073741824
FcgidMaxRequestsPerProcess 10000
FcgidOutputBufferSize 4000
FcgidProcessLifeTime 3600
Timeout 1024
KeepAlive On
KeepAliveTimeout 50
MaxKeepAliveRequests 500
AddHandler fcgid-script .php
FcgidWrapper "/php/php-cgi.exe" .php
- Step 3: Search for
#ServerName www.example.com:80and change this line to below:
ServerName YOURDOMAIN:80
- Step 4: Change the contents of the
DirectoryIndexdirective by adding the following contents to the directive line:
index.php index.phtml
After adding this, it will look like below:

- Step 5: Set the
${SRVROOT}variable with your Apache folder path: Search for theDefine SRVROOTand edit it as follows:
Define SRVROOT "c:/Apache24"
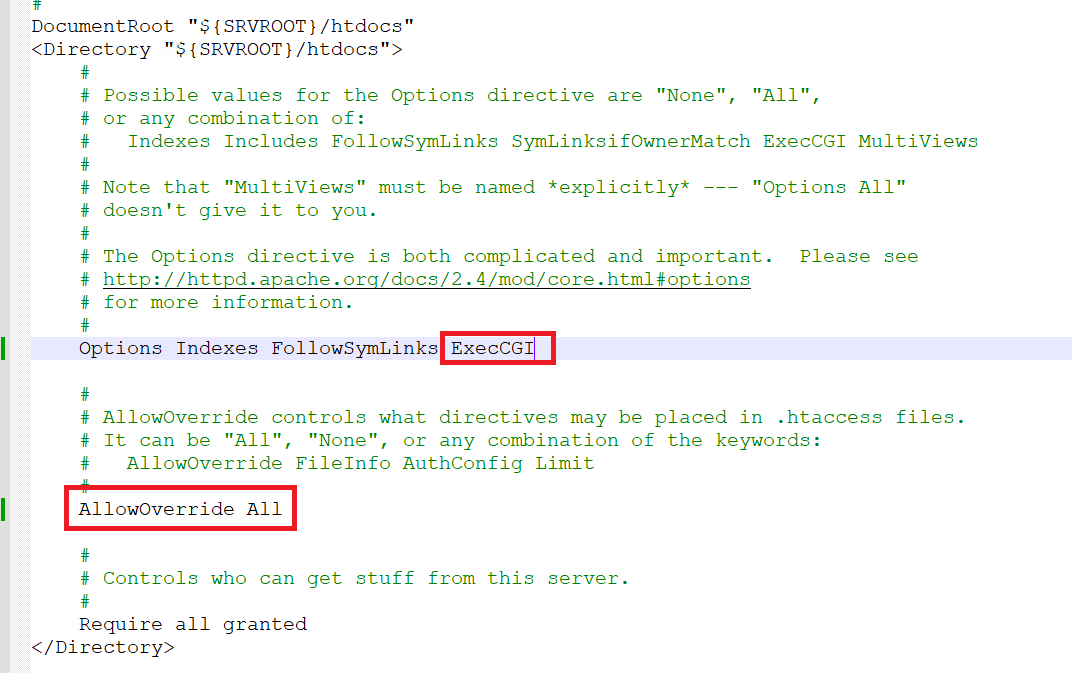
- Step 6: Change the contents of the
<Directory "${SRVROOT}/htdocs">directive.
Options Indexes FollowSymLinks ExecCGI
AllowOverride All
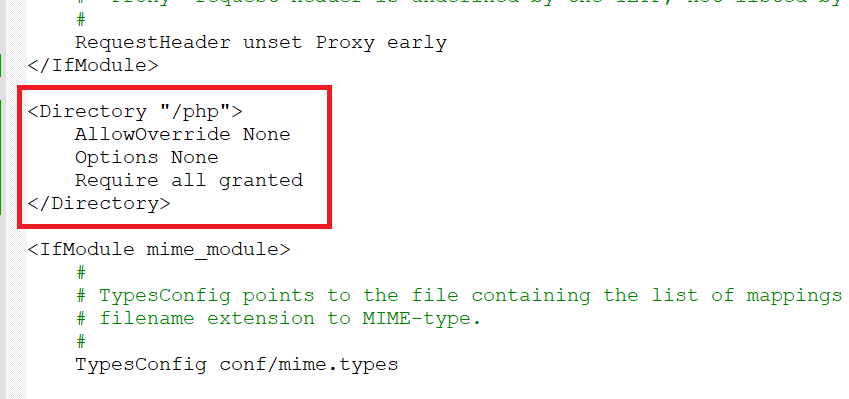
- Step 7: Search for the
IfModule mime_moduledirective and add the below content above this directive:
<Directory "/php">
    AllowOverride None
    Options None
    Require all granted
</Directory>
g. Enable Necessary Modules
- Look for the following line in
C:\Apache24\conf\httpd.conf, Uncomment it by removing # at its beginning.
LoadModule rewrite_module modules/mod_rewrite.so
LoadModule authz_host_module modules/mod_authz_host.so
LoadModule access_compat_module modules/mod_access_compat.so
2. PHP 8.4 for Apache Web Server
- Click Here to download
php-8.4.29-nts-Win32-vs16-x64.zipfile.

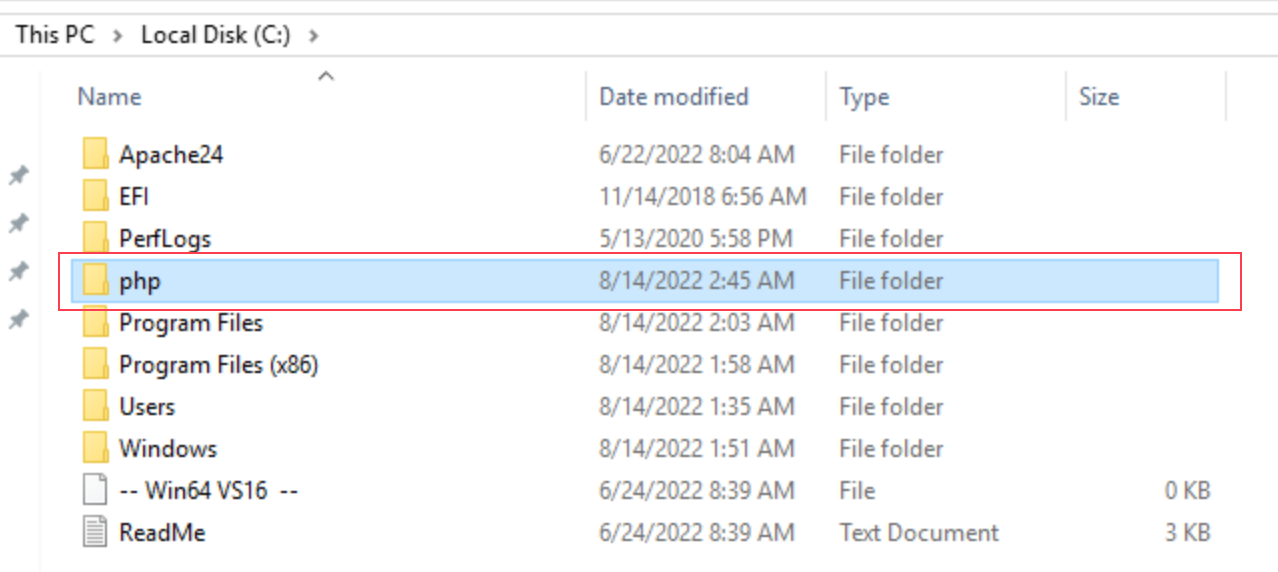
- Extract the zip file & rename it to
php. Now move the renamedphpfolder toC drive.
b. Configure the PHP 8.4
With Apache active and functional, you now need to define and configure the C:\php\php.ini file so those database extensions and libraries are available for use by Faveo.
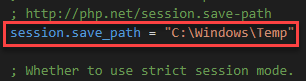
- Step 1: Access the PHP folder in
C:/and rename thephp.ini-developmentfile tophp.ini.
- Step 2: Access the
php.inifile with a text editor using Administrative privileges and search for the;extension_dir = "ext"directive.
Assign the value “C:\php\ext” to this directive as shown below:
extension_dir = "C:\php\ext"
After assigning the value C:\php\ext, it will look like below:

- Step 3: Enable the extensions listed below, by uncommenting them (Remove the semicolon
;at beginning of line).
Default Extensions
extension=bz2
extension=ldap
extension=curl
extension=fileinfo
extension=gd
extension=gettext
extension=imap
extension=mbstring
extension=exif
extension=mysqli
extension=openssl
extension=pdo_mysql
extension=soap
extension=sockets
extension=sodium
- Step 4: Set the recommended minimum value of these PHP directives listed below for Faveo to work properly.
- Search for the directives and assign the value according to this example:
max_execution_time = 360
max_input_time = 360
max_input_vars = 10000
memory_limit = 256M
post_max_size = 1024M
upload_max_filesize = 100M
max_file_uploads = 100
short_open_tag = On
- Step 5: Set up PHP TimeZone according to your region. You must use the value available in PHP Documentation
- Search for the
date.timezoneline, uncomment it and edit it according to the selected TimeZone:
date.timezone = Asia/Kolkata
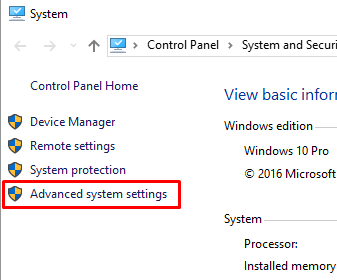
- Step 6: Set the folder where temporary files will be stored.
- Search for the
;session.save_path line, uncomment it, and enter the path to your temporary folder.
session.save_path = "C:\Windows\Temp"
After adding the path, it look look like below:
-
Step 7: Save all changes made to the
php.inifile. -
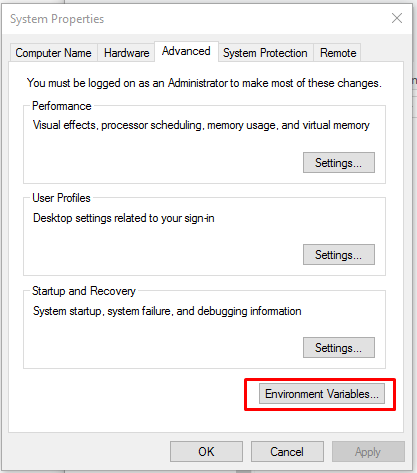
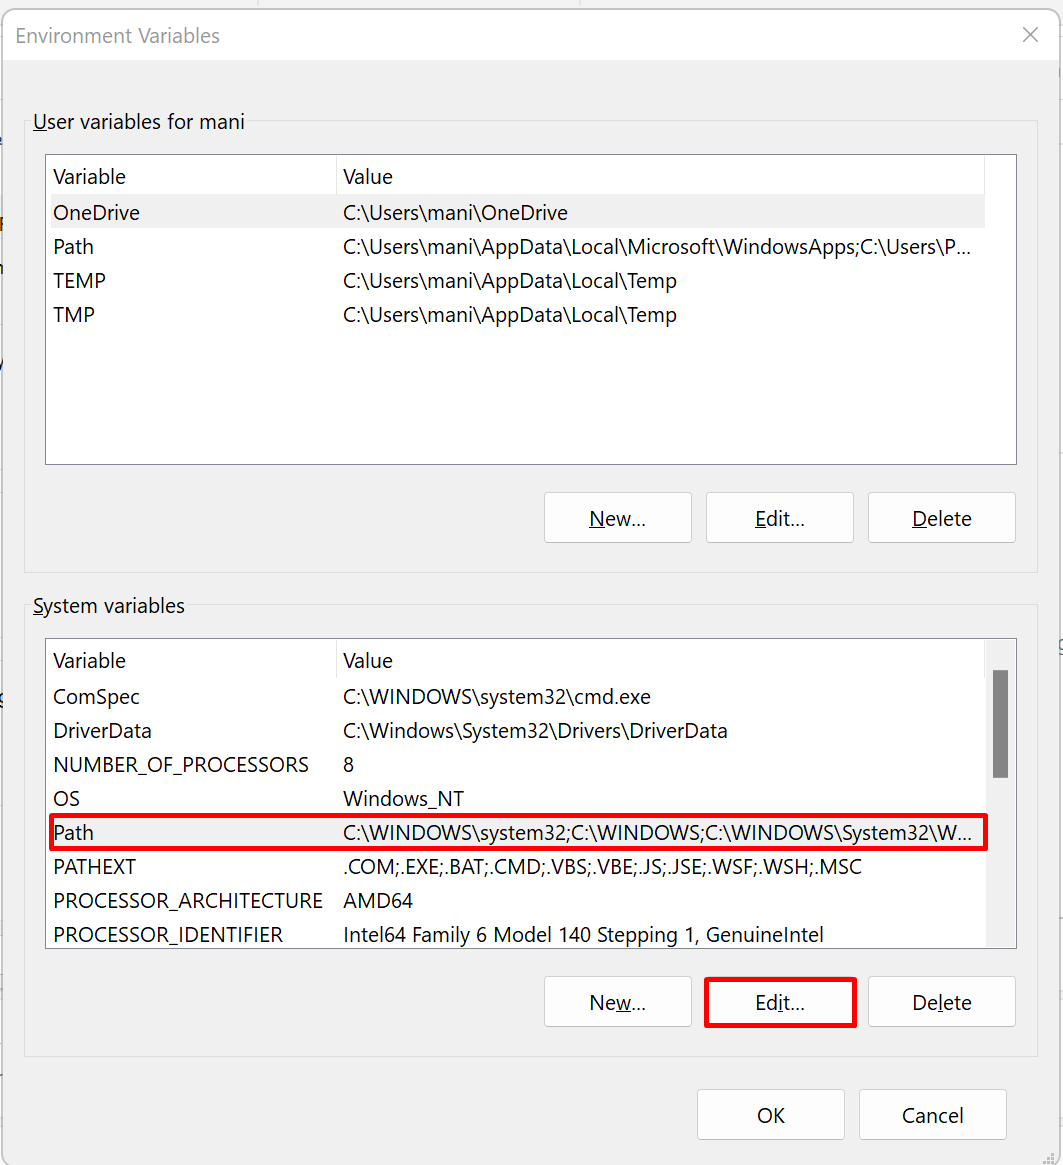
Step 8: Update the Environment Variable for PHP Binary.
-
Right click on This PC, go to
Properties > Advanced System Settings >Environment Variables.
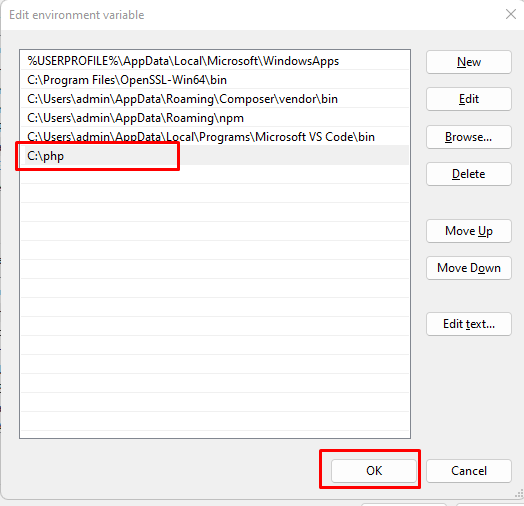
- Now click on Path > Edit > New & add copied path
C:\phphere and click OK in all 3 tabs.
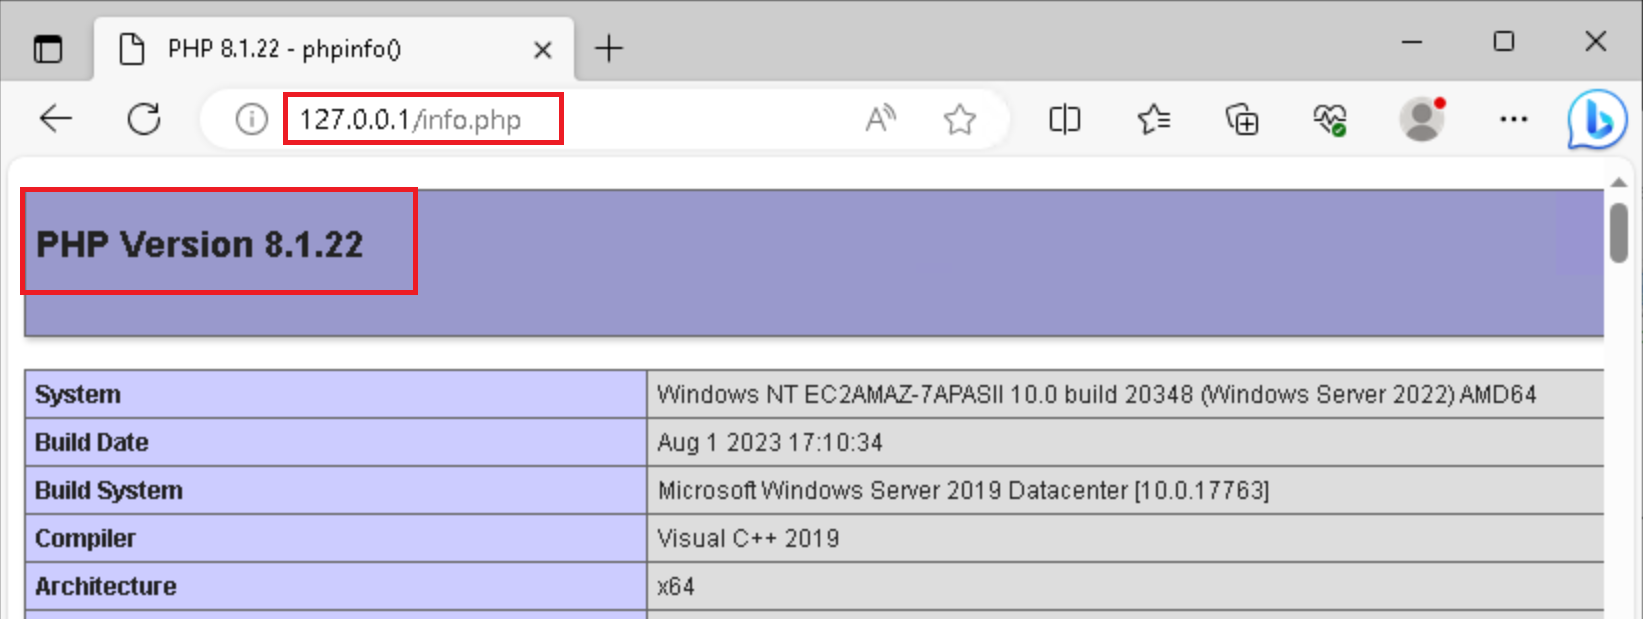
- Step 9: Verify changes made through the
info.phpfile. - You need to create this file and place it in the
C:\Apache24\htdocsdirectory with the following content:
<?php
phpinfo();
?>
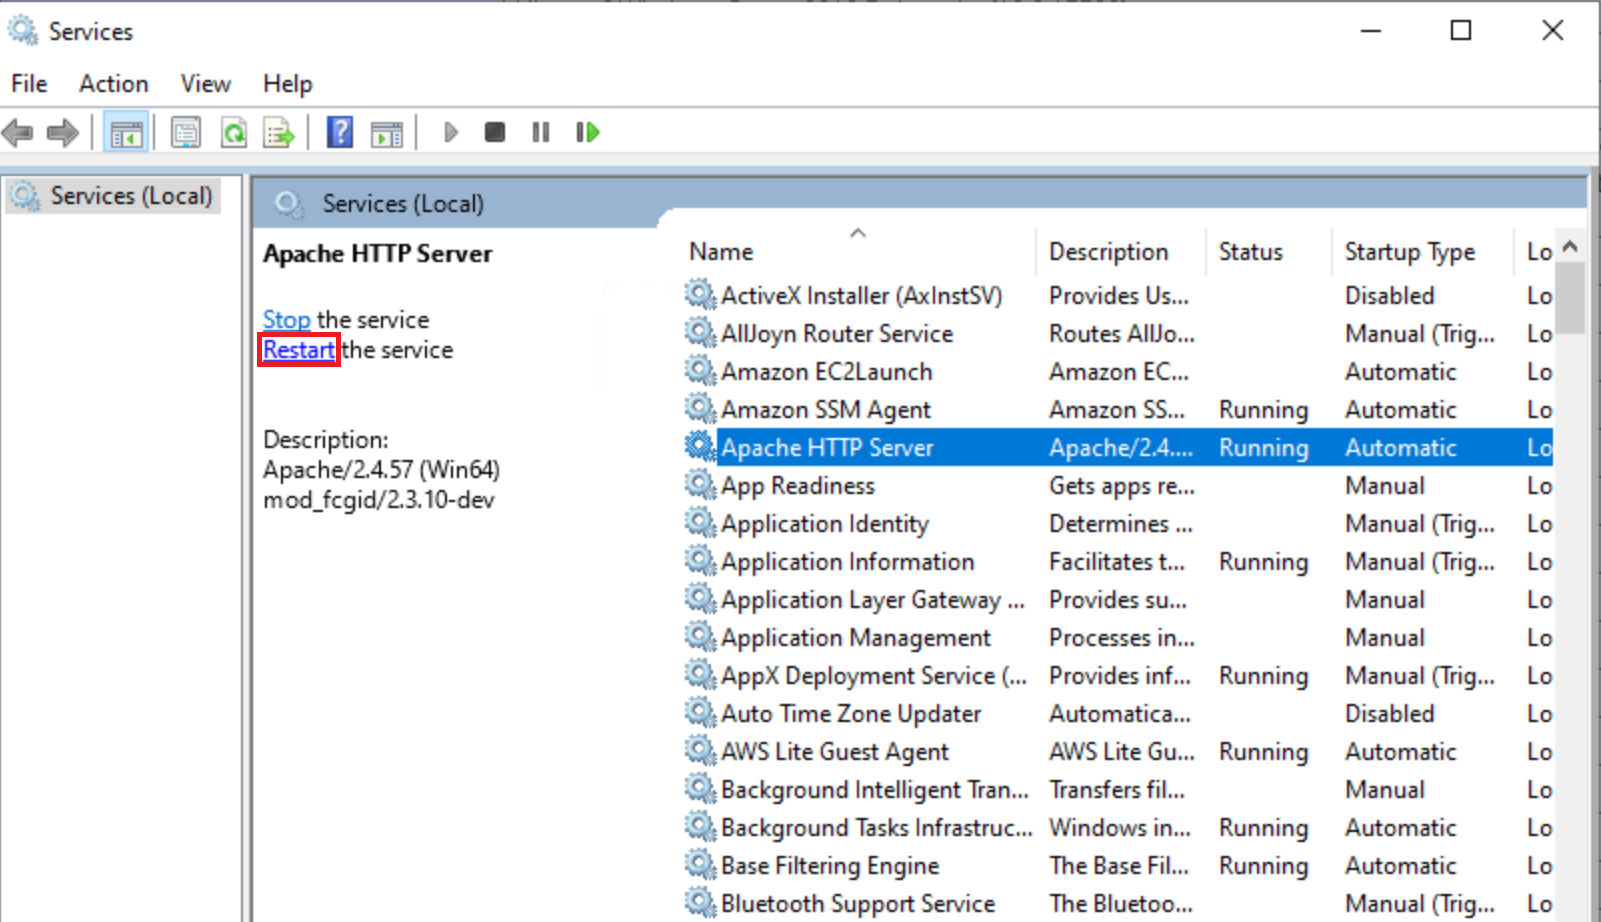
- Step 10: Restart
Apache HTTP ServerService.
- After this, check the generated page in your browser by going to the URL below:
http://127.0.0.1/info.php
c. Download & Enable cacert.pem File in PHP Configuration File
- Click Here to download
cacert.pemfile. This is required to avoid the “cURL 60 error” which is one of the Probes that Faveo checks. - Rename the file to
cacert.pemand copy it toC:\phppath. - Edit the
C:\php\php.ini, Uncommentcurl.cainfoand add the location of cacert.pem to it as below:curl.cainfo = "C:\php\cacert.pem"
3. Install Ioncube Loader
-
Click Here to download Ioncube Loader zip file.
-
Step 1: Extract the IonCube Loader file downloaded.
-
Step 2: Copy the
ioncube_loader_win_8.4.dllfile and paste it into the PHP extensions directoryC:\php\ext. -
Step 3: Copy the
“loader-wizard.php”from the extracted Ioncube folder and paste it into theC:\Apache24\htdocs. -
Step 4: Edit the
C:\php\php.inifile and below the last line enter the path to the extension within thezend_extensionparameter:
zend_extension = "C:\php\ext\ioncube_loader_win_8.4.dll"
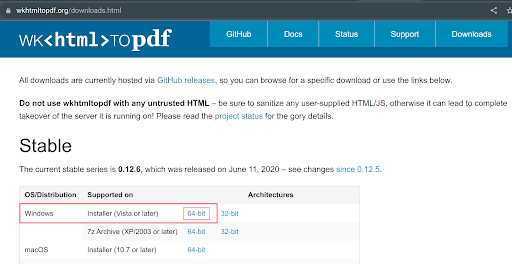
- Step 5: Run the below URL to verify the ionCube Installation.
- Note: If you didn’t get the below output try restarting the Apache Server.
http://127.0.0.1\loader-wizard.php
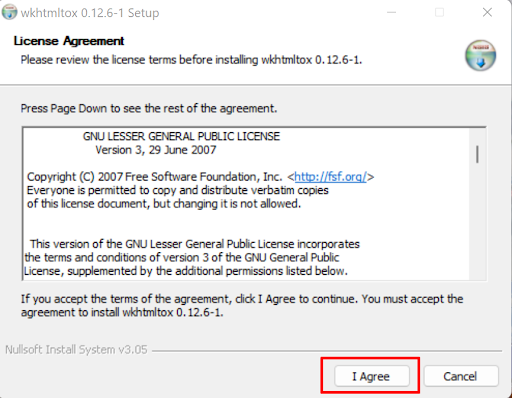
4. Install wkhtmltopdf
Wkhtmltopdf is an open source simple and much effective command-line shell utility that enables user to convert any given HTML (Web Page) to PDF document or an image (jpg, png, etc). It uses WebKit rendering layout engine to convert HTML pages to PDF document without losing the quality of the pages. It is really very useful and trustworthy solution for creating and storing snapshots of web pages in real-time.
- Click Here to download 64-bit wkhtmltopdf-0.12.6-1.exe installer file.
-
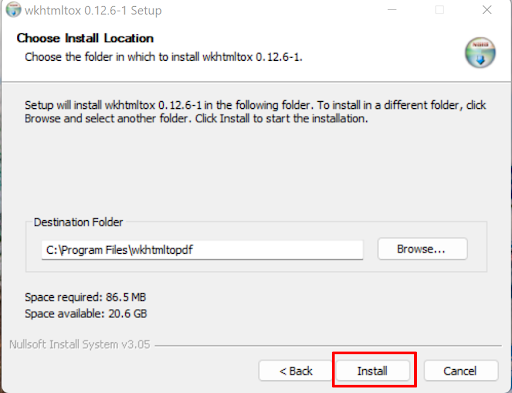
Run the downloaded
wkhtmltopdf-0.12.6-1.exe installer. -
Click
I Agreeon the license agreement screen.
- Specify the installation destination folder or leave it as default location and click
Install
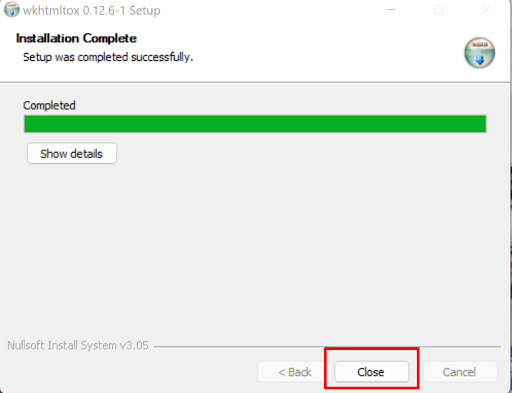
- When the installation is complete, click the
Closebutton.
-
Now copy
wkhtmltox.dlllocated atC:\Program Files\wkhtmltopdf\binand paste it inC:\php\ext -
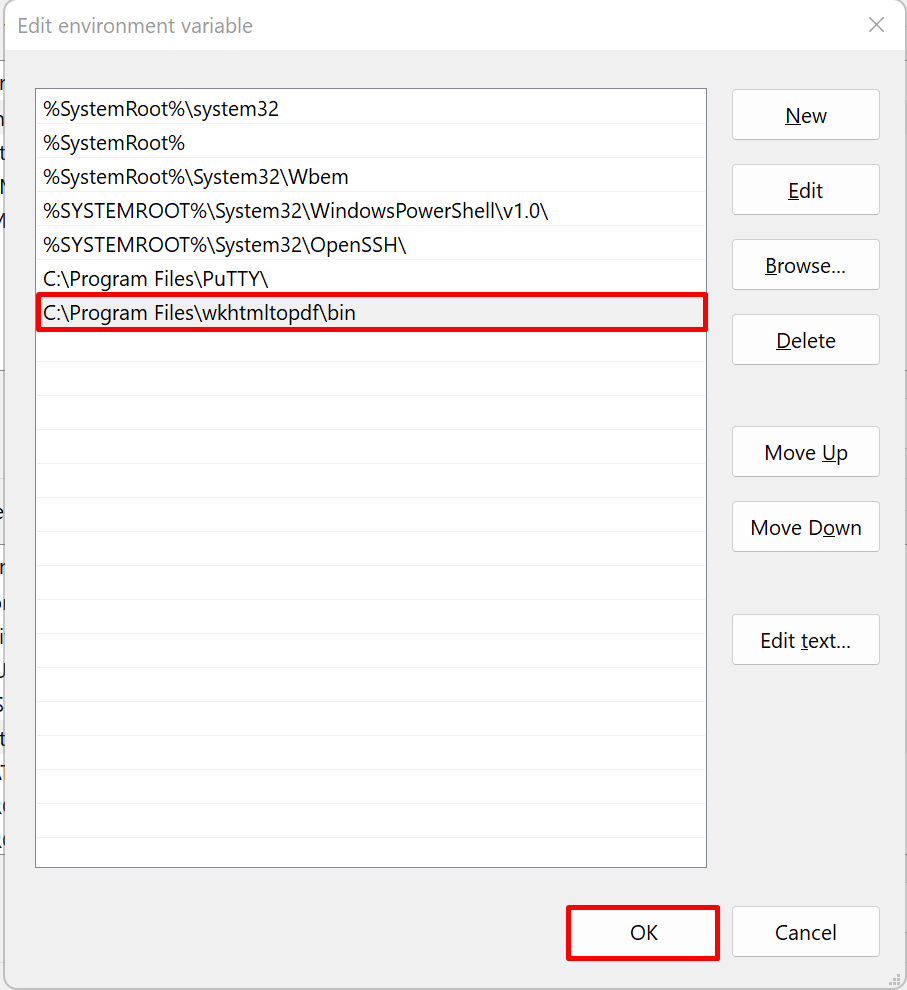
Update the Environment variable for wkhtmltopdf.
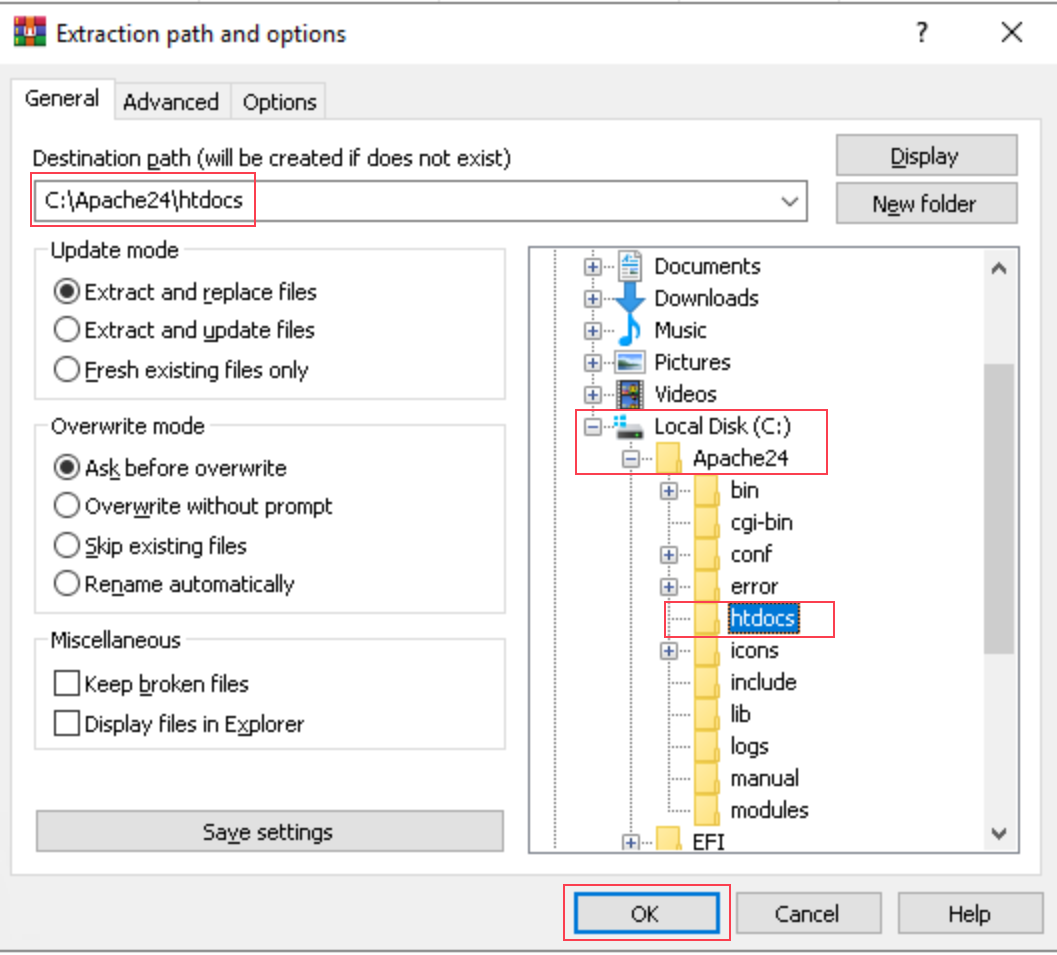
5. Upload Faveo
- Download the Faveo Helpdesk from https://billing.faveohelpdesk.com and upload it to the below directory.
C:\Apache24\htdocs
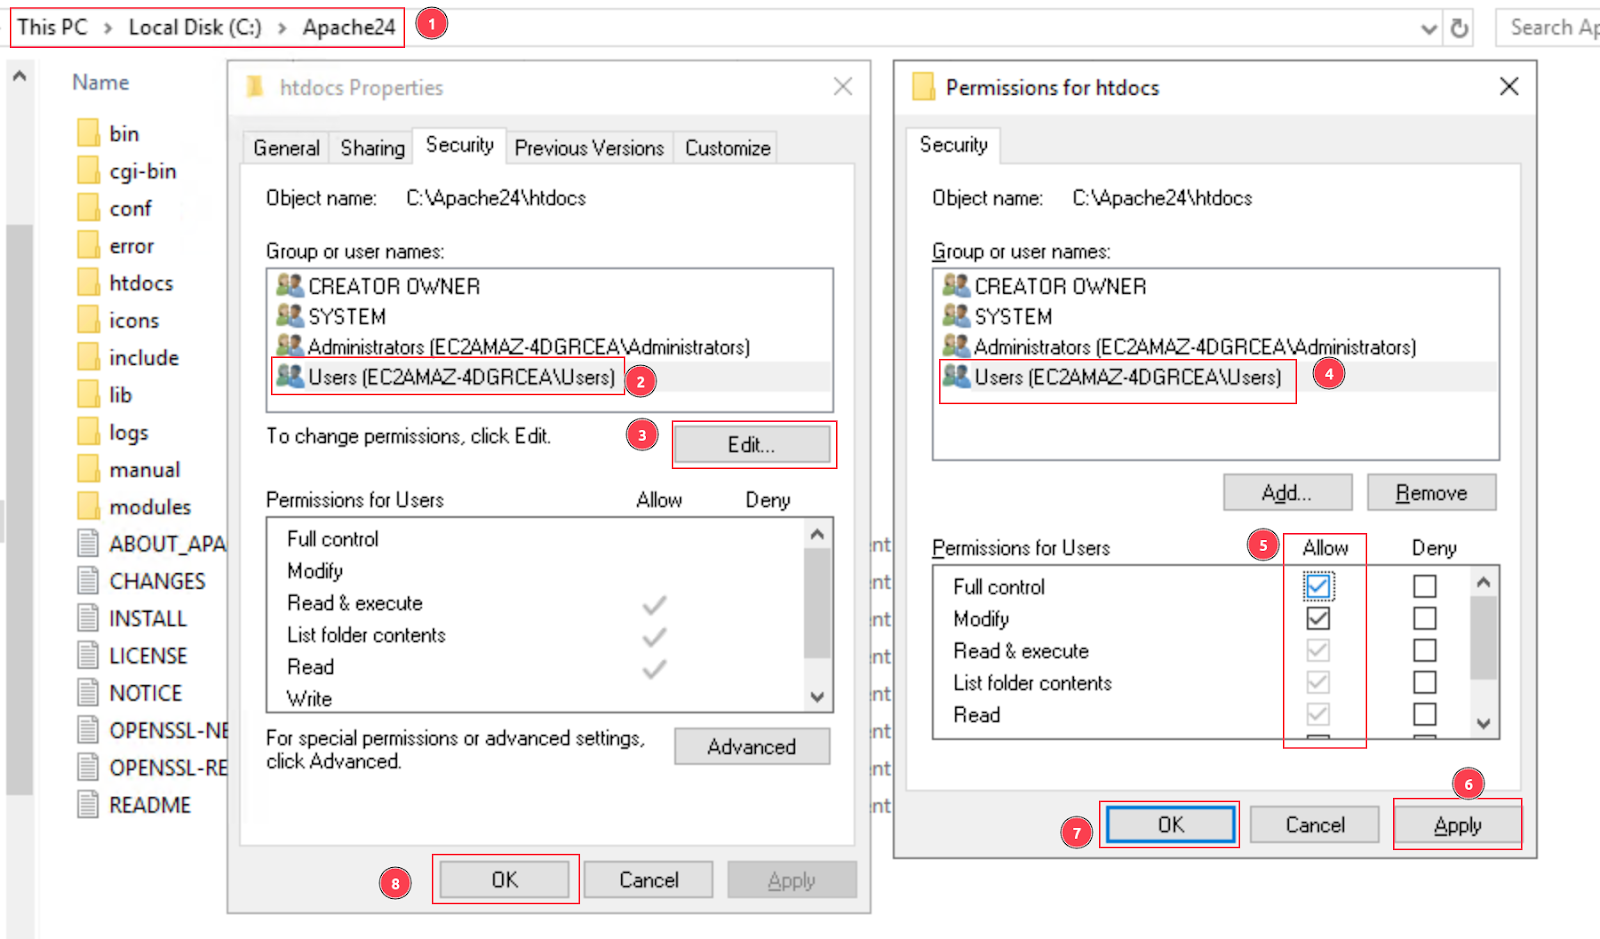
- We need to give full write permission to
Usersfor theC:\Apache24\htdocsfolder.
Give full permissions (same as above) to the Windows Temp folder as well:
C:\Windows\Temp
6. Install MariaDB 10.6/MySQL 8.0
-
An open-source relational database management system(RDBMS) can be chosen among the MariaDB and MySQL.
- MariaDB documentation
- MySQL documentation
7. Setting up the Database
Open MariaDB 10.6 or Mysql 8.0 Command Line Client and run the below command.
- Create a database called ‘faveo’.
CREATE DATABASE faveo;
- Create a user called ‘faveo’ and its password ‘strong password’.
CREATE USER 'faveo'@'localhost' IDENTIFIED BY 'strongpassword';
- We have to authorize the new user on the faveo DB so that he is allowed to change the database.
GRANT ALL ON faveo.* TO 'faveo'@'localhost';
- And finally, we apply the changes and exit the database.
FLUSH PRIVILEGES;
exit
8. Set Cron & Configure Queue Driver
a. Cron in Task Scheduler
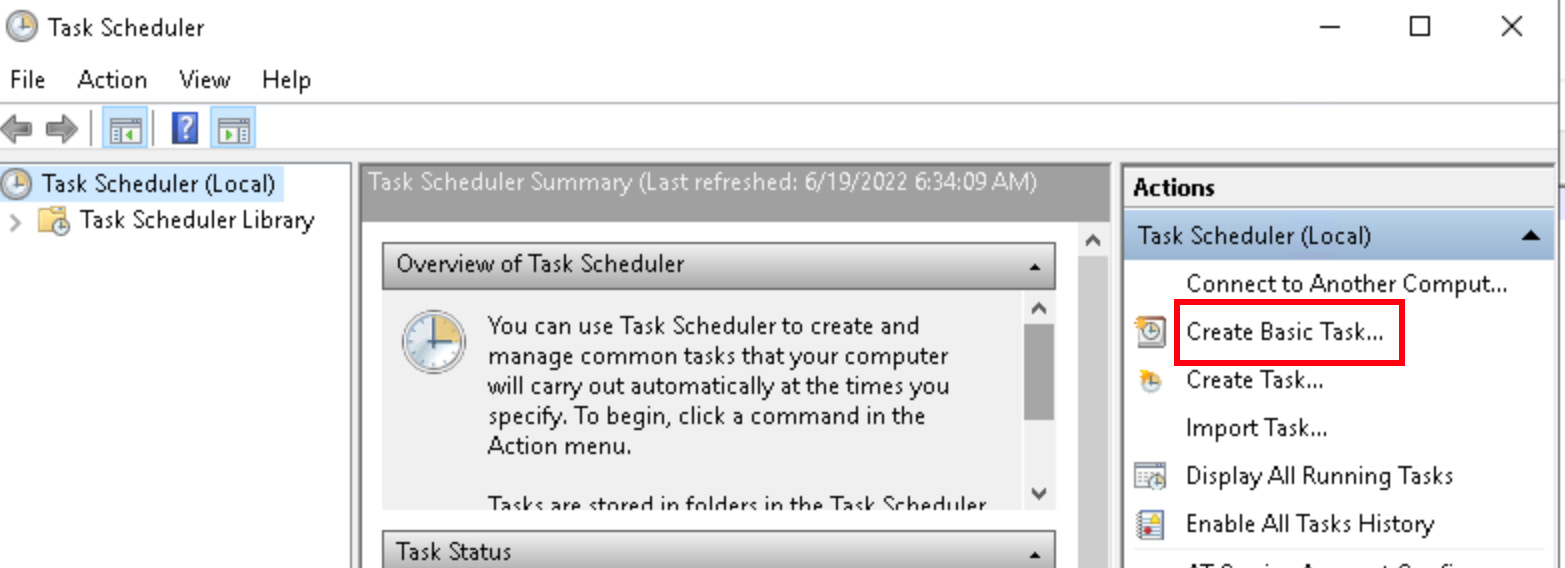
- To open Task scheduler press Win+R and type
taskschd.msc. - On the Right pane of the Task scheduler select
Create Basic Taskenter aNamefor the task and clickNext.
-
Under
Task Trigger, section selectDailyand clickNextand leave the default values inDailysection tick theSynchronize across time zonesand proceedNext. -
Now under the
Actionsection selectStart a programand clickNext. - In
Start a programcopy the below value into theprogram/script field.C:\Windows\System32\cmd.exe -
Add the following highlighted values to the Argument :
- This is for faveo incoming mail, esacalation, faveo update check.
/c php "c:\Apache24\htdocs\artisan" schedule:run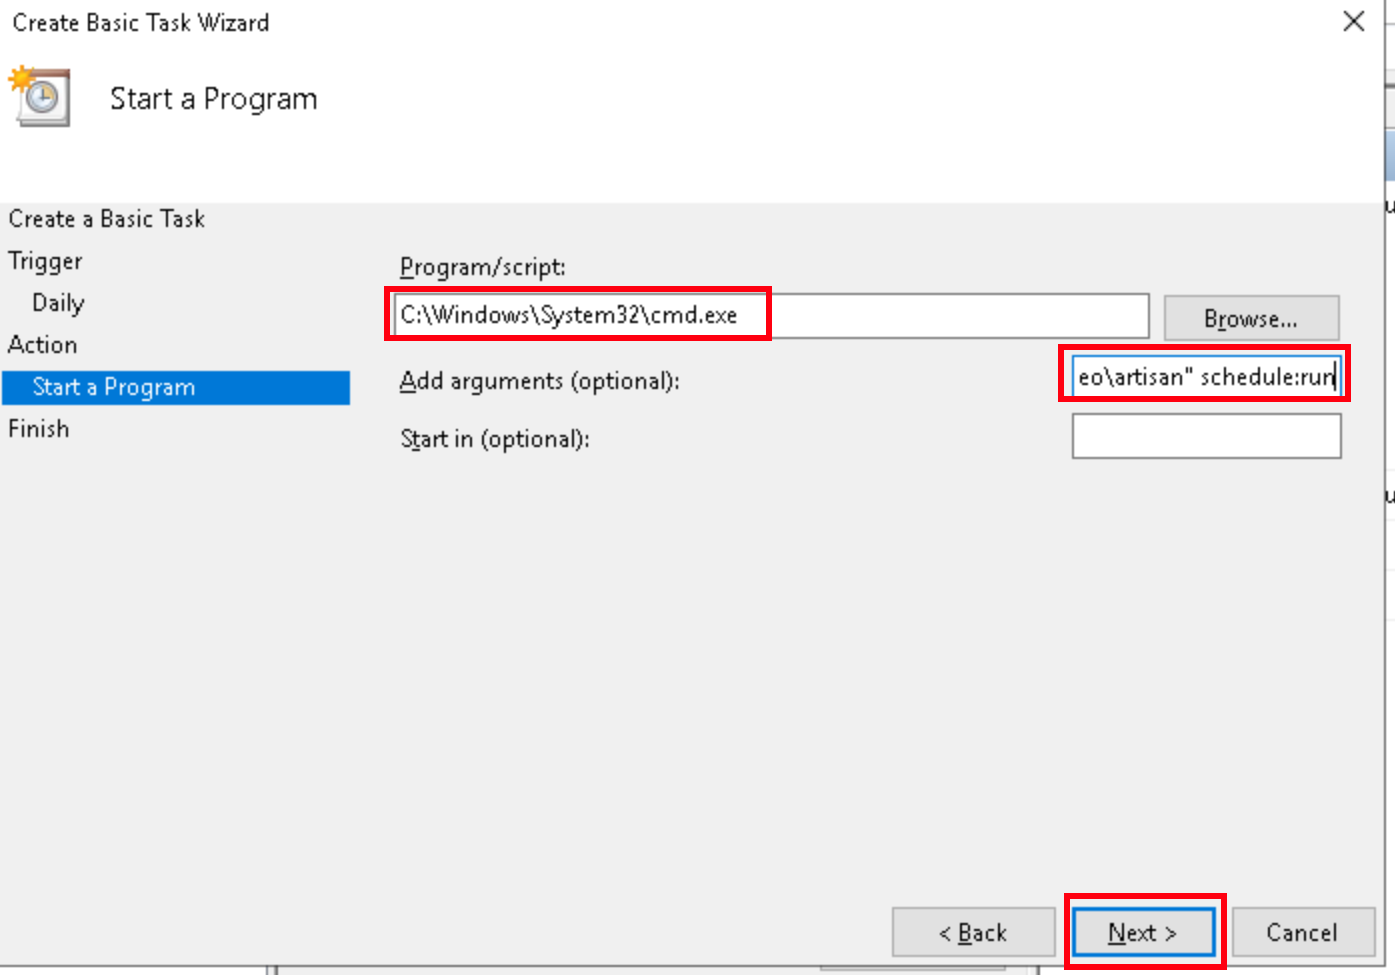
-
Finally under the
Finishsection select thecheckboxto open the properties window after finish and click theFinishbutton. - In the properties window, select the
Triggerstab, click onEditand select the checkbox forRepeat task everyset values to run every5 minutes, for a duration ofindefinitelyand click onOK.
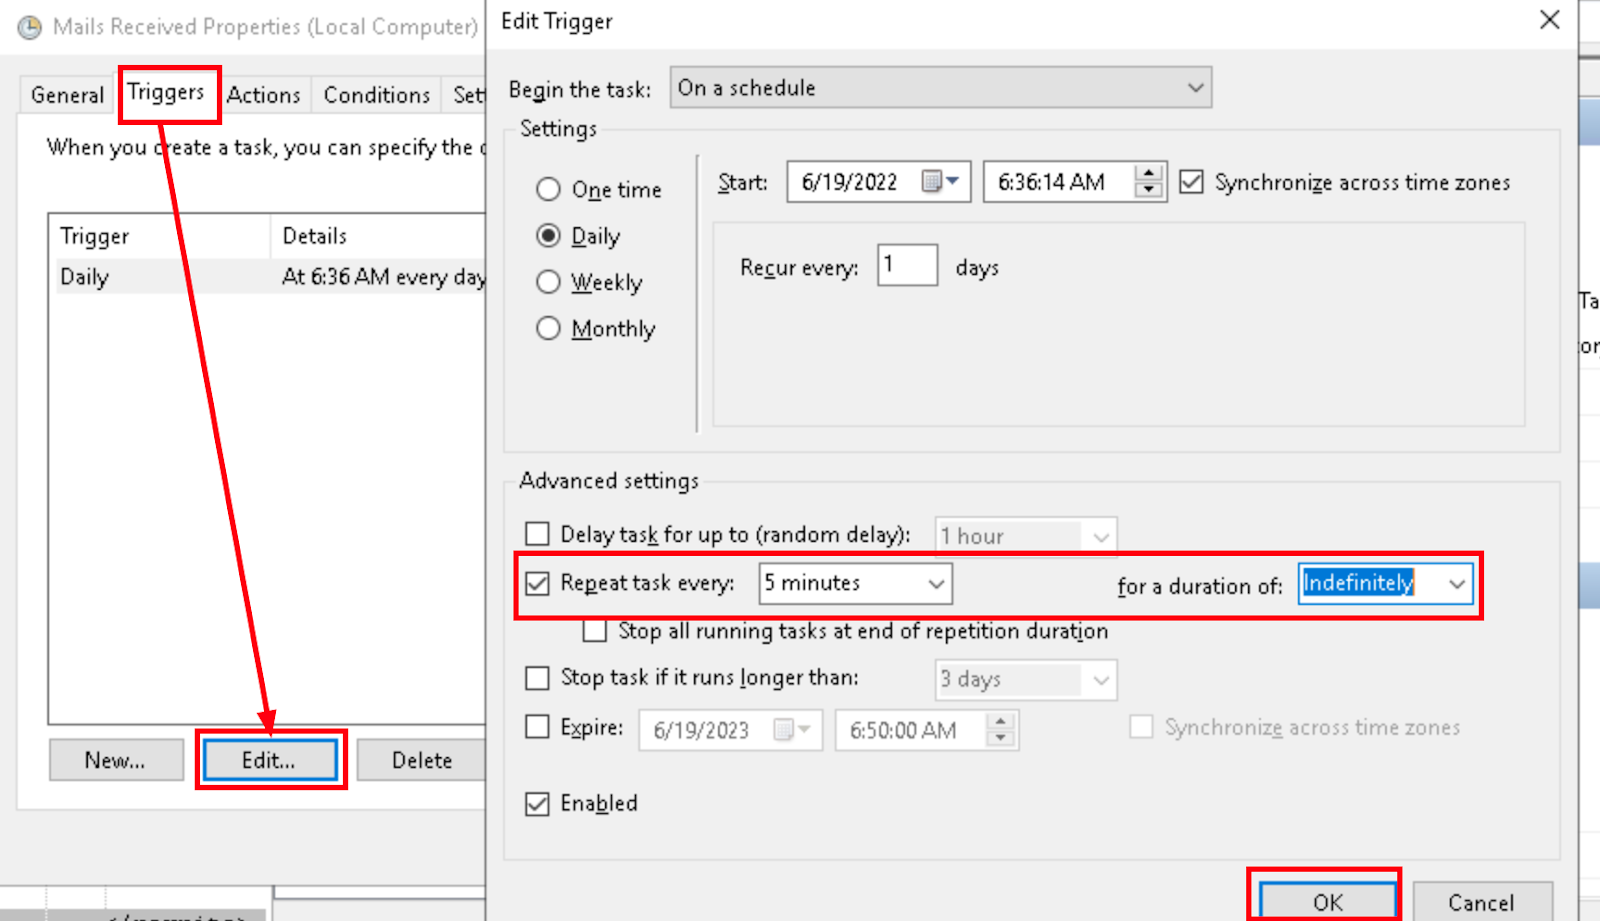
- Similarly add two more triggers
At log on&At startup up, set values to run every5 minutes, for a duration ofindefinitelyand click onOK.

b. Queue Drivers
A queue driver is the handler for managing how to run a queued job, identifying whether the jobs succeeded or failed, and trying the job again if configured to do so. There are different queue lists available to be used by the system:
- Sync (Activated by default)
- Database (this will use the database used by the application to act as a queue)
-
Redis
-
Sync, or synchronous, is the default queue driver which runs a queued job within your existing process. With this driver enabled, you effectively have no queue as the queued job runs immediately. When a small number of incoming and outgoing mail functionalities are operated by the system, this sync method can be used.
- Database driver stores queued jobs in the database. In Database queue multiple users need to work on a pool of records in a queue to process them. The records in the queue are in an unprocessed state. After the user worked on any record, that record is in a completed state and is removed from the queue.
- Database Queue option lets the emails queue to execute using First in First out (FIFO) method and sends emails to the clients one by one.
-
In Database, Read and Write operations are slow because of storing data in secondary memory.
- Redis is an open-source (BSD licensed), in-memory data structure store, used as a database, cache and message broker. This will improve system performance and is highly recommended.
-
In Redis, Read and Write operations are extremely fast because of storing data in primary memory.
- Redis Installation documentation
Note: Database queue driver must be used only in windows server. C Panel or Linux users should not use database as queue driver.
9. Install Meilisearch
MeiliSearch is an open-source search engine developed in Rust that delivers flexible search and indexing capabilities. It adeptly handles typos, supports full-text search, synonyms, and comes packed with various features, making it an ideal choice for elevating search functionalities in Faveo.
Meilisearch installation documentation
10. SSL Installation
Secure Sockets Layer (SSL) is a standard security technology for establishing an encrypted link between a server and a client. Let’s Encrypt is a free, automated, and open certificate authority.
Apache only supports Paid SSL or the Self Signed SSL, Let’s Encrypt is not supported by Apache.
11. Install Faveo
Now you can install Faveo via GUI Wizard or CLI
12. Faveo Backup
At this stage, Faveo has been installed, it is time to setup the backup for Faveo File System and Database. Follow this article to setup Faveo backup.